
Introduction
Corgea is a plugin for IntelliJ-based IDEs that finds insecure code in your project and applies AI-generated fixes without leaving the editor. It works with IntelliJ IDEA, PyCharm, WebStorm, GoLand, PhpStorm, RubyMine, CLion, Rider, DataSpell, DataGrip, and Android Studio.For any issues or support, please email support@corgea.com.
Features
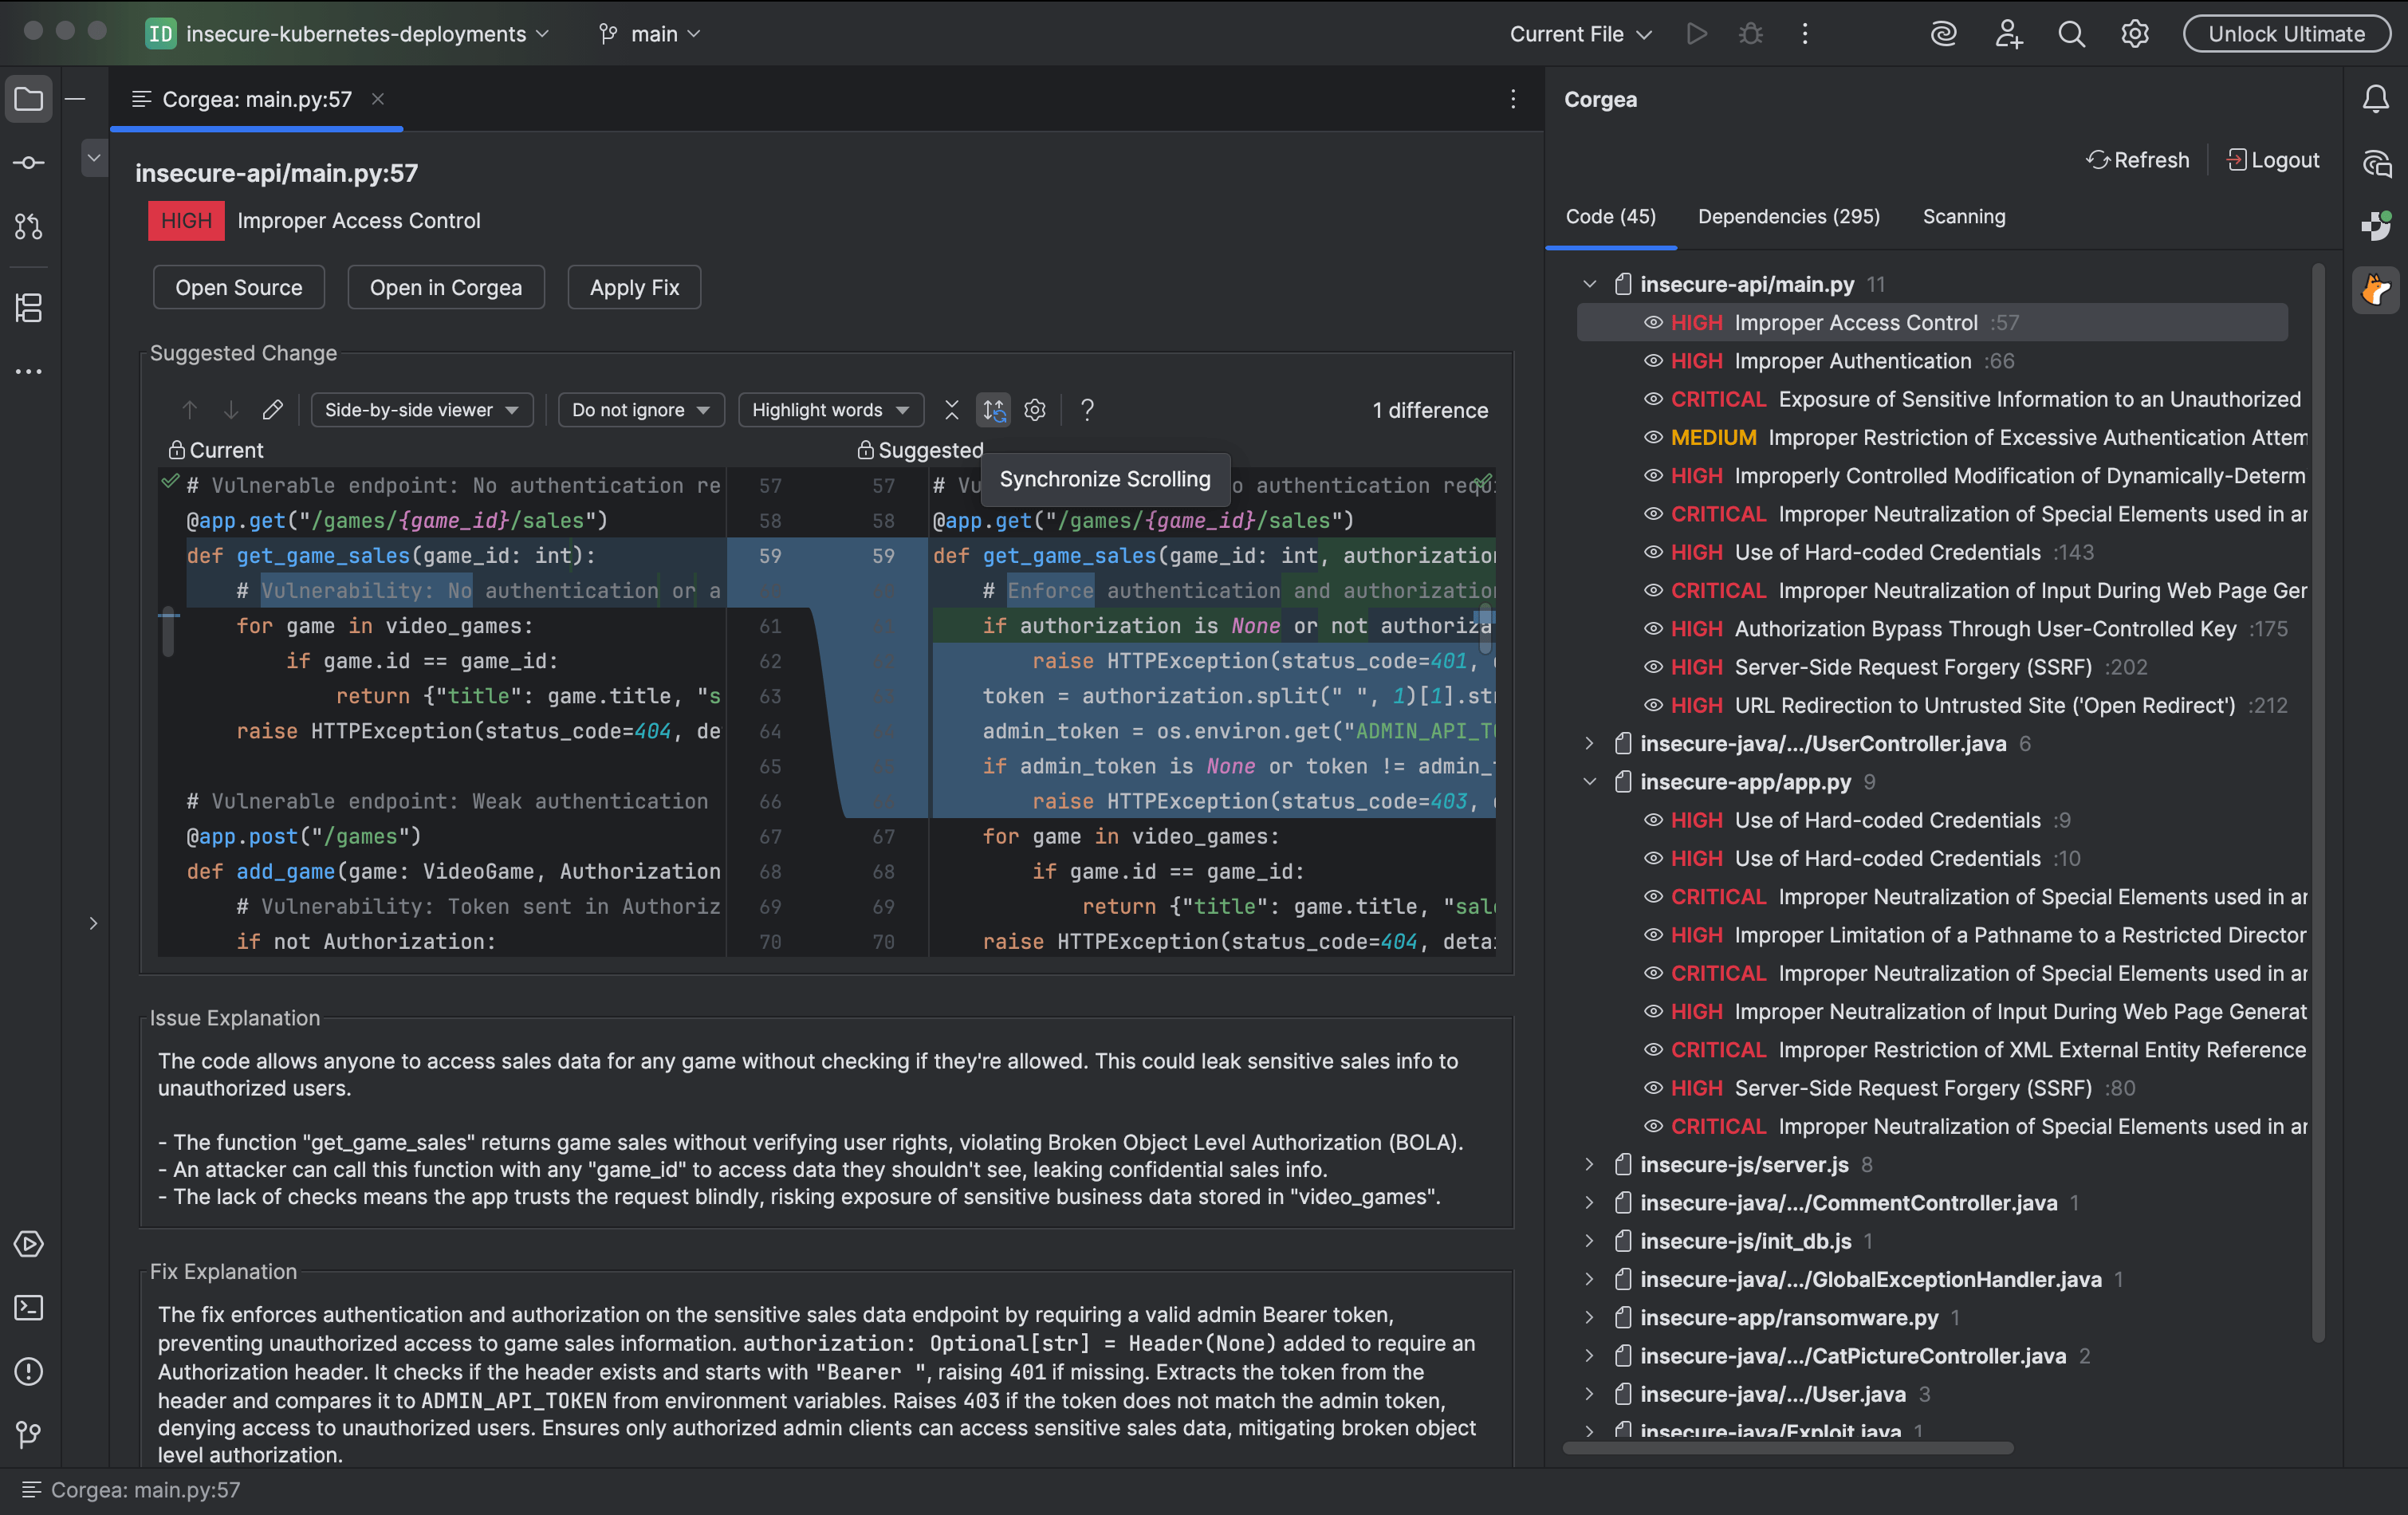
- Security Scanning: Scan the whole project, or only your uncommitted changes.
- Code Vulnerabilities: Browse findings grouped by file, with severity and line numbers.
- Dependency Vulnerabilities: Browse SCA findings grouped by package, with CVE identifiers and fix versions.
- Editor Highlighting: Vulnerable lines are underlined and marked with a gutter icon.
- Finding Details: Read the explanation for a finding and preview the suggested fix as a diff.
- One-Click Fixes: Apply an AI-generated patch from the gutter, the context menu, or
Alt+Enter. - Live Scan Progress: Watch each scan step and its CLI output while results stream into the tool window.
- OAuth and API Key Authentication: Sign in with either method, including on enterprise and self-hosted servers.
Prerequisites
Before installing the Corgea plugin, ensure you have the following:- Corgea account: have an active Corgea account.
- A JetBrains IDE (2024.3 or later): any IntelliJ-based IDE, including Android Studio Meerkat (2024.3.1) and later.
- Corgea CLI: required to run scans from the IDE. Browsing findings from existing scans does not require it. See the CLI installation guide.
Installation Guide
From the Integrations page
Open Settings → Automation → Integrations (open). In the IDE Extensions section, select Install on the IntelliJ IDEA card. That opens the JetBrains Marketplace. After you install the plugin and restart the IDE, continue with login below.From the IDE
Step 1: Open the Plugins Settings
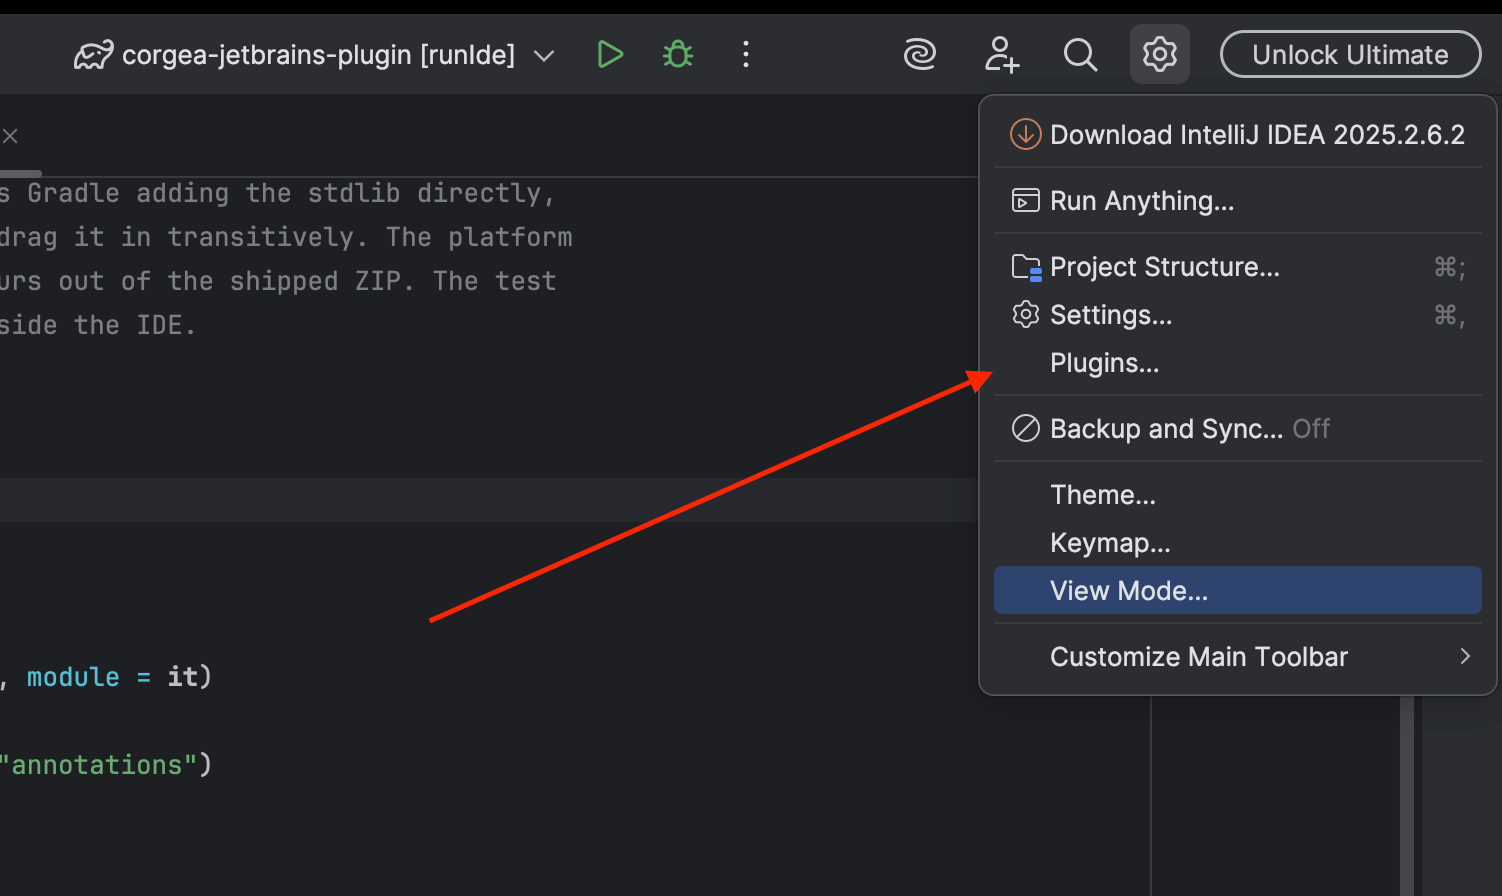
- Open your JetBrains IDE.
- Go to
Settings>Plugins.
Step 2: Install the Plugin
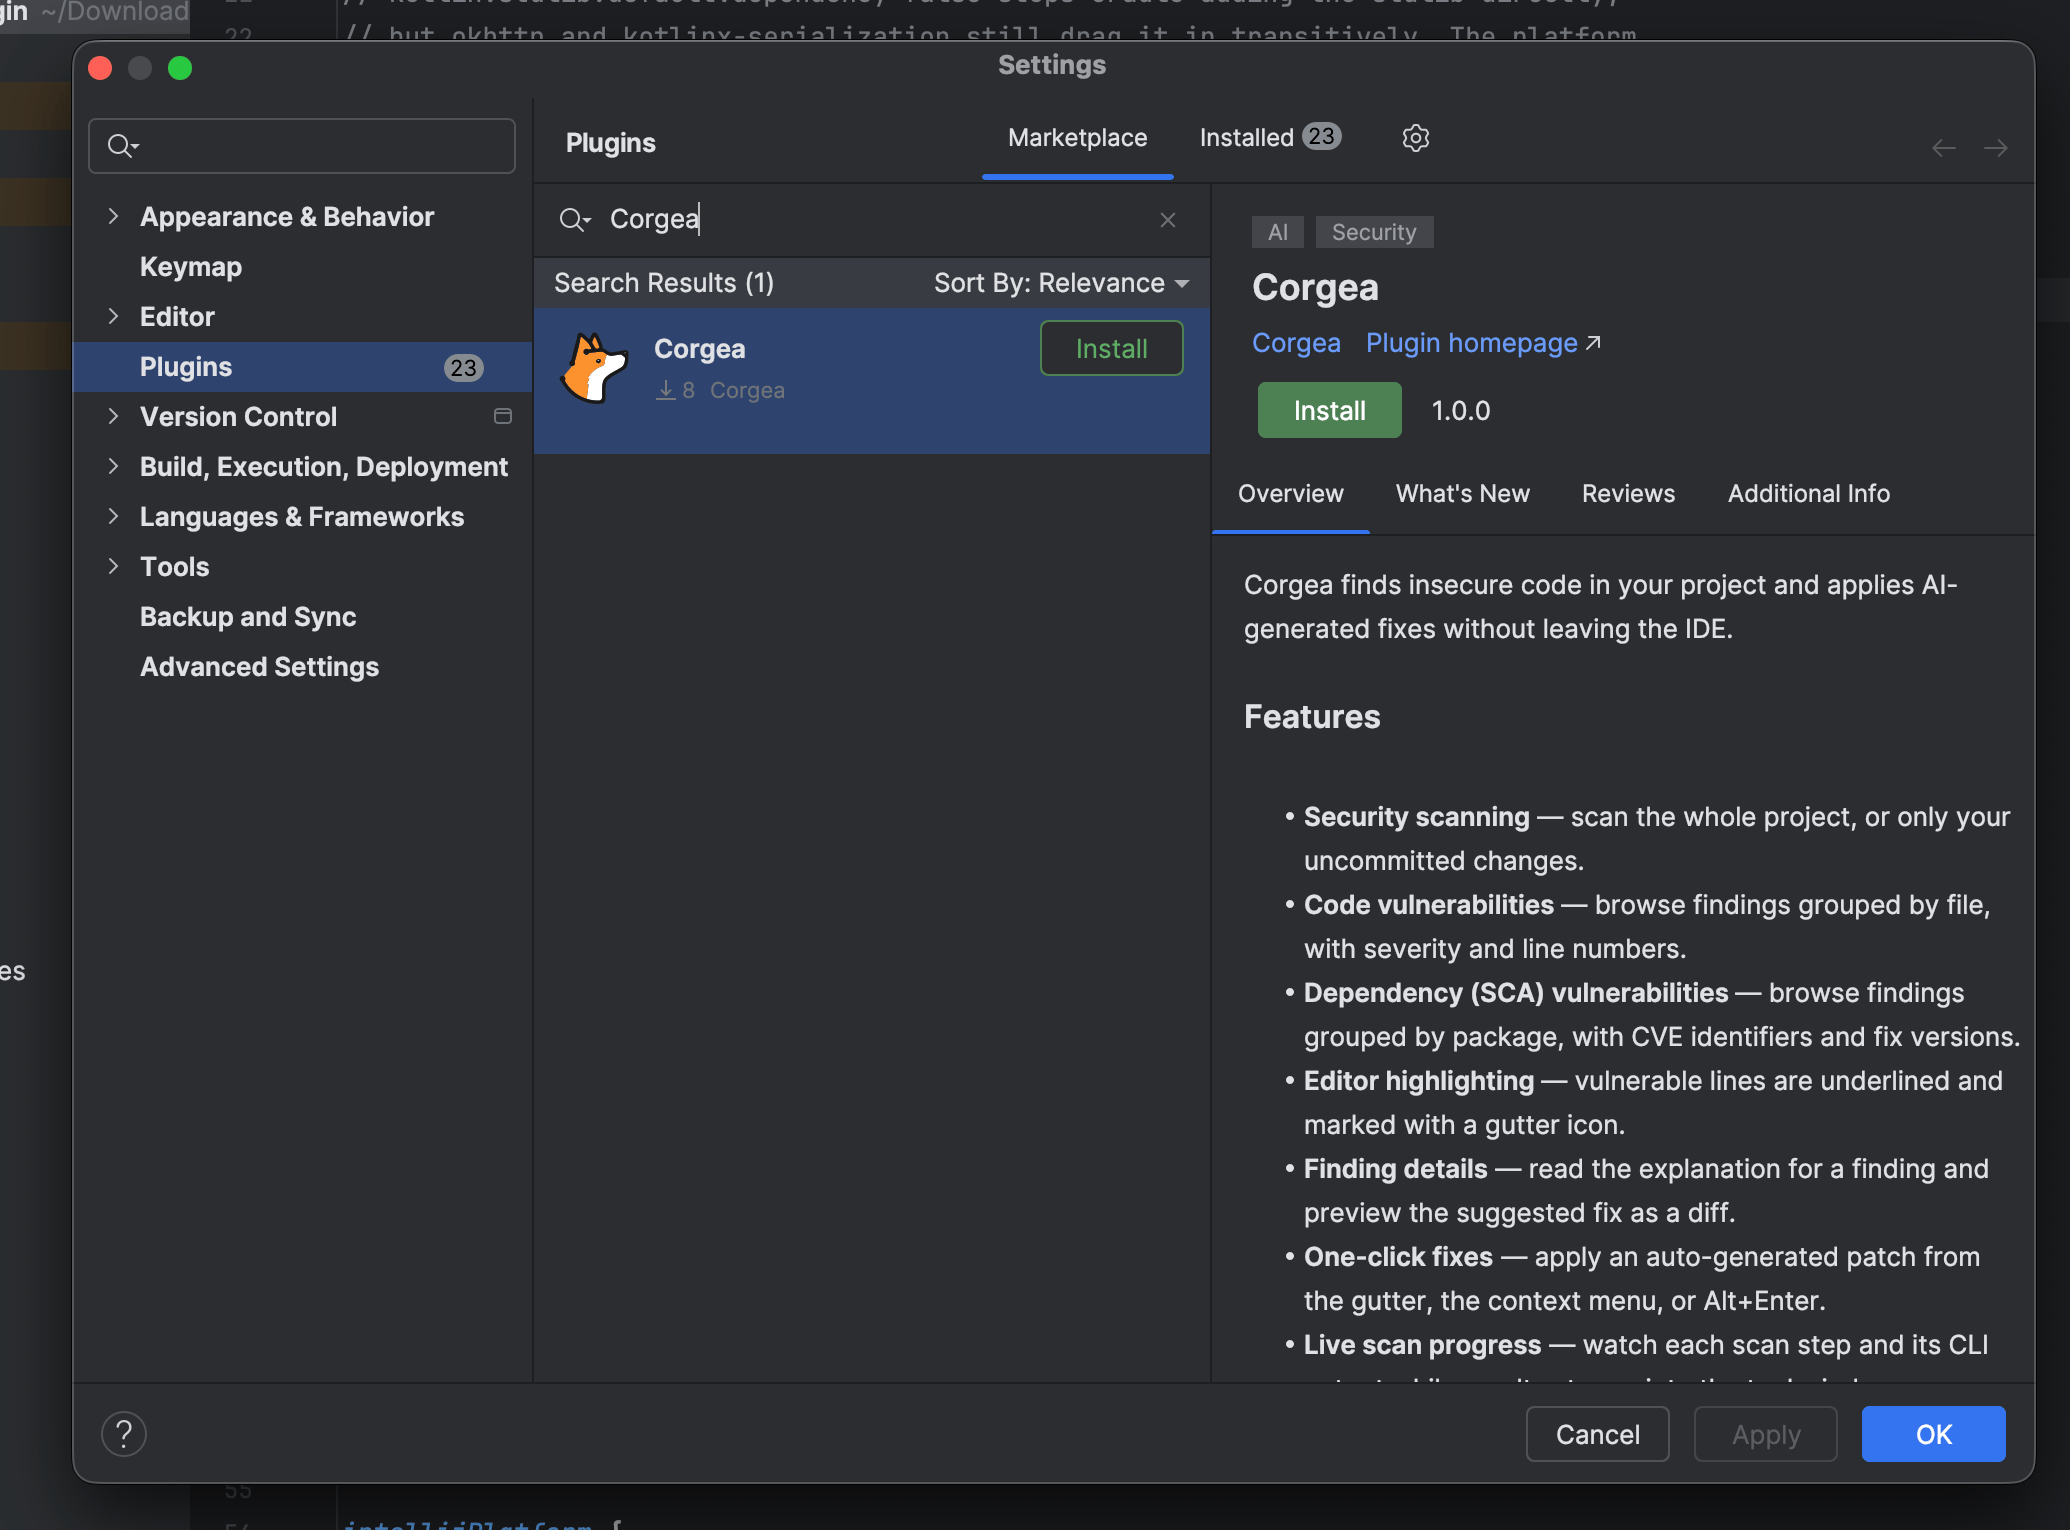
- Select the
Marketplacetab and search for “Corgea”. - Click
Install.
Step 3: Restart the IDE
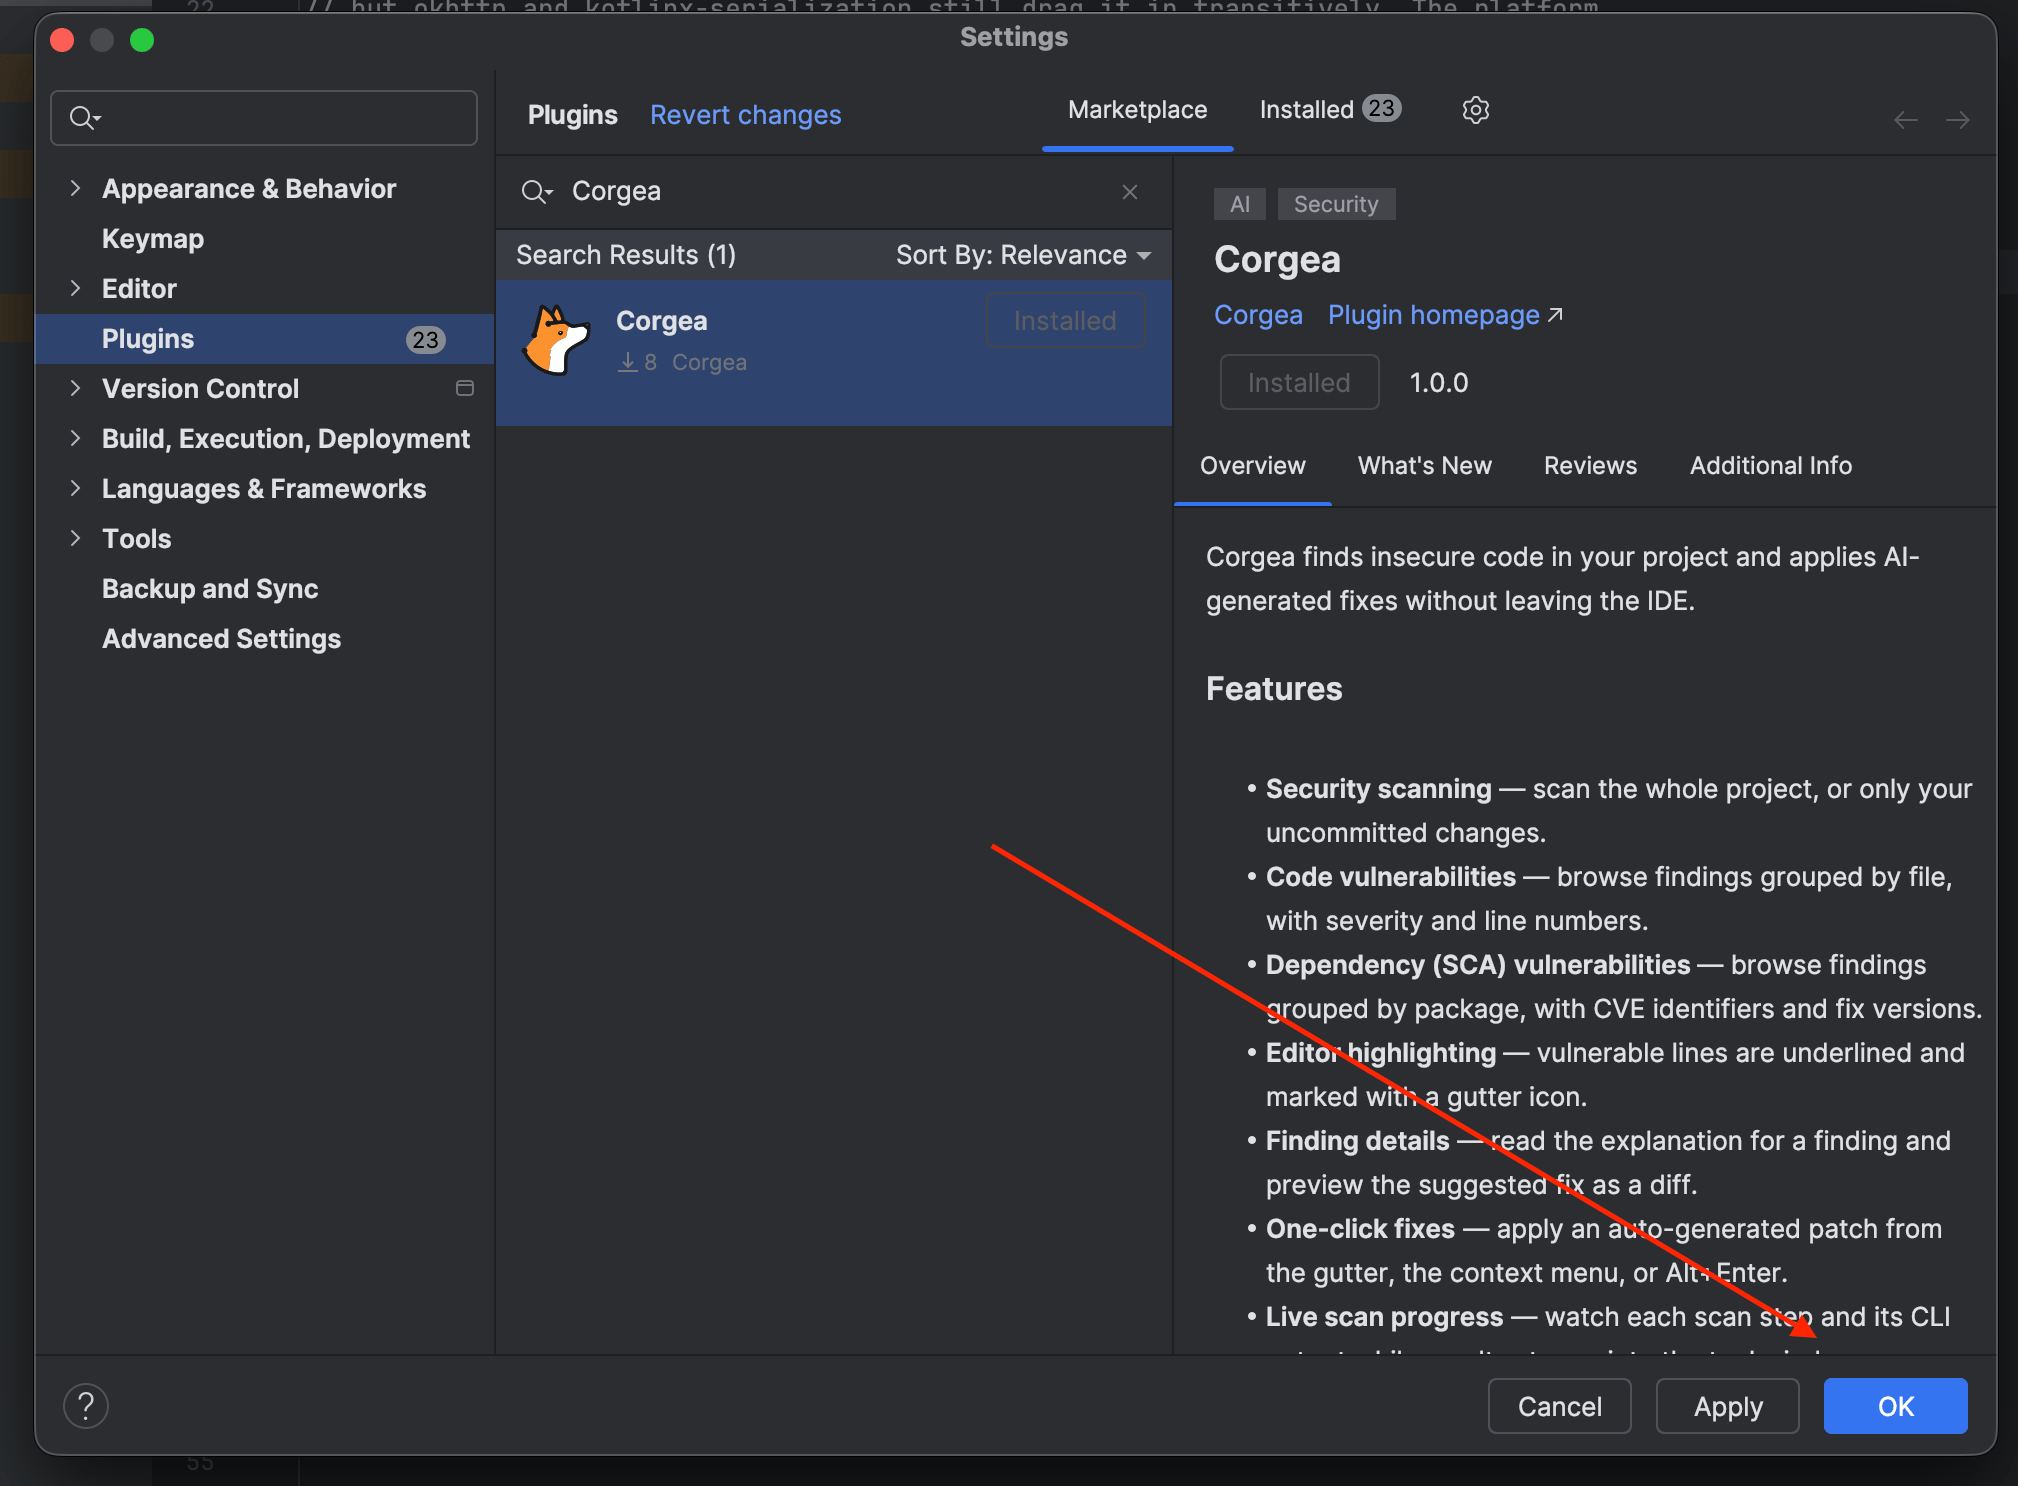
- Click
OKto close the settings dialog. - Restart the IDE when prompted so the plugin loads.
Step 4: Login
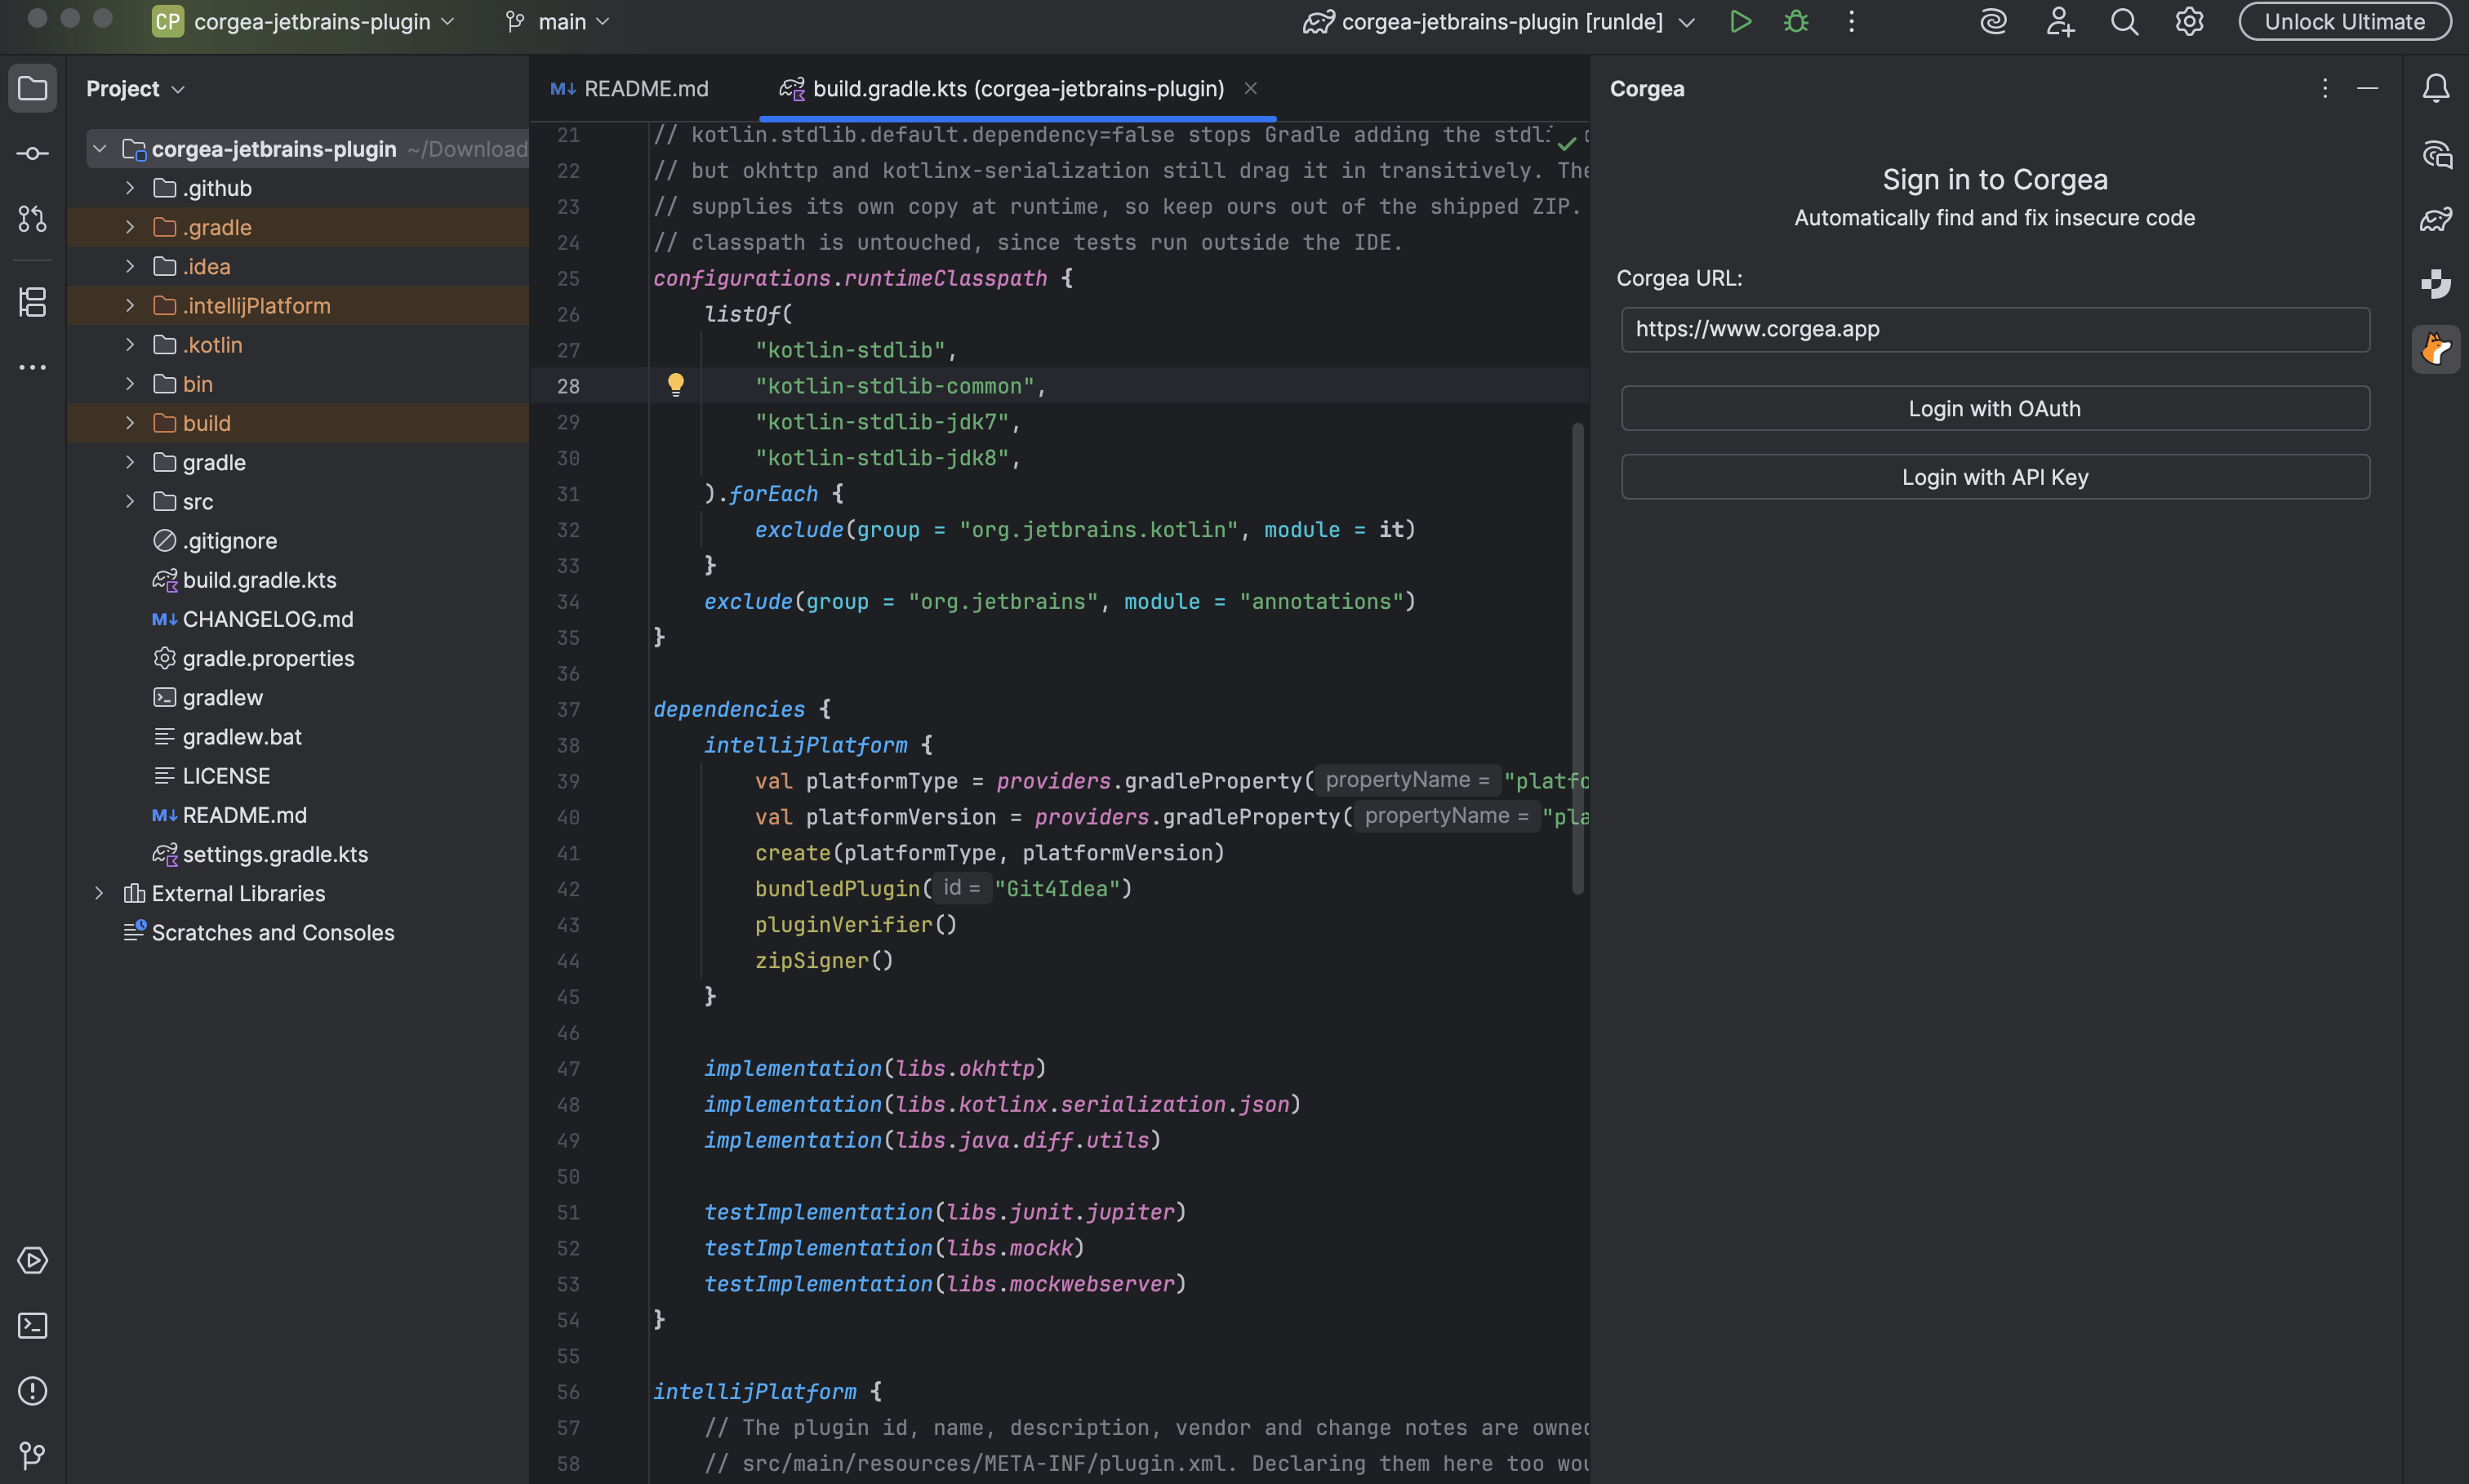
- Open the
Corgeatool window from the right sidebar. - Confirm your Corgea URL. If you are using the default URL (corgea.app), it will be prefilled. Customers on a single-tenant instance should enter their own server URL.
- Click
Login with OAuthand authorize the plugin in your browser. The IDE picks up the token automatically. - To use an API key instead, click
Login with API Key. You can find it under Settings → Automation → API token in the Corgea dashboard.
Usage
Running a Scan
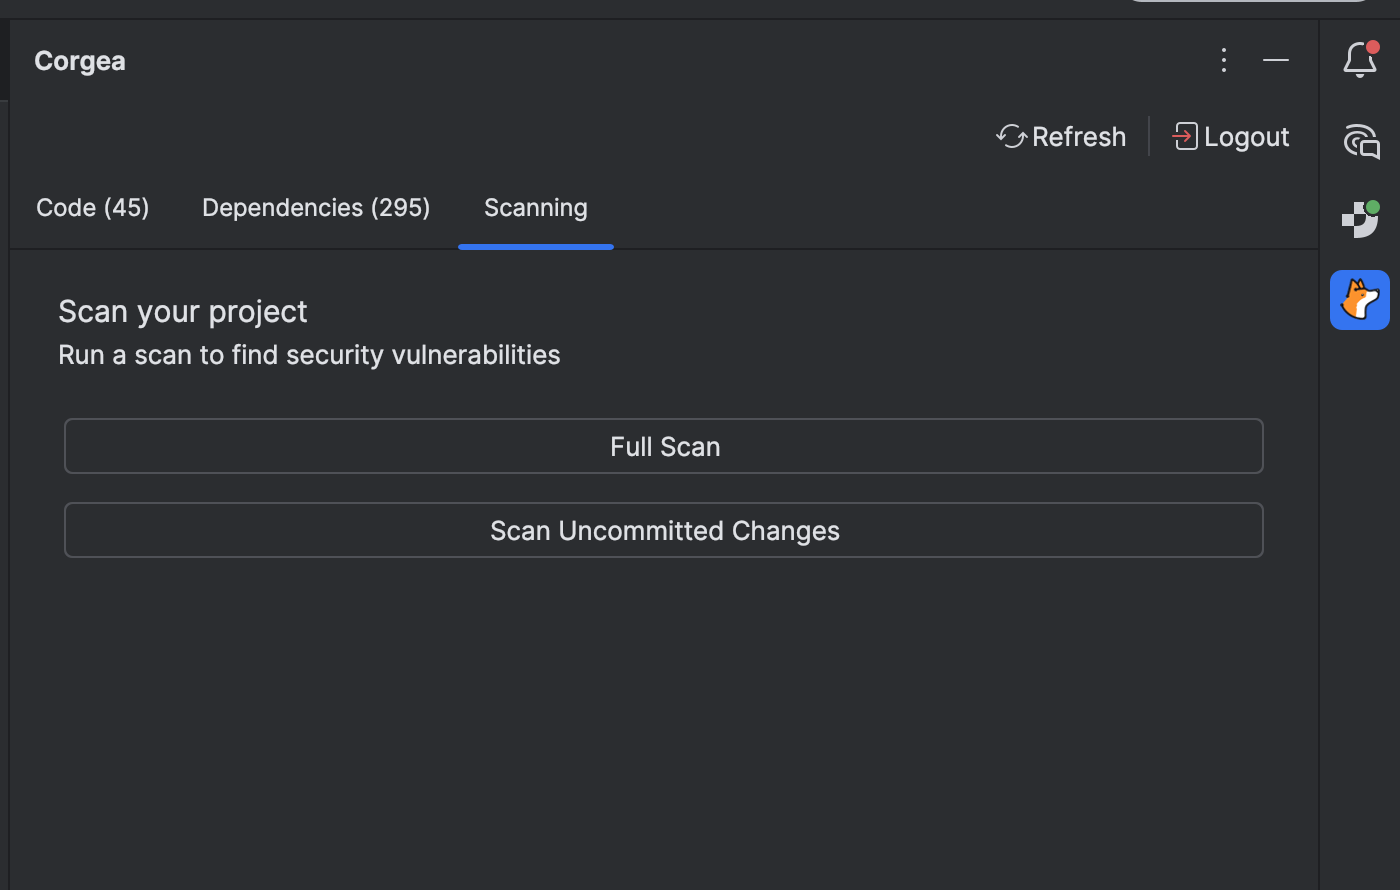
- Open the
Scanningtab in the Corgea tool window. - Click
Full Scanto scan the entire project, orScan Uncommitted Changesto scan only modified files. - You can also start a scan from
Tools>Corgea>Full ScanorTools>Corgea>Scan Uncommitted Changes. - While a scan runs, the tab shows each step as it completes along with the CLI output, and the results tabs refresh themselves as findings arrive.
Viewing Code Vulnerabilities
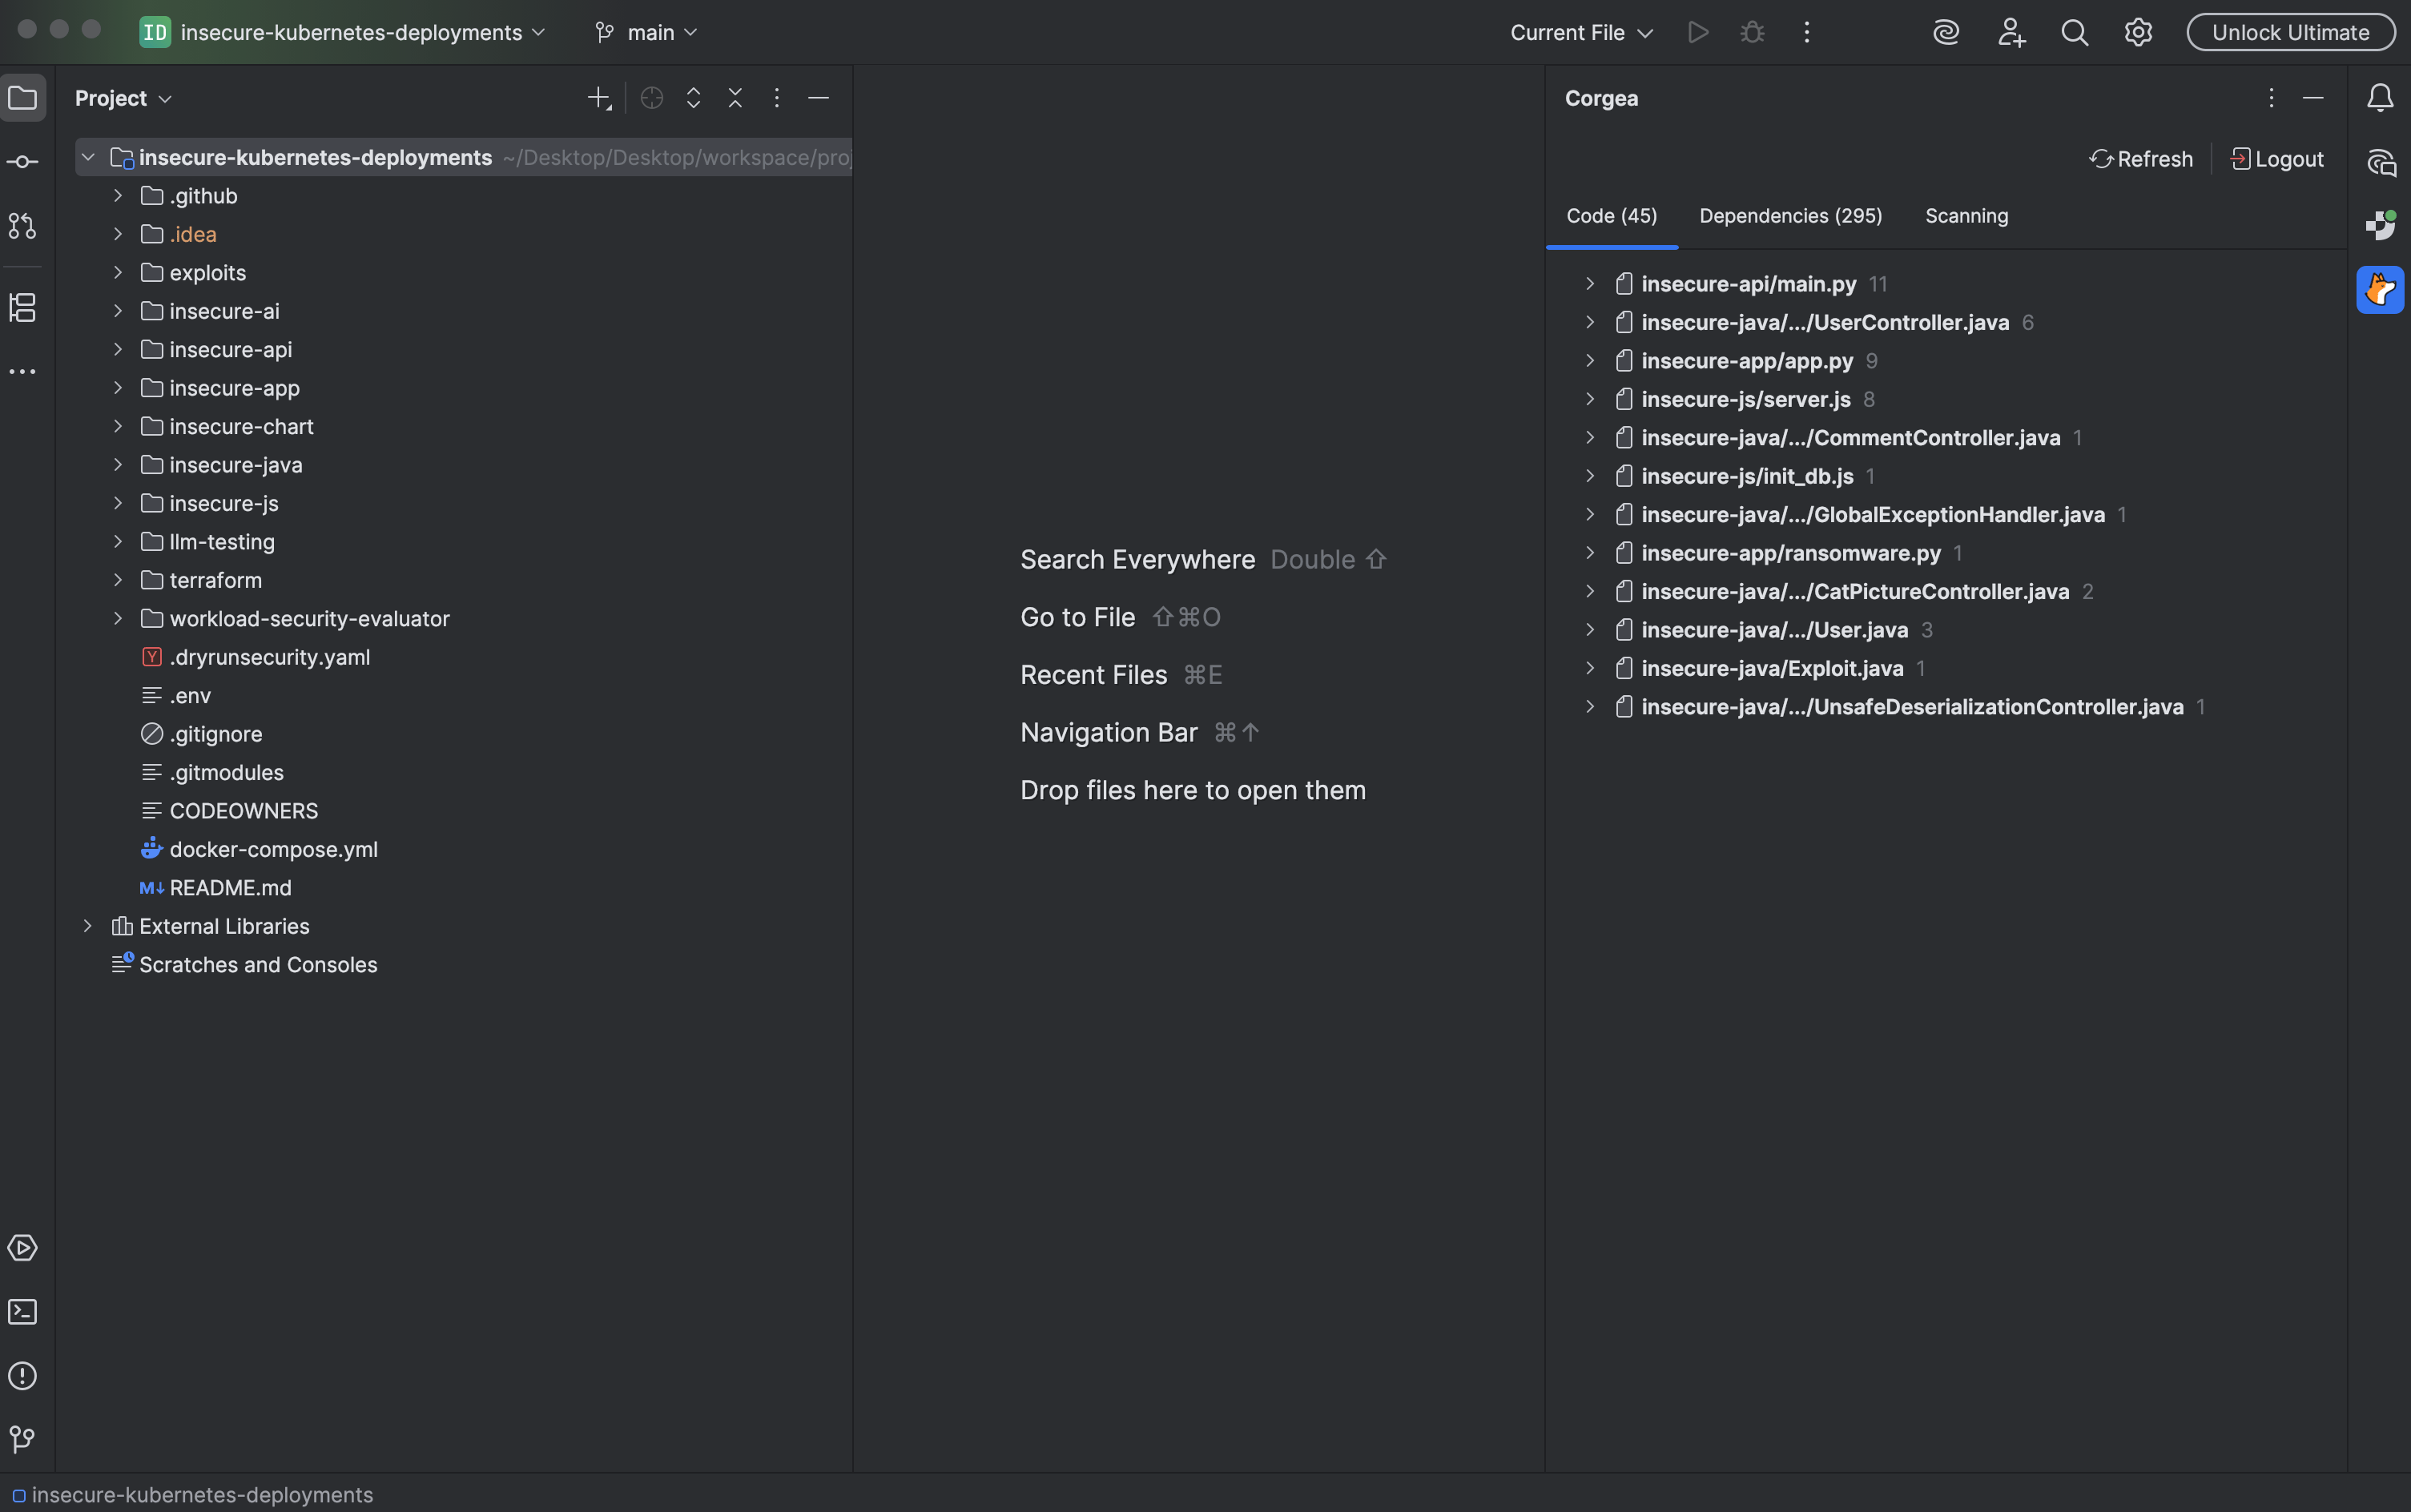
- The
Codetab lists vulnerabilities grouped by file, with a severity label and the affected line number. - Click a finding to jump to the affected line in the editor. Vulnerable lines are underlined and marked with a gutter icon.
Viewing Finding Details
- Click a finding to open its details in a new editor tab. The details view shows the classification, severity, an issue explanation, and a fix explanation.
- When Corgea has generated a fix, the
Suggested Changesection shows it as a side-by-side diff so you can review it before applying anything. - Click
Open Sourceto jump to the vulnerable code, orOpen in Corgeato view the finding in the web application.
Applying Fixes
- To apply a fix, click the
Apply Fixbutton in the details view. Corgea updates the related files automatically. - You can also apply a fix directly from the editor: click the gutter icon on a highlighted line, press
Alt+Enterand selectApply Corgea fix, or right-click and chooseCorgea>Apply Corgea Fix. - Corgea generates fixes with AI and runs quality checks before surfacing them, but you should still validate the change in your codebase.
- Save the updated files.
Viewing Dependency Vulnerabilities
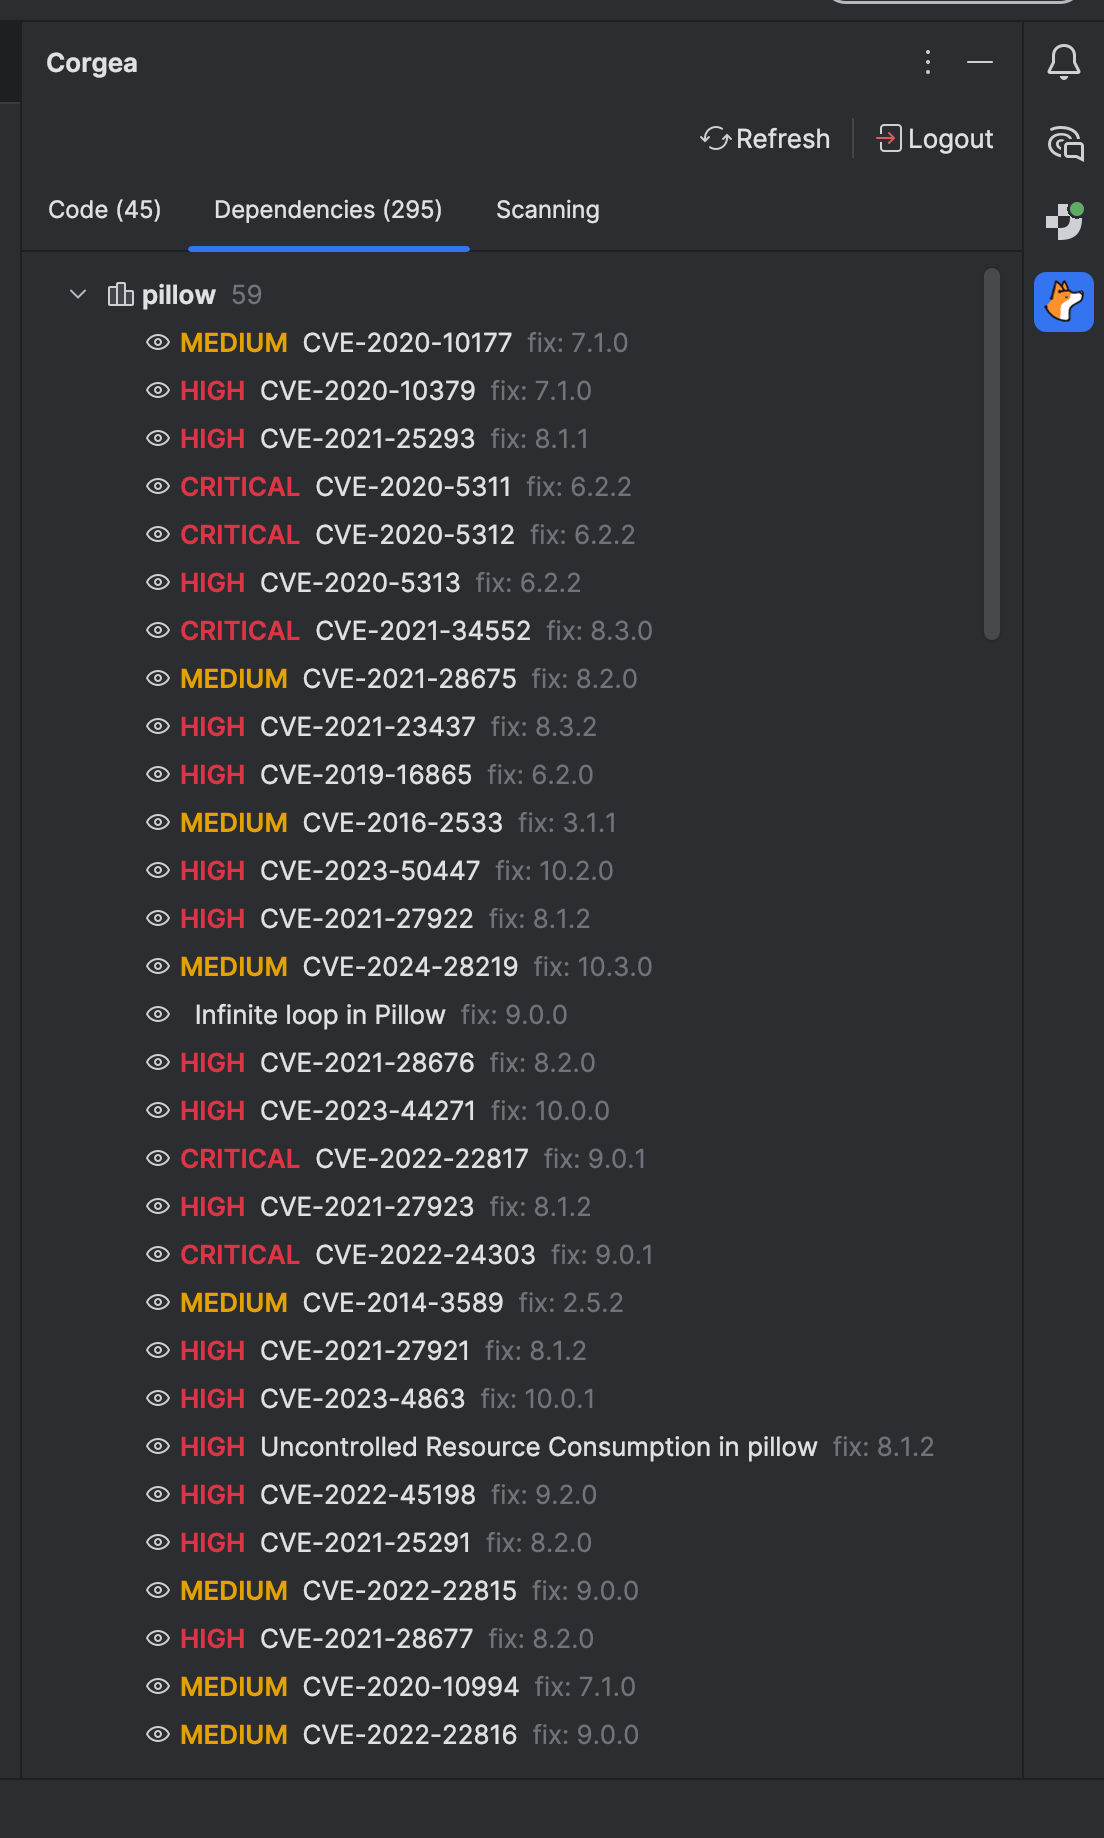
- The
Dependenciestab lists SCA findings grouped by package, with the severity, CVE identifier, and the version that resolves the vulnerability.
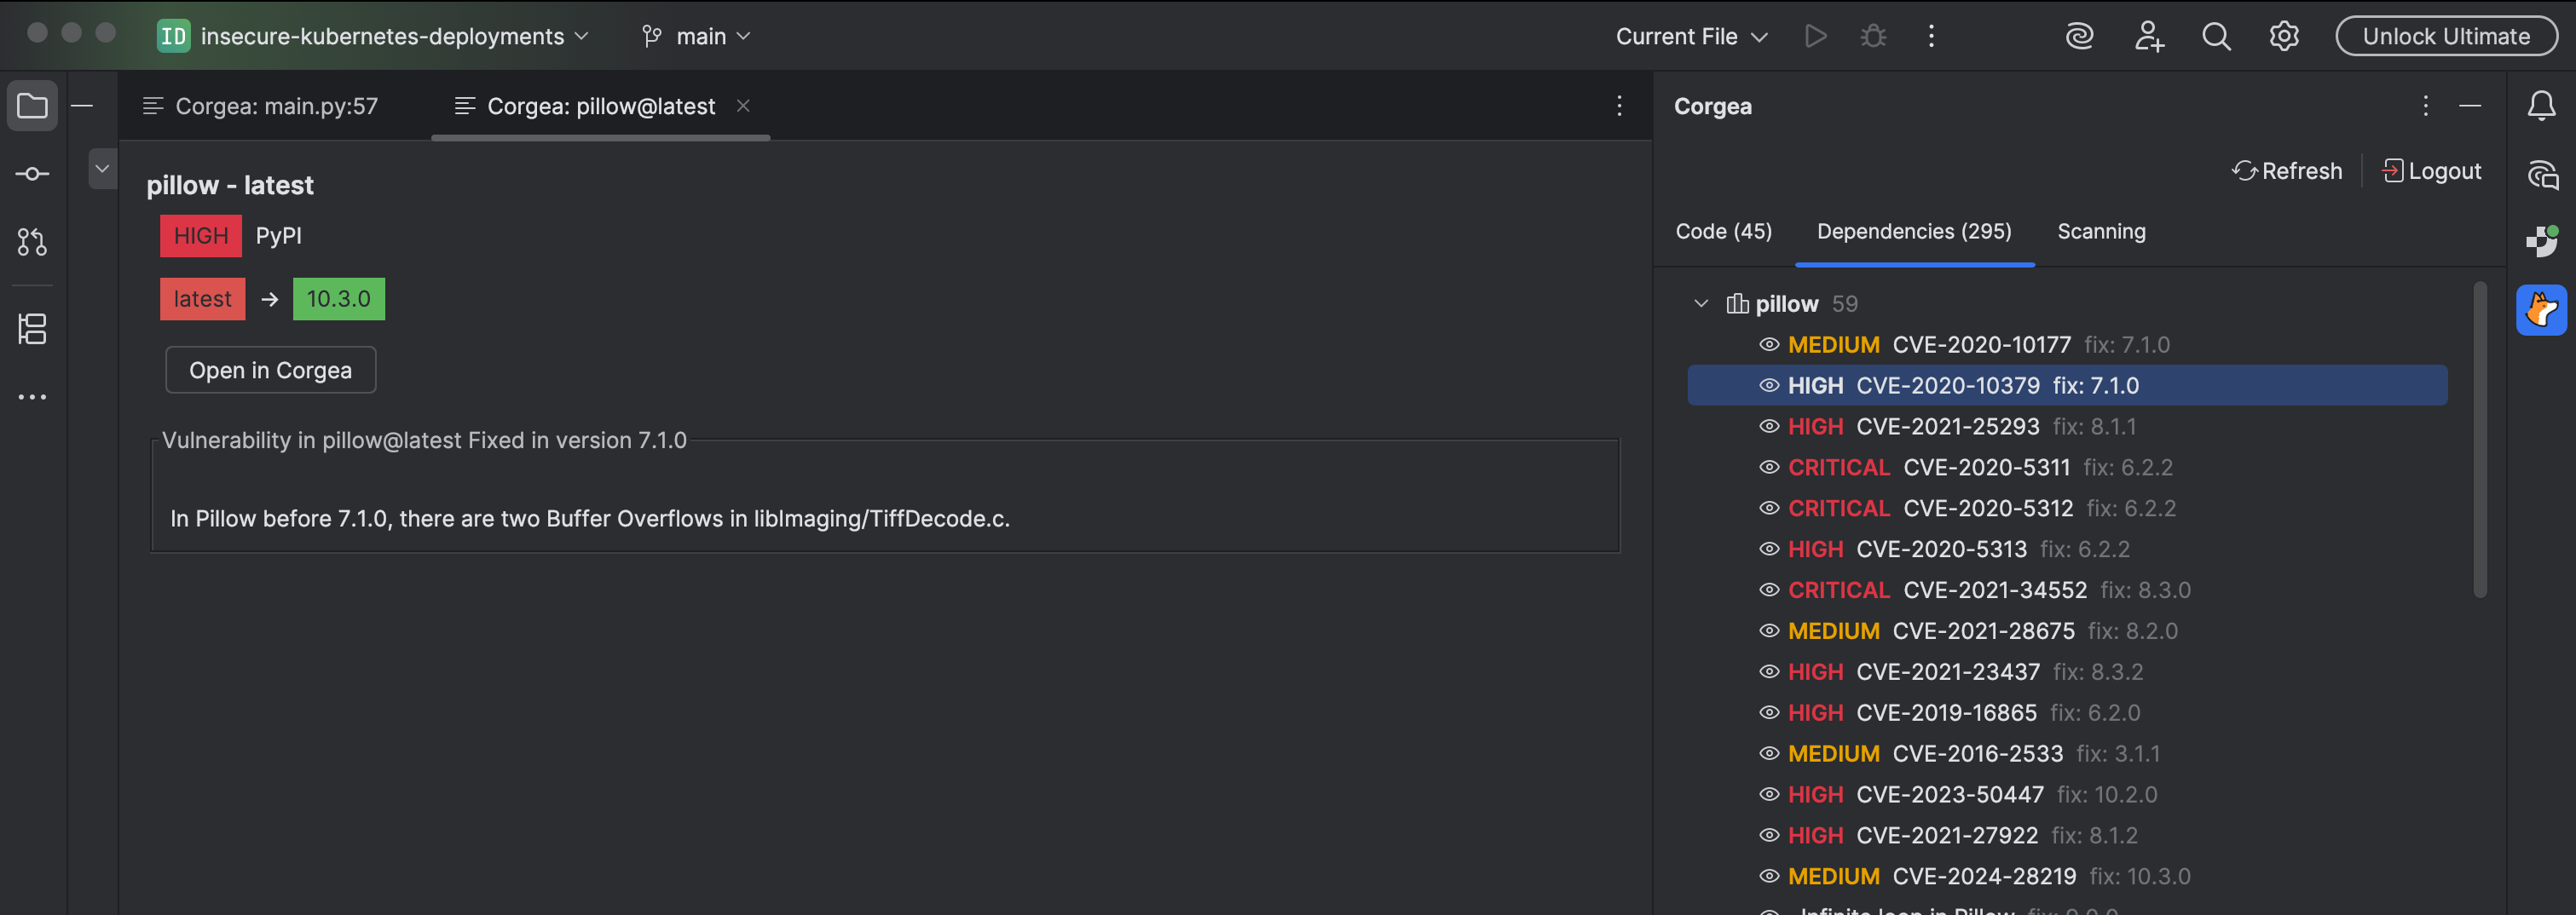
- Click a finding to open its details, showing the package registry, the current and fixed versions, and a description of the vulnerability.
- Click
Open in Corgeato view the finding in the web application.
Logging Out
- To log out or sign in as another user, click
Logoutin the Corgea tool window.