1. Register with Corgea
Go to corgea.app and register for a free account with Corgea. You will be onboarded through our setup flow that’ll help you set up everything you need.2. Add Your Project
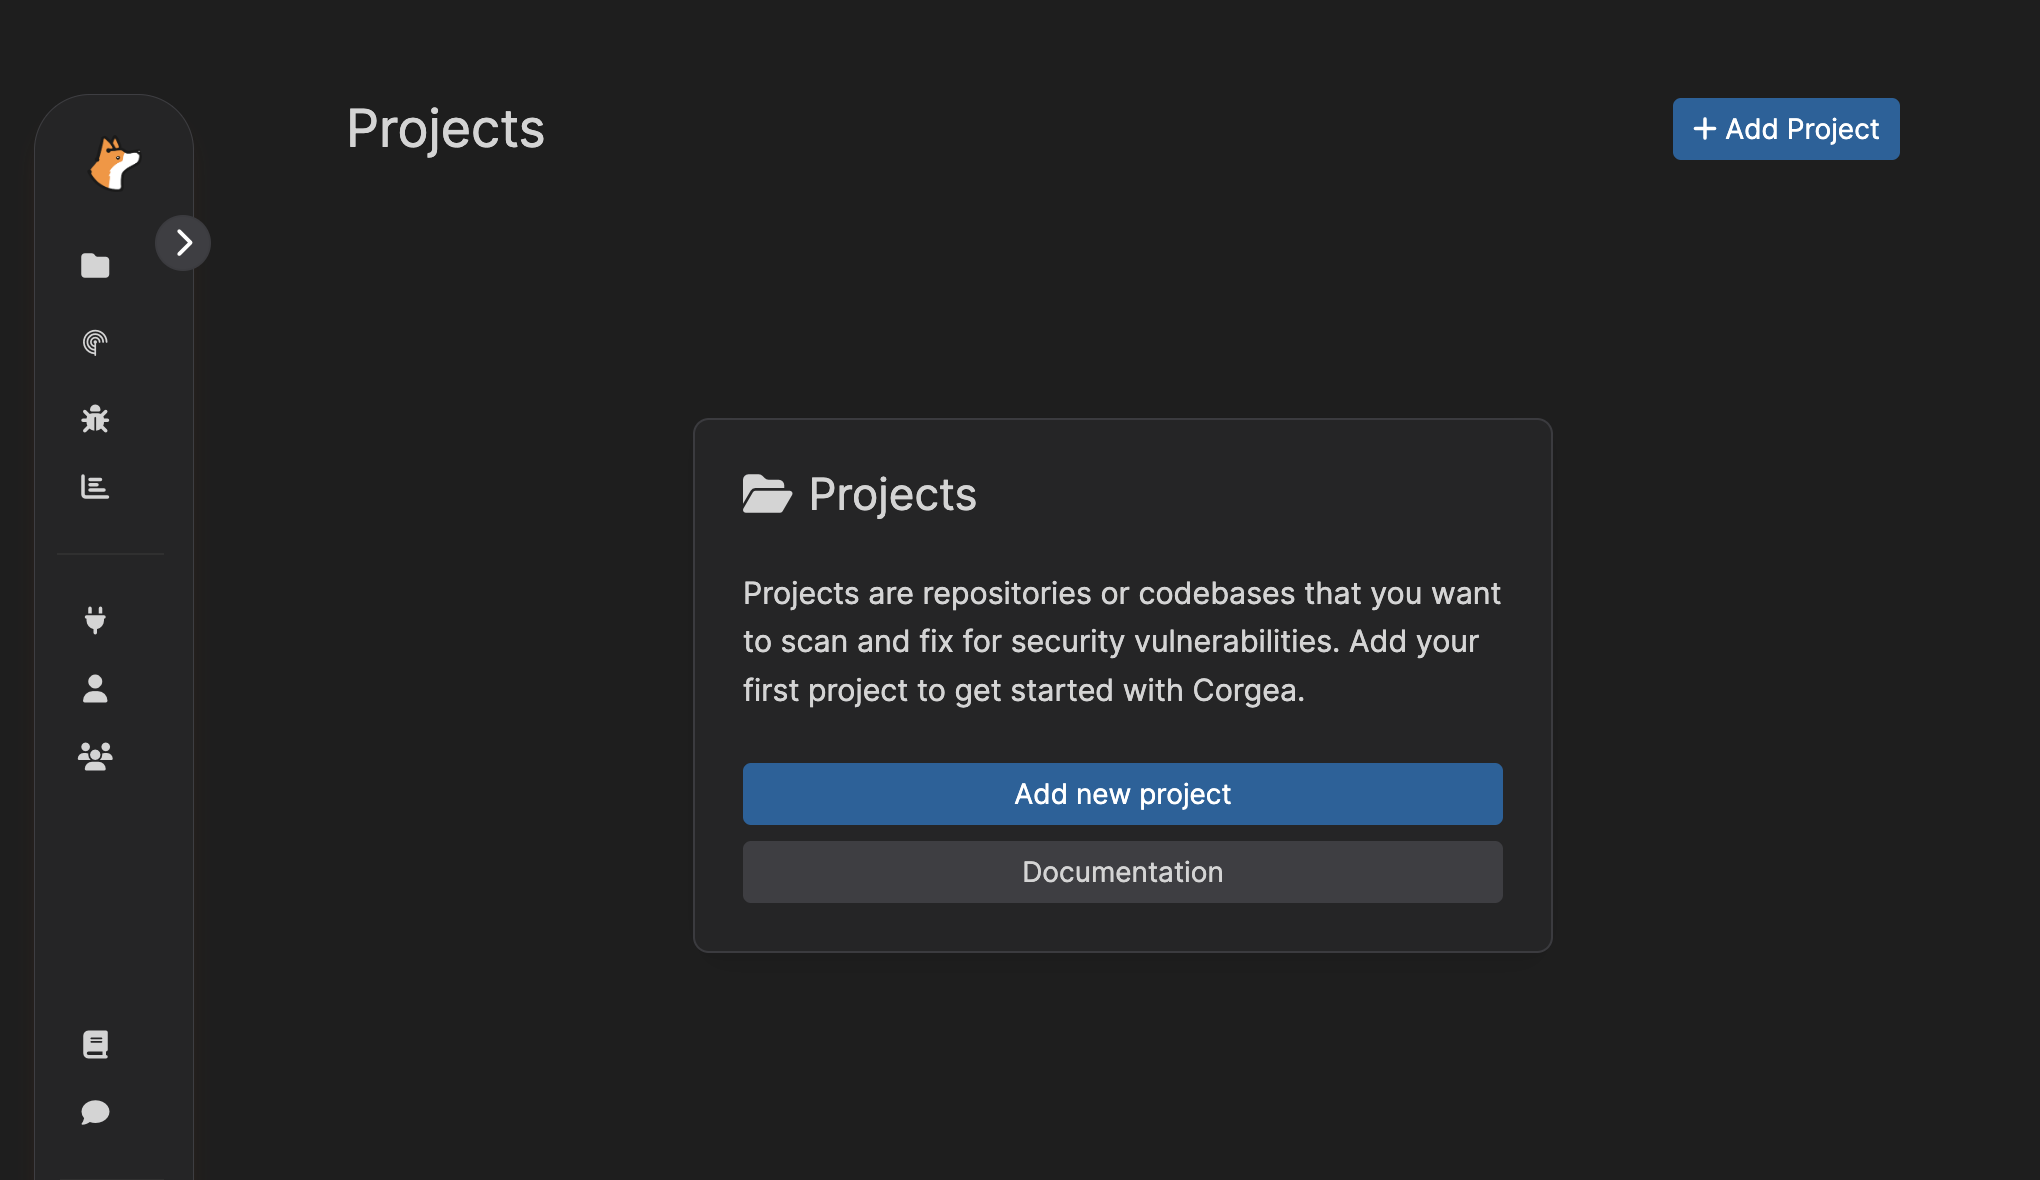
The first step is to add your project to Corgea. You can do this using the Corgea Dropsite, a web interface that allows you to easily upload your code and security reports.- Navigate to the Dropsite page by clicking the “Add Project” button in the Corgea dashboard.
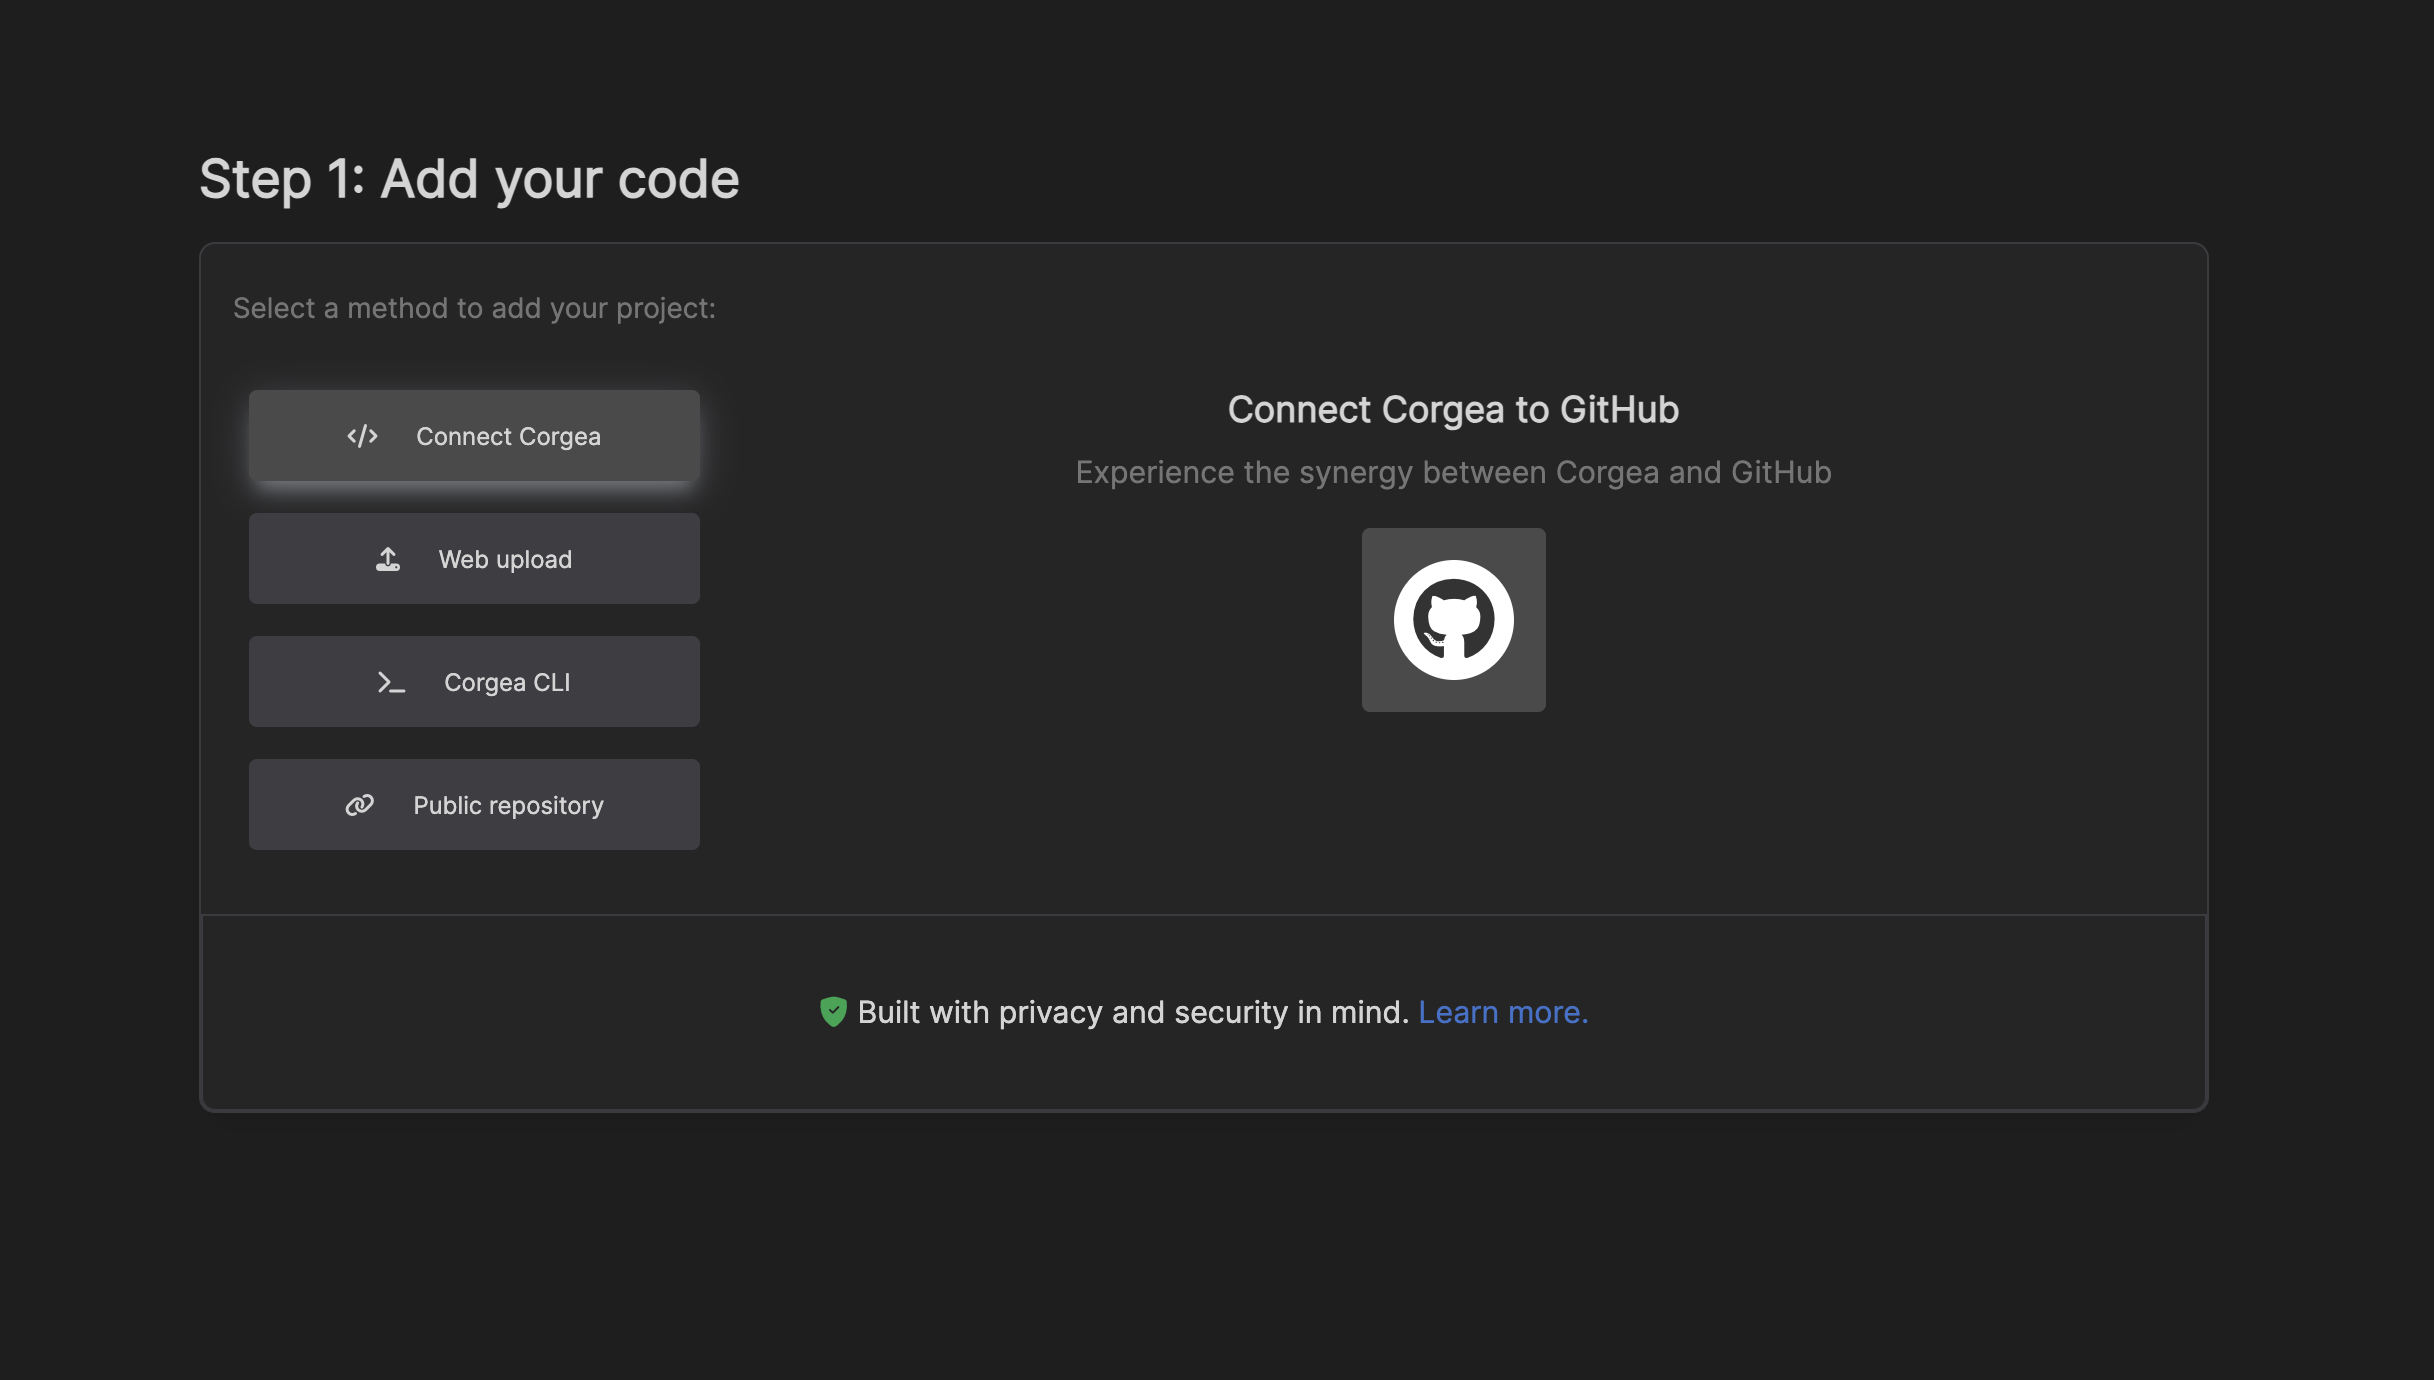
- On the Dropsite page, you can choose from several options to add your project:
- Connect Your Repository (Recommended): Connect your GitHub directly to Corgea.
- Web Upload: Upload a ZIP file containing your project’s code.
- Add a Public Repository: If your repository is publicly accessible, provide the URL.
3. Scan
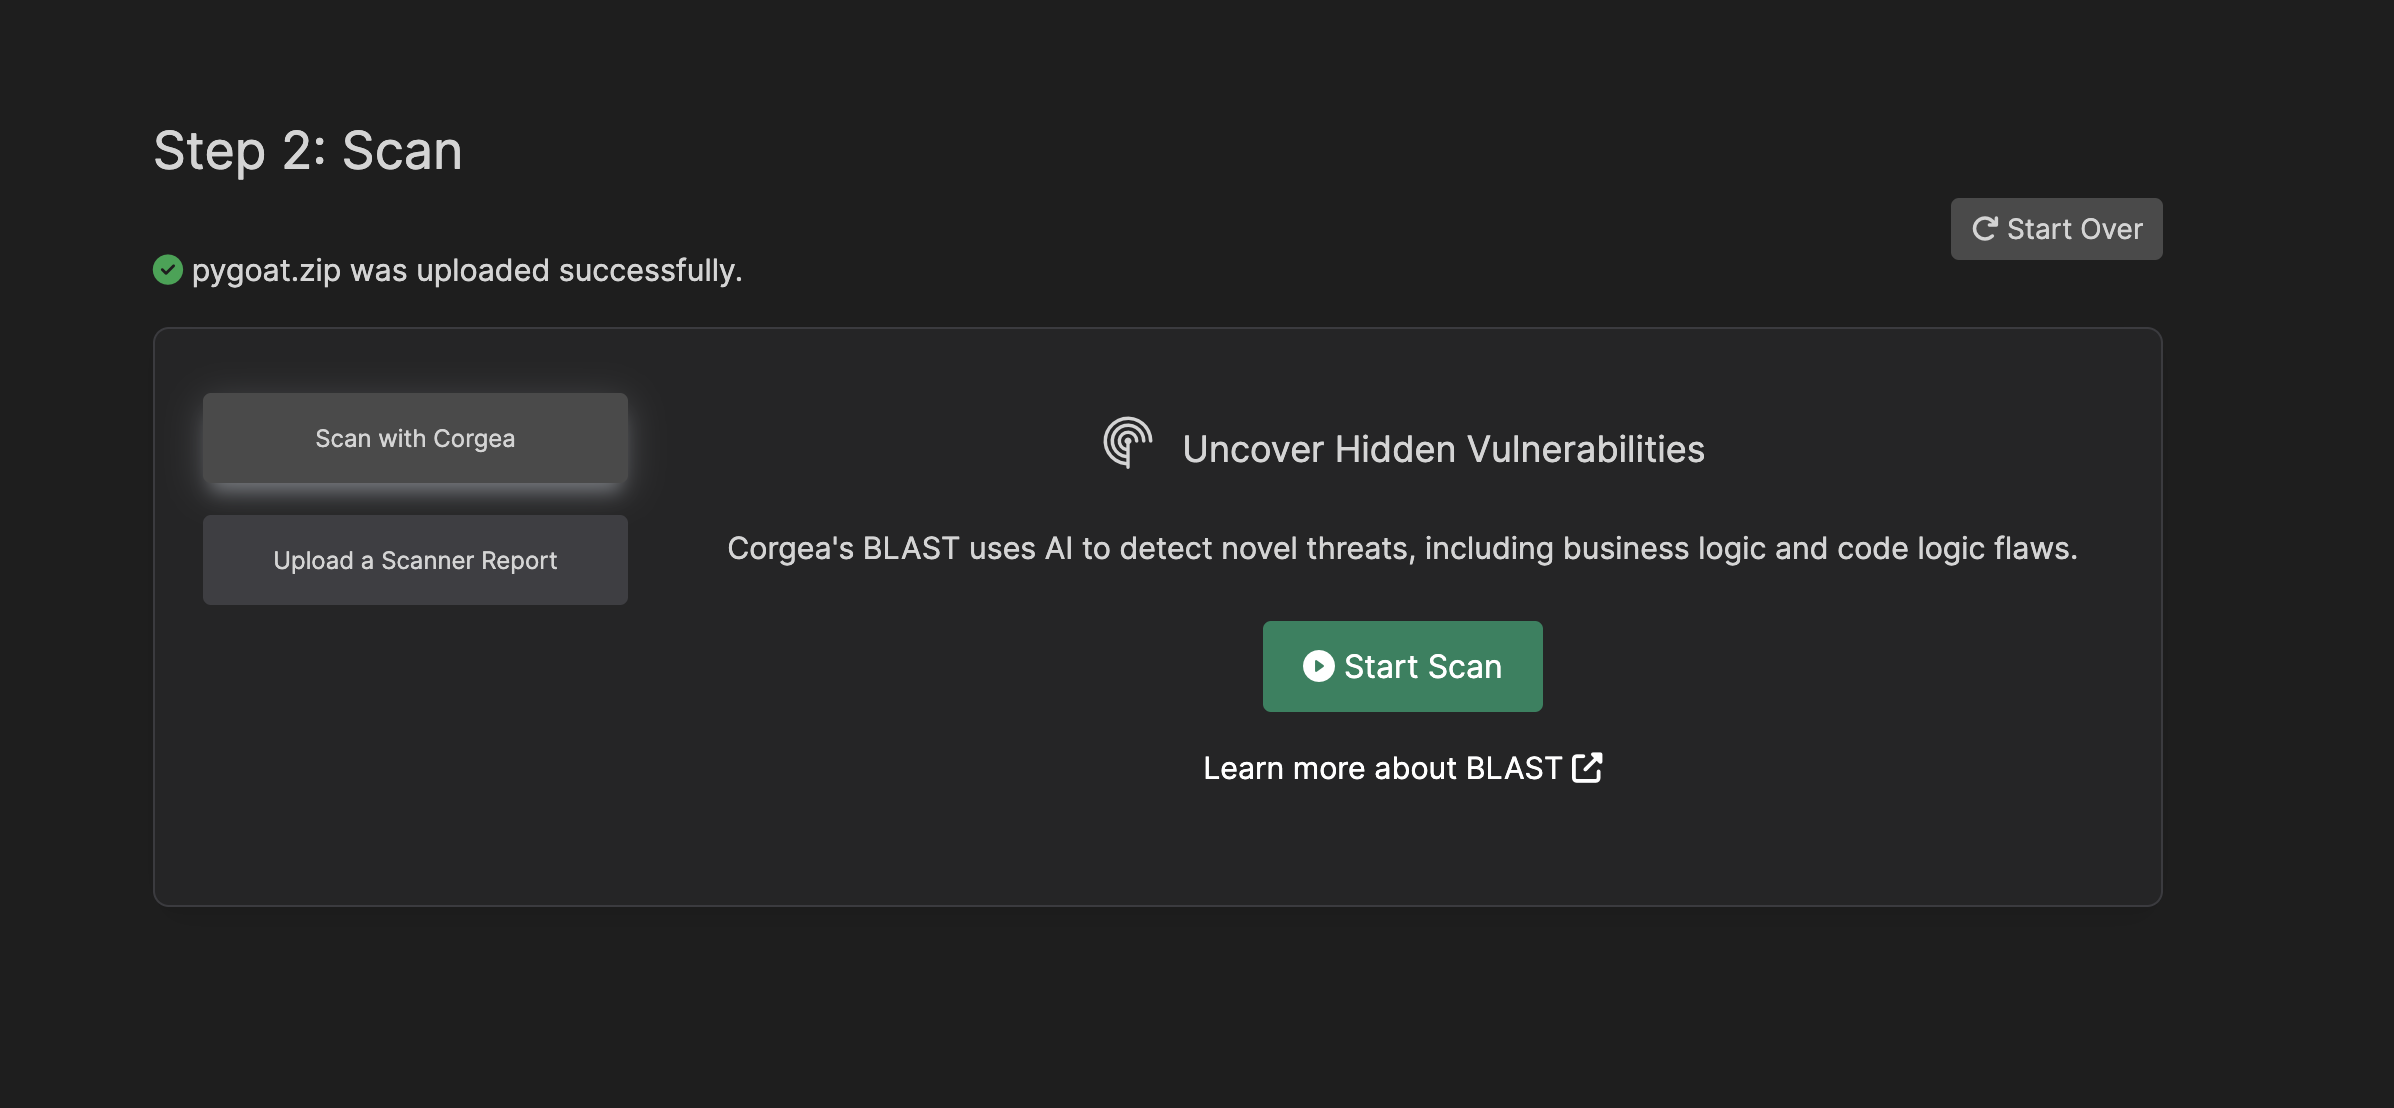
Once your project is added, you have two options for processing a scan:-
Option 1: BLAST Enabled
If you have BLAST enabled—Corgea’s AI-powered security scanner—you can initiate a scan directly within Corgea.
-
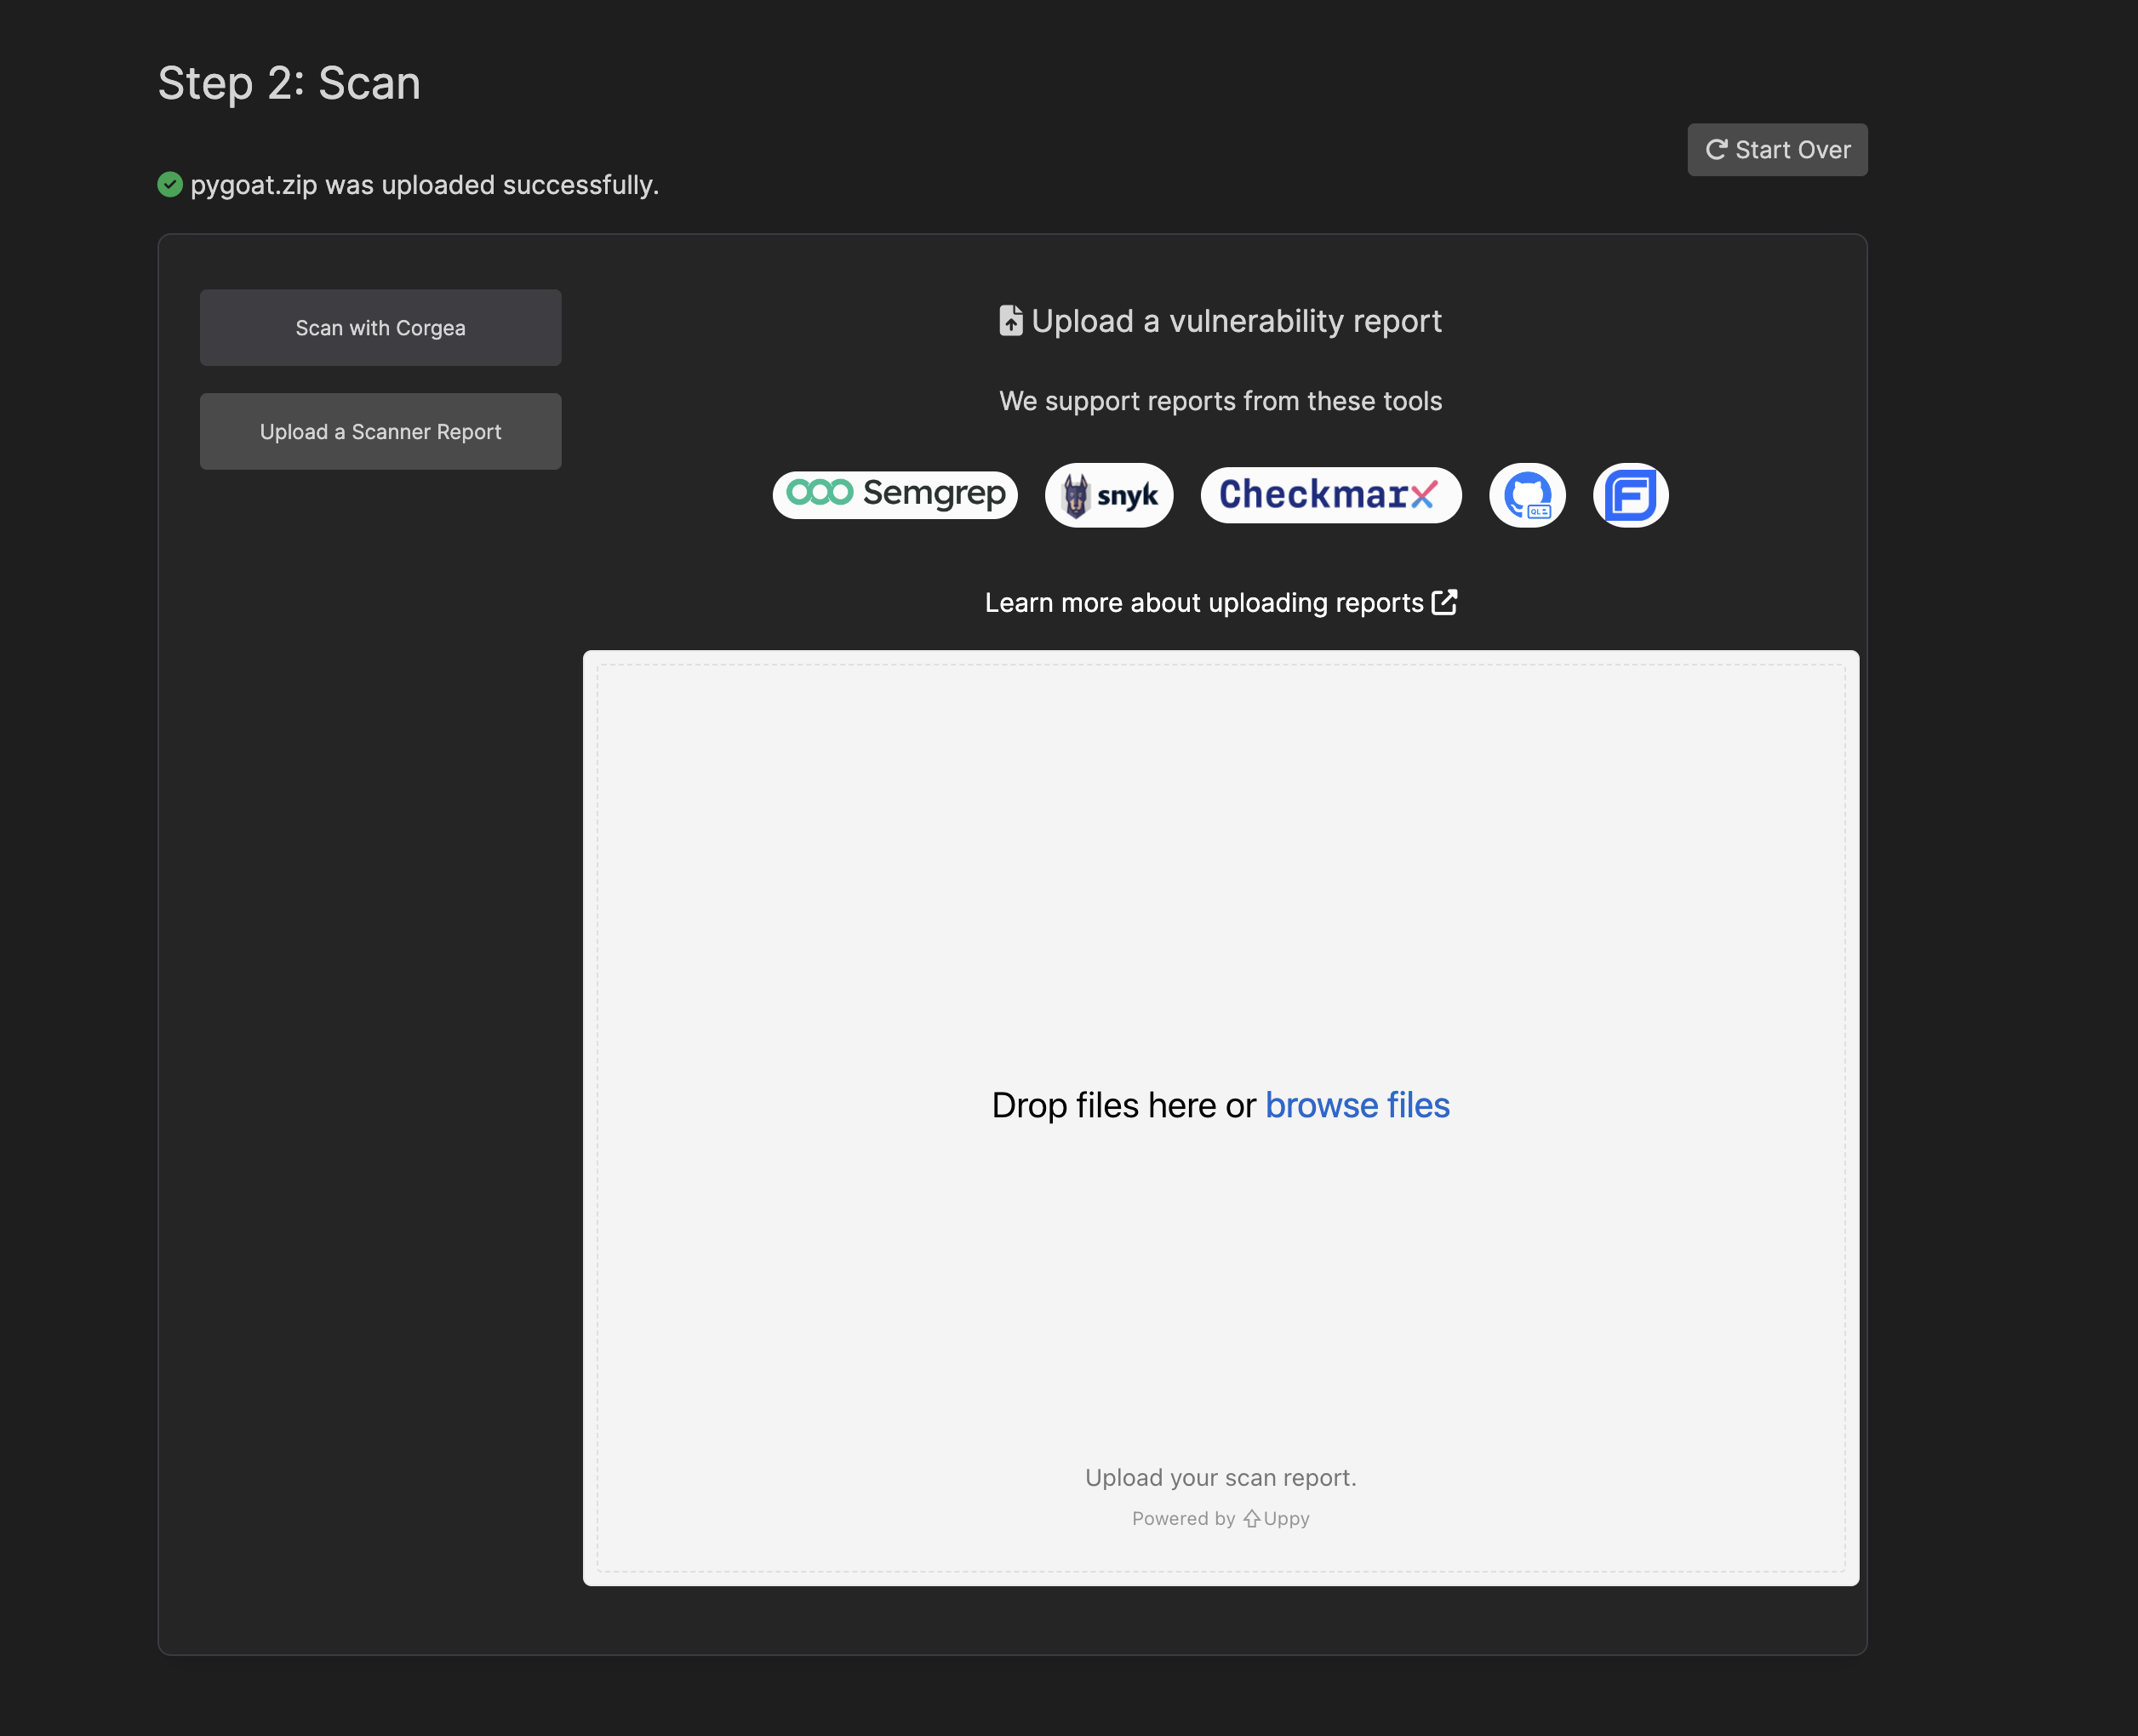
Option 2: Upload 3rd-party Report
If you are using another security tool, you can upload a scan report from that tool. Just select the report file (typically a JSON file) from your local machine and drop it into the upload box.
4. Review Findings and Fixes
Corgea uses AI to analyze potential vulnerabilities and determine if they are likely to be false positives. The false positive analysis considers various factors, such as the context of the code, the nature of the vulnerability, and relevant coding patterns or best practices.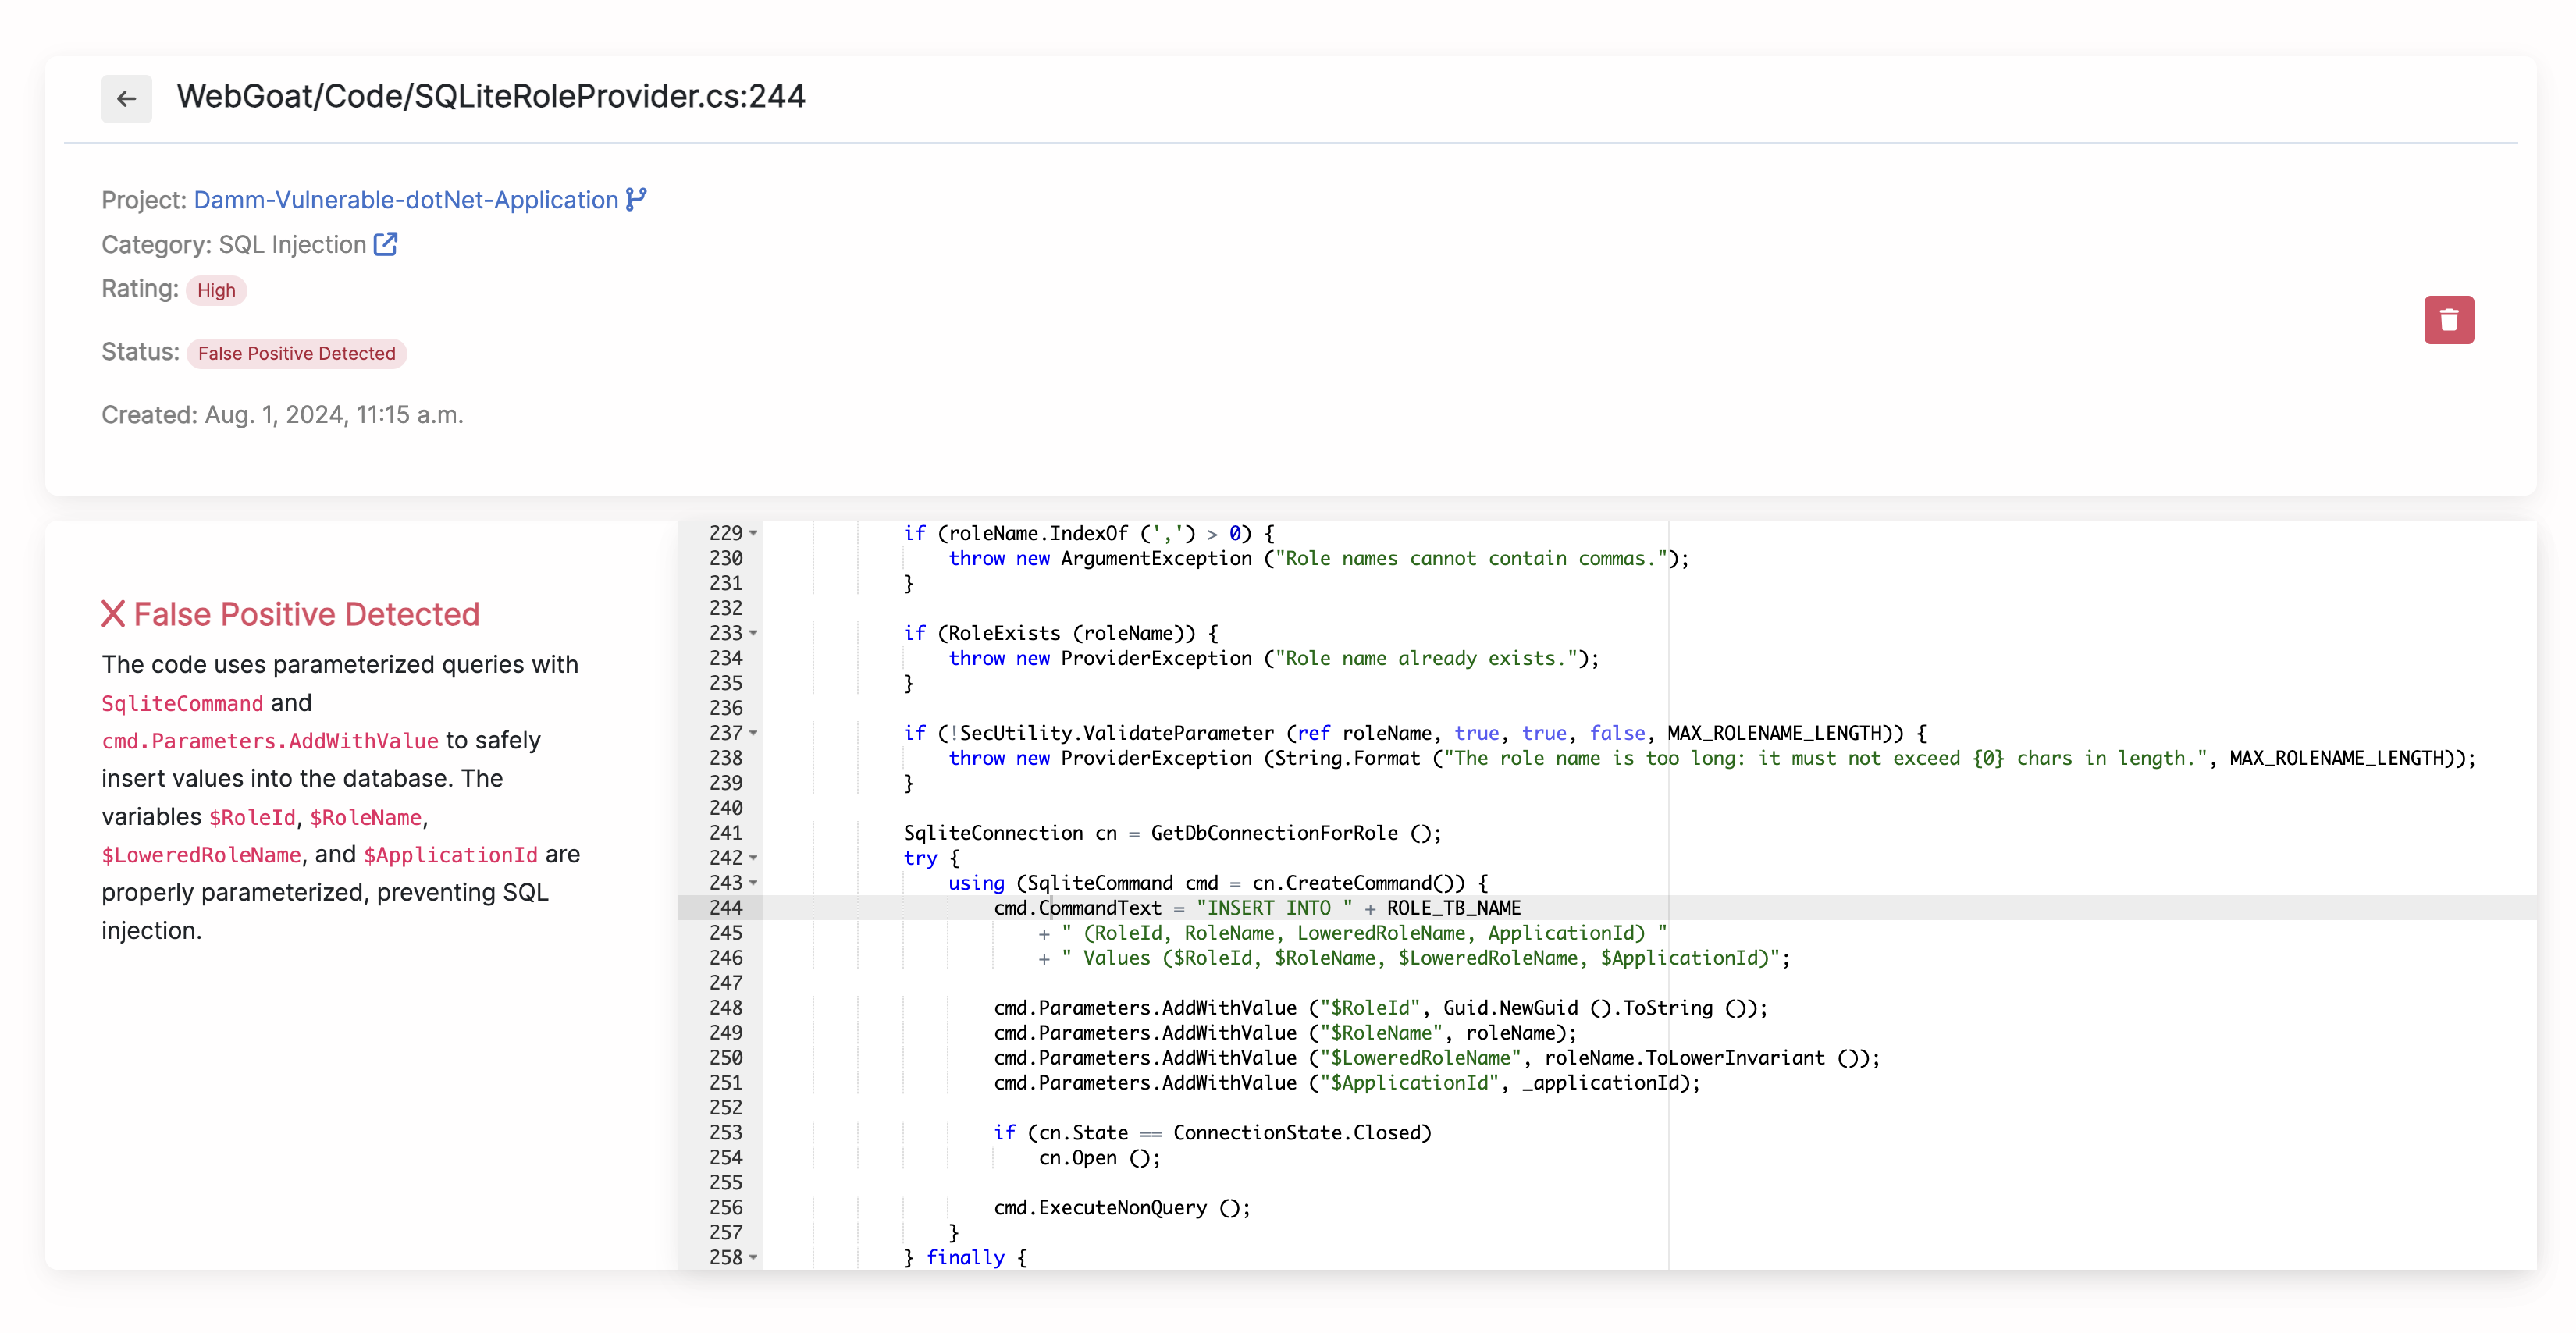
5. Apply Fixes
You can apply the proposed fixes in several ways:- Pull Request Integration: Corgea can automatically create a pull request with the proposed fixes for your repository.
- IDE Integration: Use the Corgea VS Code extension to apply fixes directly within your integrated development environment (IDE).
- Manual Application: Download the proposed fixes as a Git diff or a full file and apply them manually to your codebase.
