Overview
Corgea’s project management live inside each project’s dashboard. Use this page to tailor scanning behavior so it aligns with your codebase, compliance needs, and team workflows. You can block noisy files, ignore irrelevant CWEs, document policies, and see the operational views you need to keep your application secure. Every change you make here applies to future scans for the selected branch. If you’re new to these controls, start with the Default Settings and gradually refine the filters after reviewing a few scan reports.Changing scan settings requires the Can edit project permission. The Settings dialog is only available to users with project edit access.
File Ignore Rules
File ignore rules help you keep findings focused on the code that matters. Matching files are skipped for future scans and ignored when new issues are added to the project. We already exclude common build artifacts, dependency folders, and generated files, so you typically only need to add rules that are unique to your project structure.Default exclusions
- Test files:
*_test.*,test_*.*,*.test.*,*.spec.*,*__tests__/*,*test/*,*tests/* - Dependencies:
*node_modules/*,*python*/site-packages/* - Generated code:
*generated.*,*.gen.go,*.pb.*,*.designer.cs,*.d.ts - Build artifacts:
*build/*,*dist/*,*coverage/* - Configuration:
tsconfig.json,webpack.config.js,pnpm-lock.yaml,*compose*.yml - Other common folders:
*migrations/*,*mock/*,*mocks/*,*fixtures*,*tmp/*,*log/*,*logs/*
How to add custom ignores
Open the Settings dialog
From the project dashboard, click Settings to open the settings dialog, then expand the File Ignore Rules section.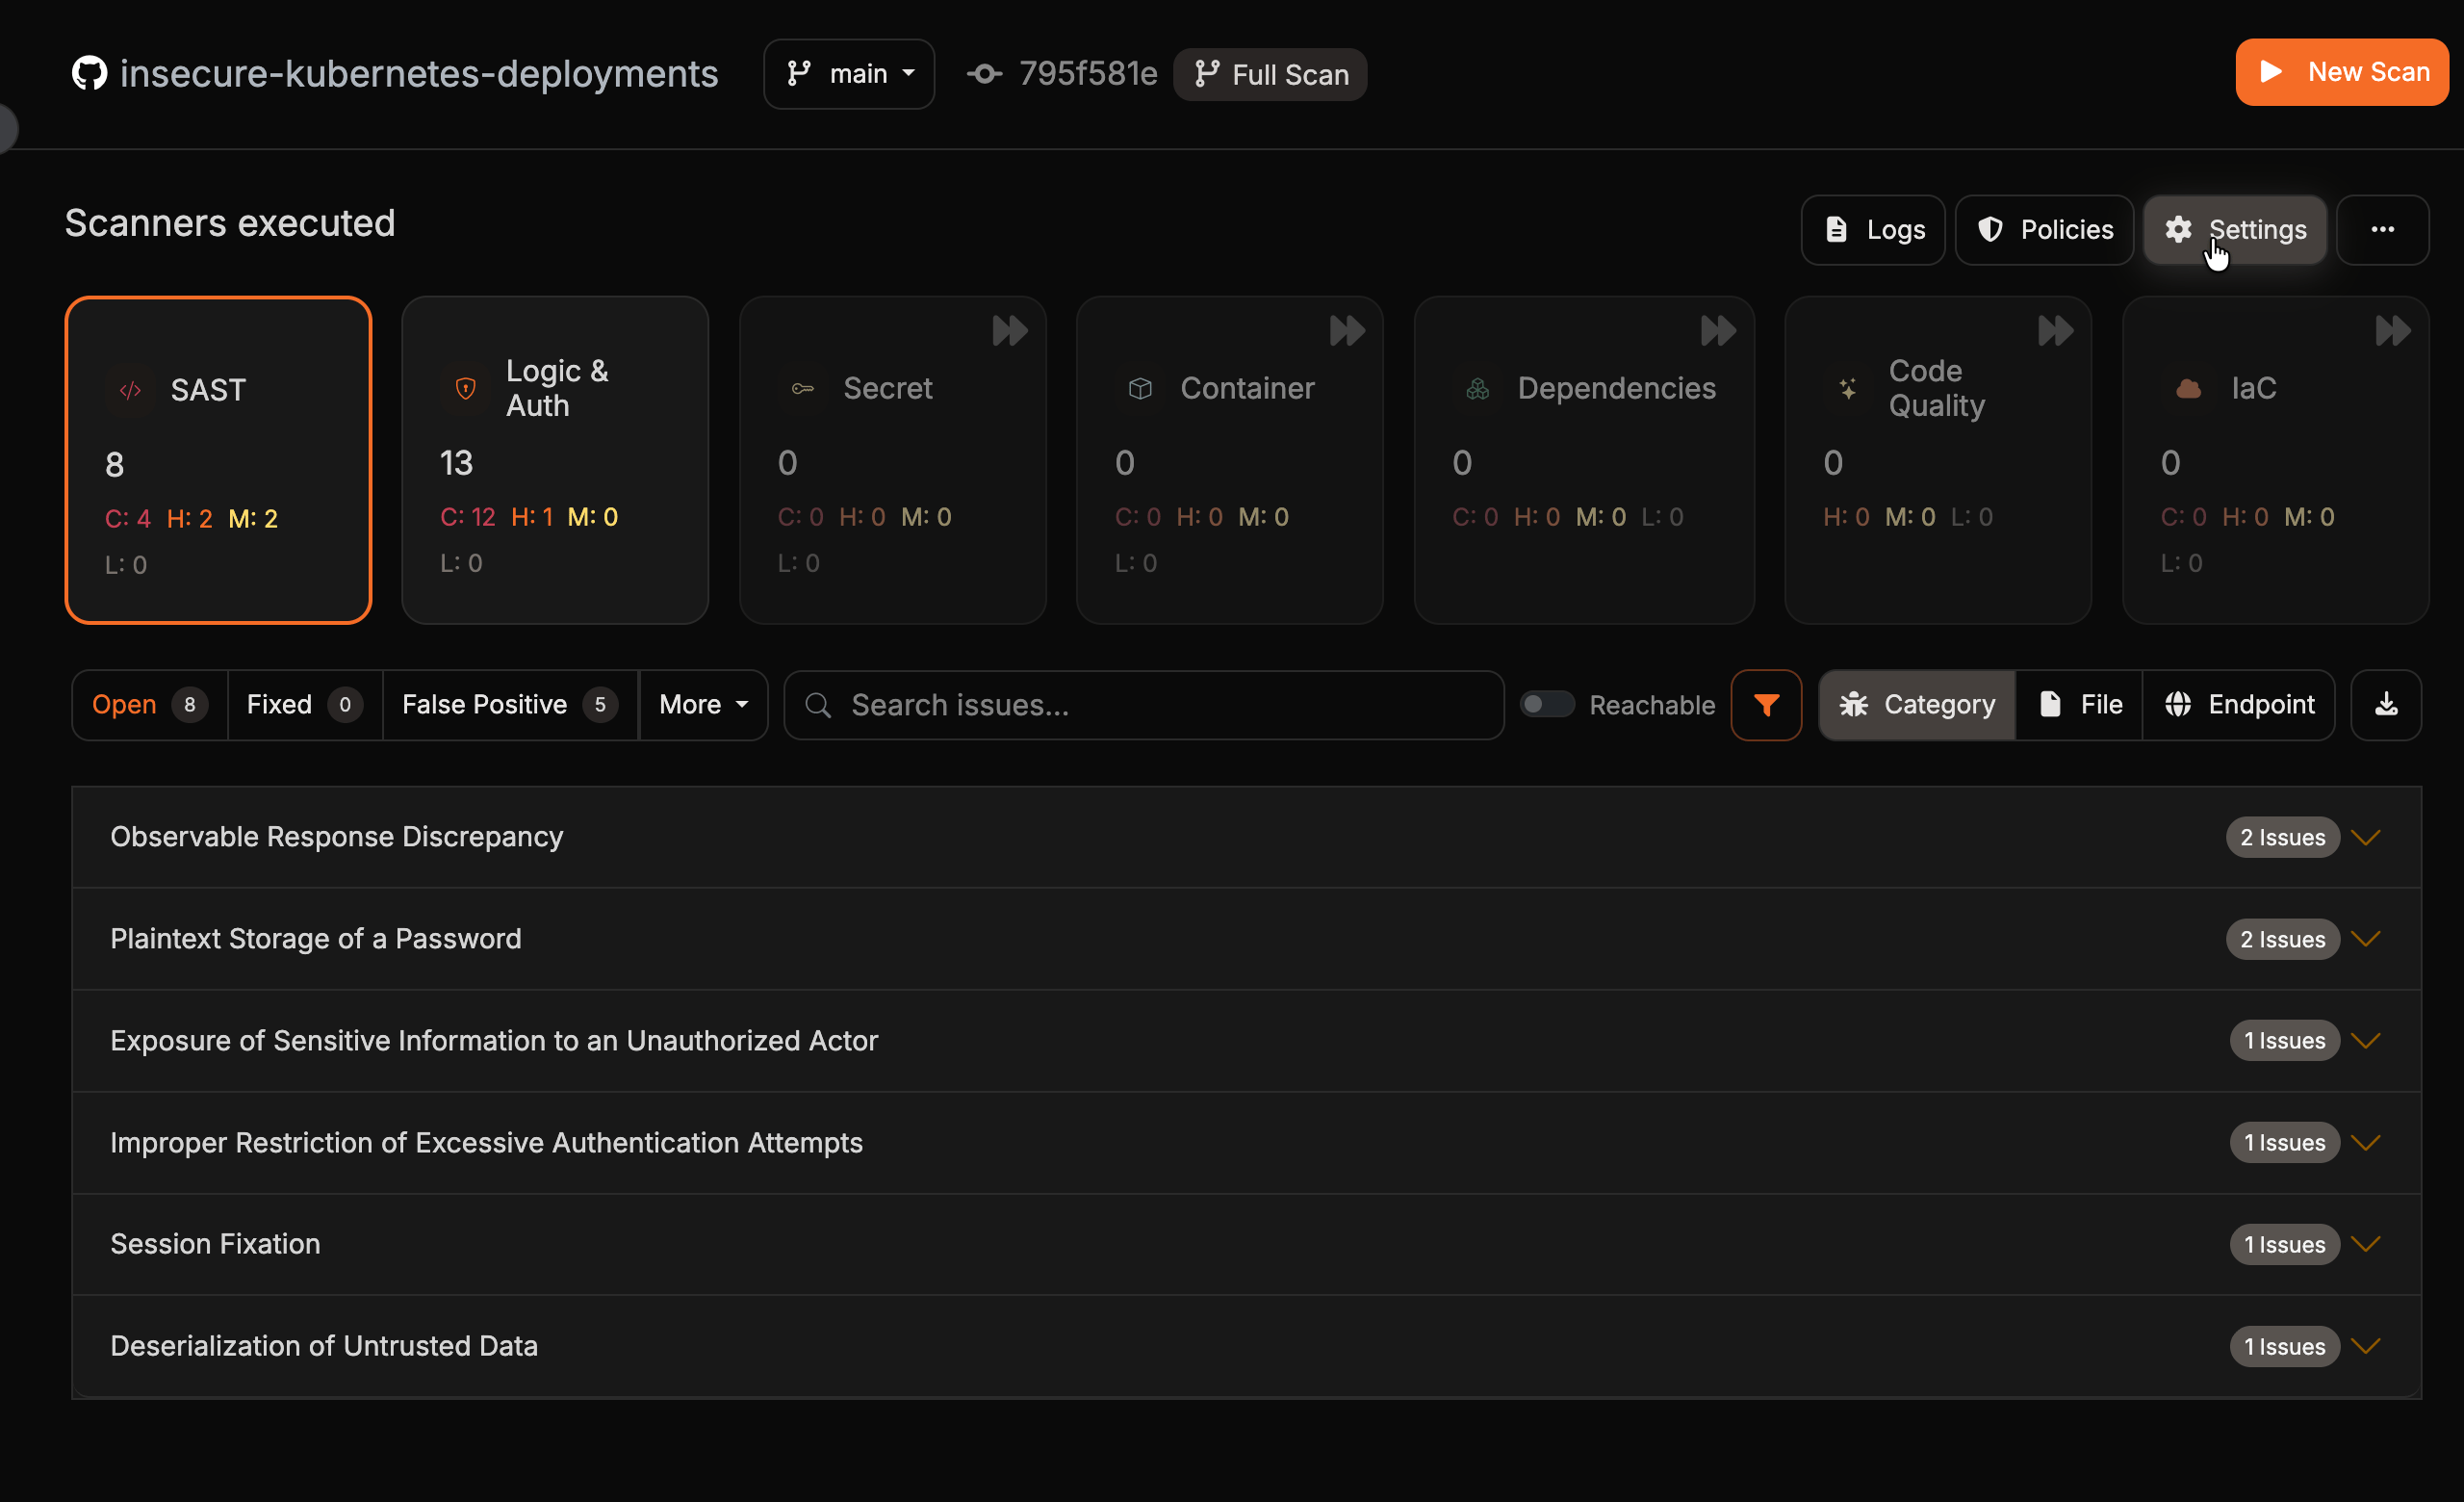
Add a pattern
In Glob Pattern of files to ignore, enter a single glob pattern for the paths (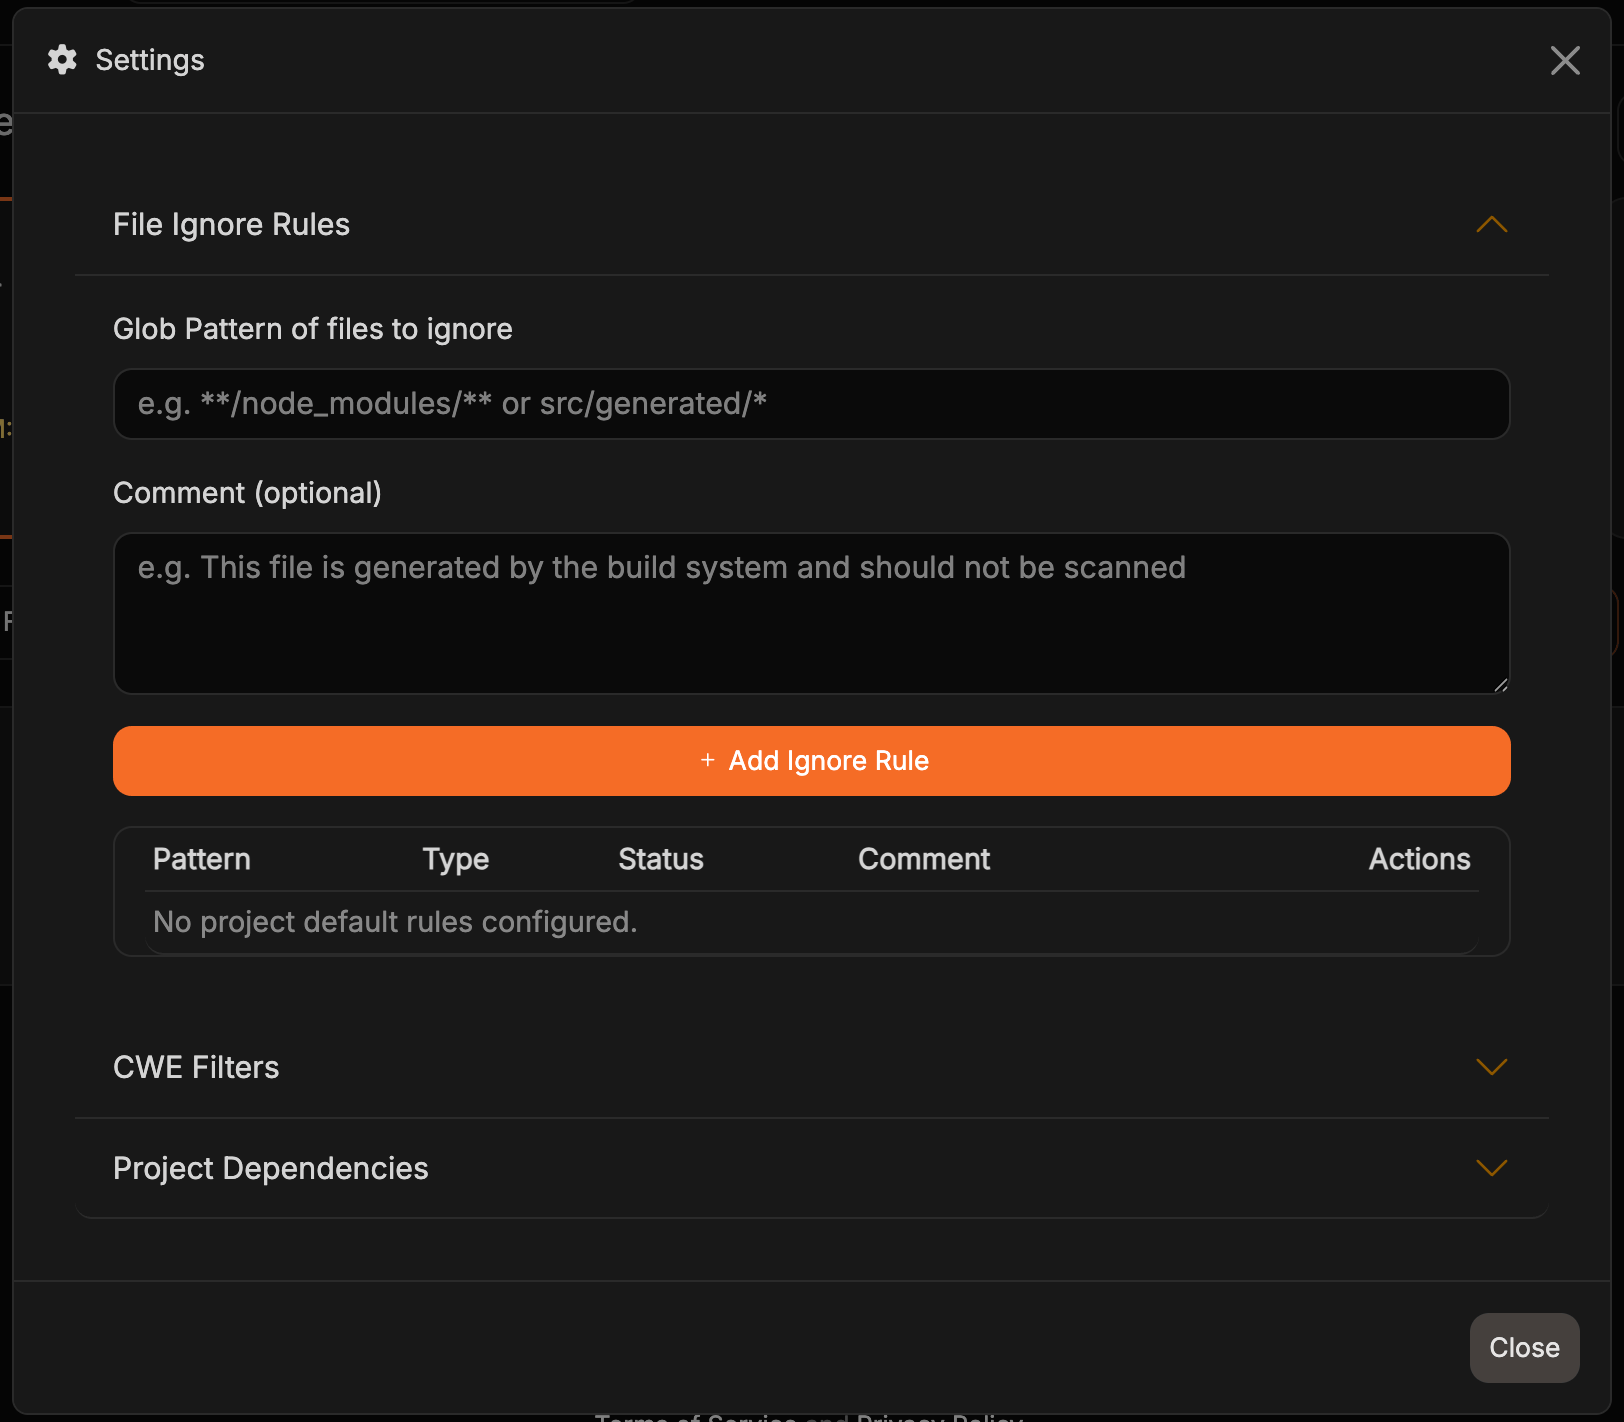
src/tools/), directories (**/legacy/**), or nested files (src/assets/languages/**) you want to skip. Patterns that start with **/ can match the folder at any depth, including the repository root. Optionally add a Comment (optional) explaining why the rule exists (up to 200 characters), then click Add Ignore Rule. Each new rule appears in the table below with its Pattern, Type, Status, and Comment.Update a rule's comment
To edit a rule’s comment, re-enter its exact pattern. The button changes to Update Ignore Rule, and submitting updates the comment on the existing rule instead of creating a duplicate. Submitting a blank comment leaves the existing comment unchanged.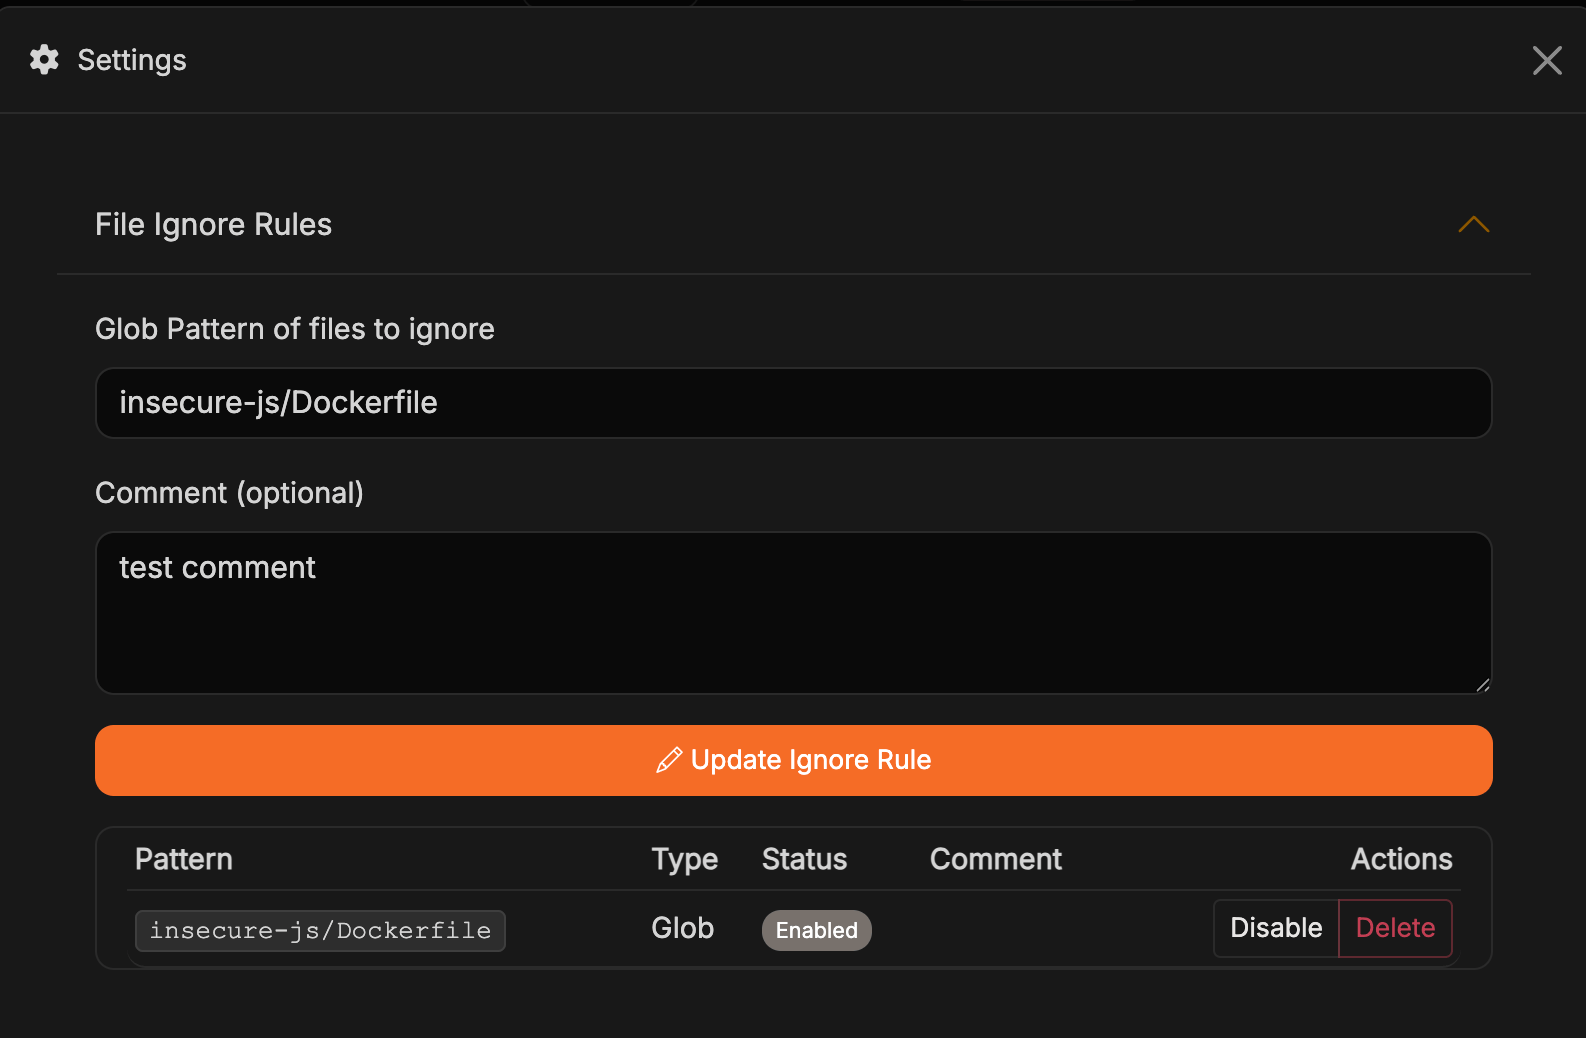
Enable, disable, or delete rules
Use the Actions column to Disable a rule (it stays in the list but is skipped during scans), Enable it again, or Delete it entirely. The Status column shows whether each rule is currently active.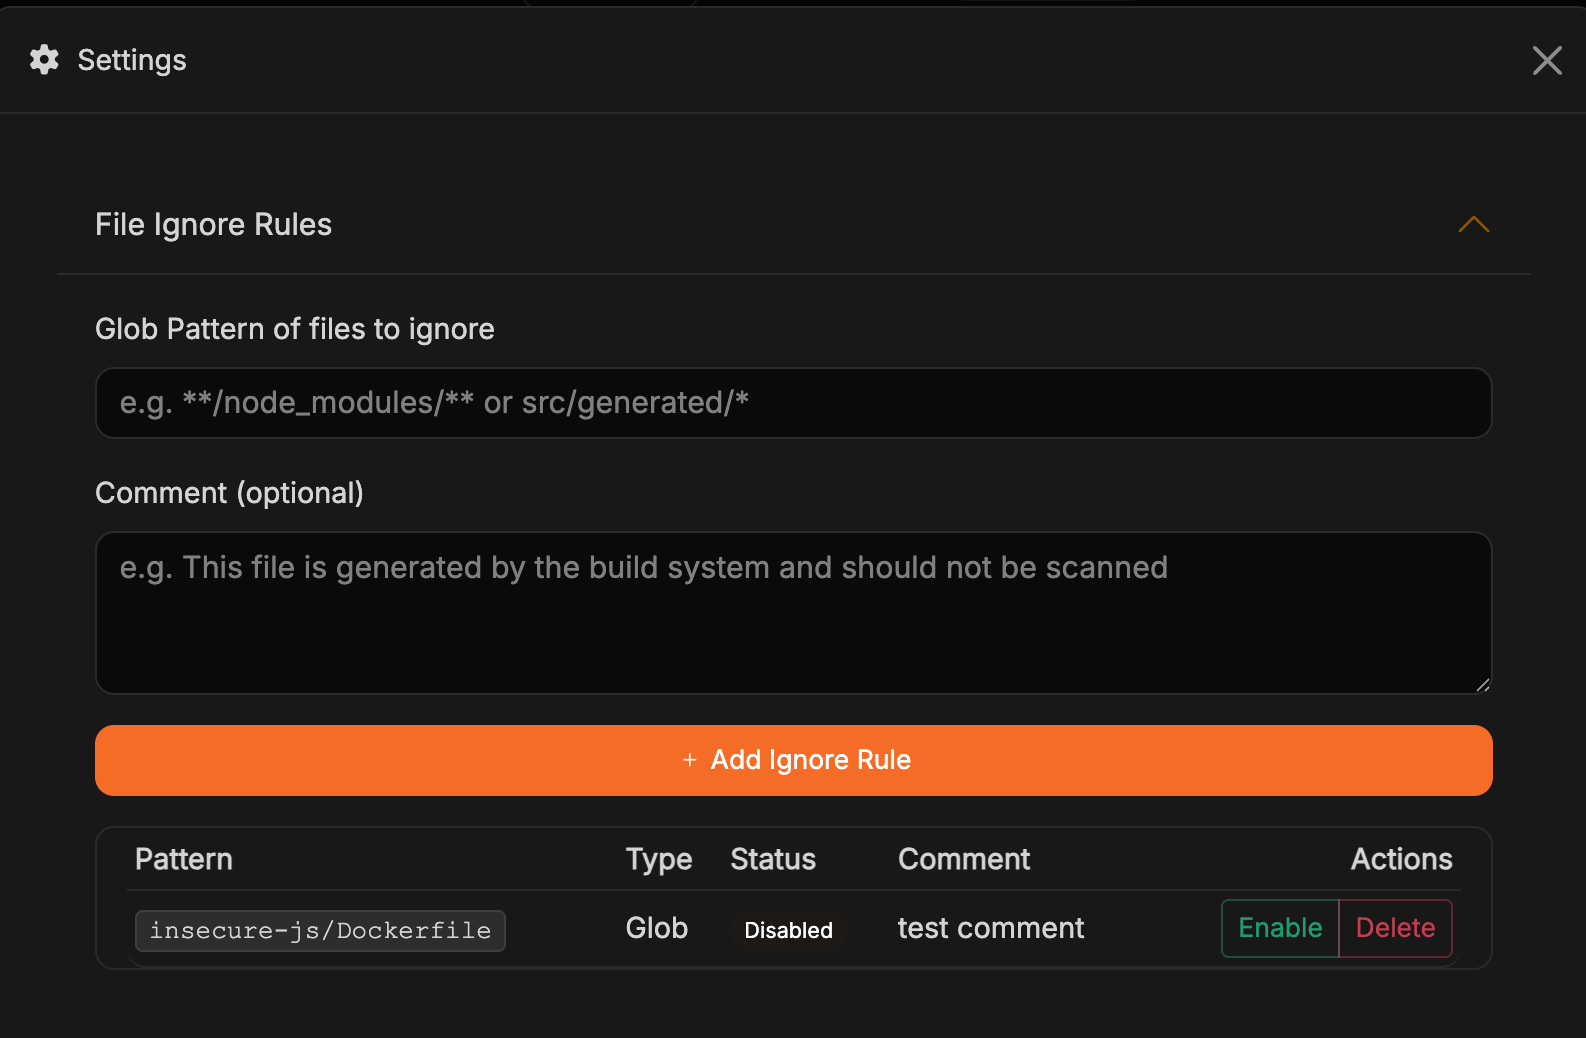
When to add rules
- Internal tooling: Scripts or utilities that should never be scanned (e.g., internal deploy scripts or CLI helpers).
- Legacy or deprecated code: Modules you’re no longer shipping but still keep for reference.
- Vendor or third-party artifacts: Files provided by hardware vendors or partners that don’t change and you don’t control.
- Documentation or content: Rule out large doc folders when only code matters.
- Custom output: Non-standard build directories created during CI or local experimentation.
CWE Filters
CWEs let you align Corgea’s findings with your project’s threat model. Think of this section as your security policy in code: you can disable specific vulnerability families that you’re already protecting through other controls or that don’t apply to your stack.How to configure filters
Open CWE Filters
In the Settings dialog, expand the CWE Filters section. By default, all CWEs are tracked.
Pick the CWEs you want to ignore
Enter a CWE ID (for example, 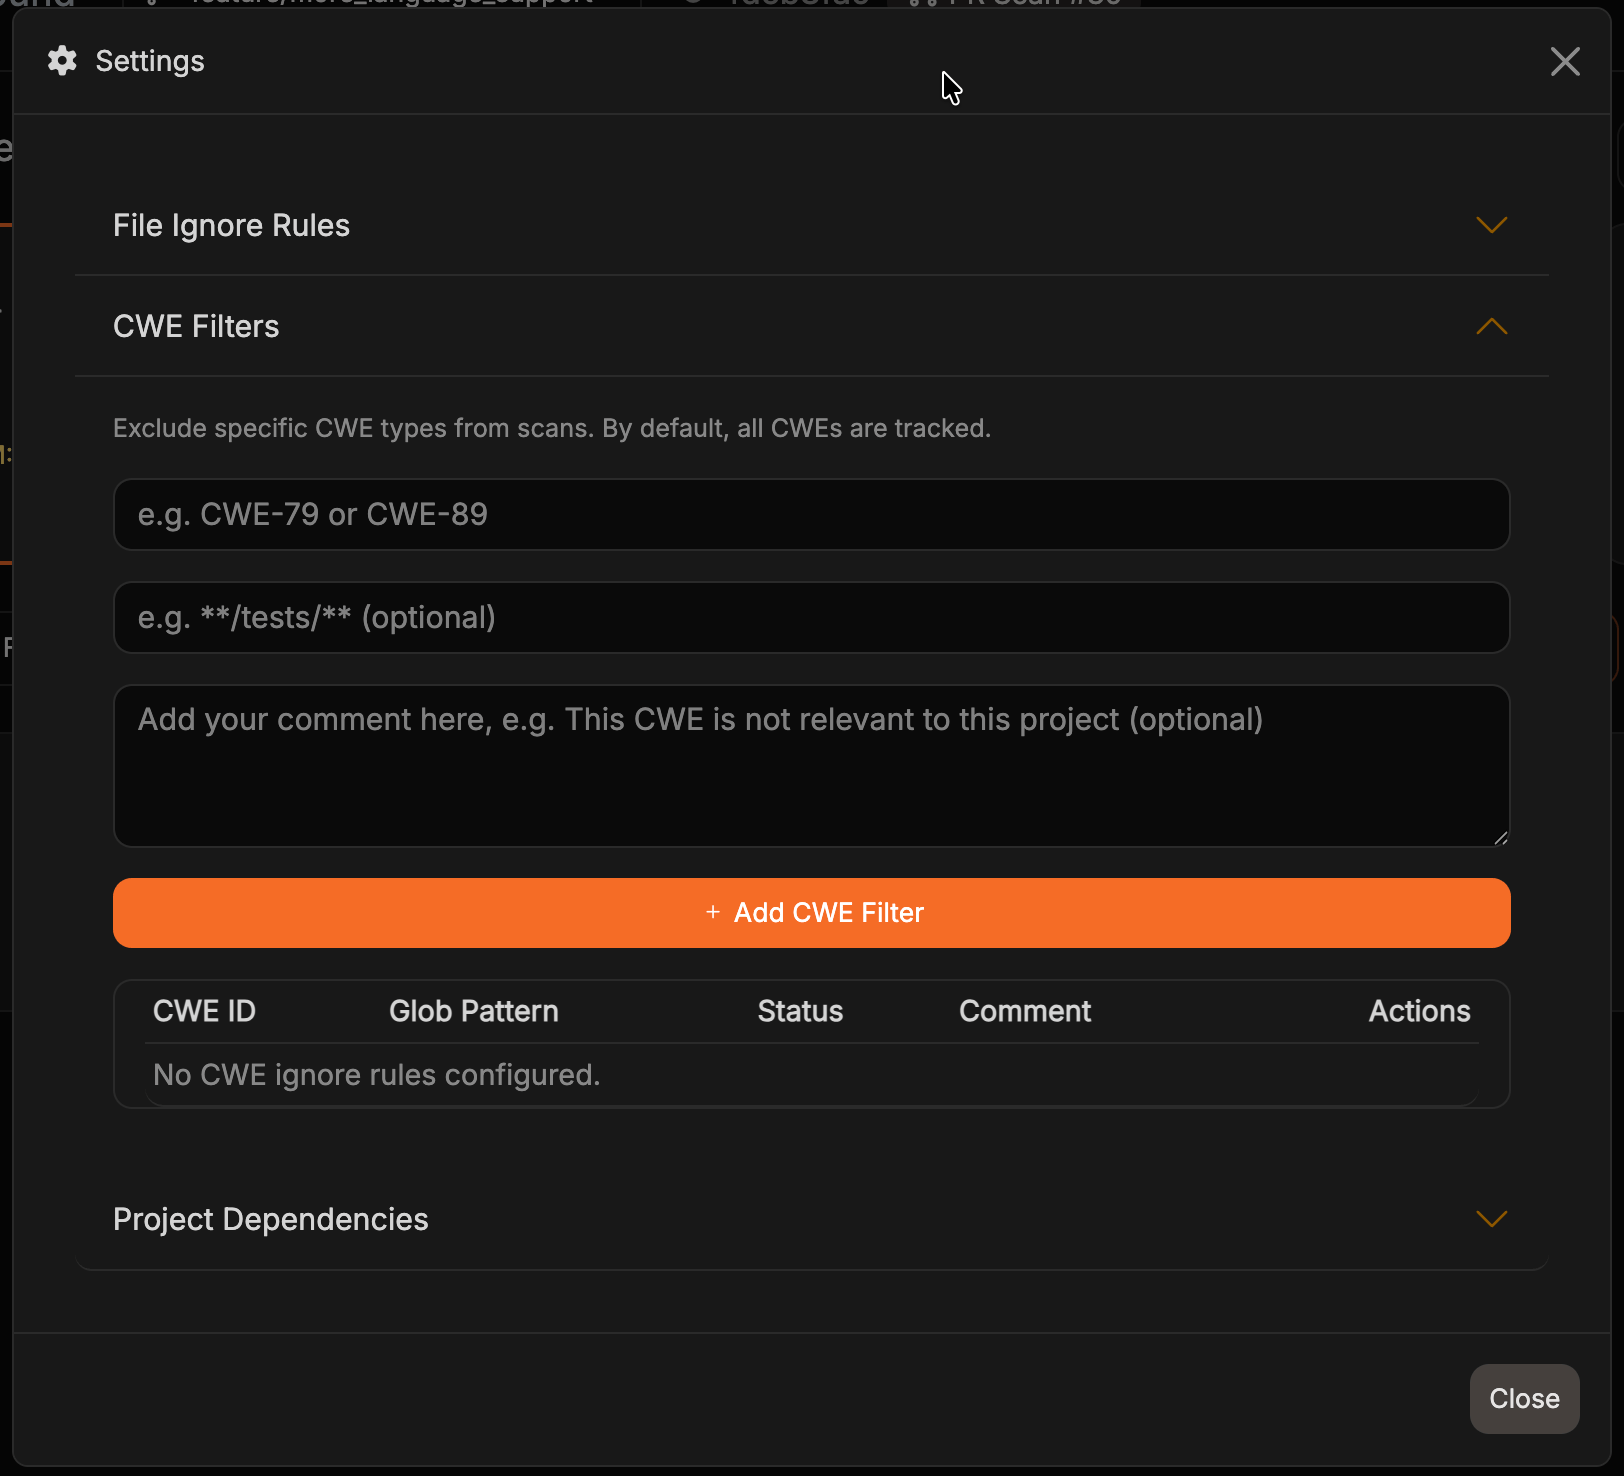
CWE-79) and optionally include a Glob Pattern to scope the rule to specific files or folders (for example, **/tests/**). Leave the glob pattern empty to apply the rule across all files in the project. Add an optional Comment explaining why the filter exists, then click Add CWE Filter.Update, disable, or delete filters
Re-enter an existing CWE and glob pattern combination to edit its comment—the button changes to Update CWE Filter and the existing entry is updated instead of duplicated. Submitting a blank comment leaves the existing comment unchanged. Use the Actions column to disable, enable, or delete a filter at any time.
Common scenarios
- Focus on critical paths: Temporarily mute low-impact CWEs until you finish triaging high-severity findings.
- Framework-level protection: Skip CWEs covered by built-in framework hardening (e.g., managed auth providers).
- Compliance tailoring: Disallow CWEs that violate organizational policies while keeping scans manageable.
- Early-stage development: Move fast by hiding noise but re-enable the filters later before shipping.
Tip: Periodically re-run scans with the full CWE list enabled so you don’t miss regressions when filters change.
Project Views and Controls
Trigger a Scan for a Specific Branch
Select the branch you care about from the branch picker at the top of the dashboard before hitting Scan now. Corgea locks the scan to that branch’s latest commit and stores branch metadata so you can compare results across lines of development.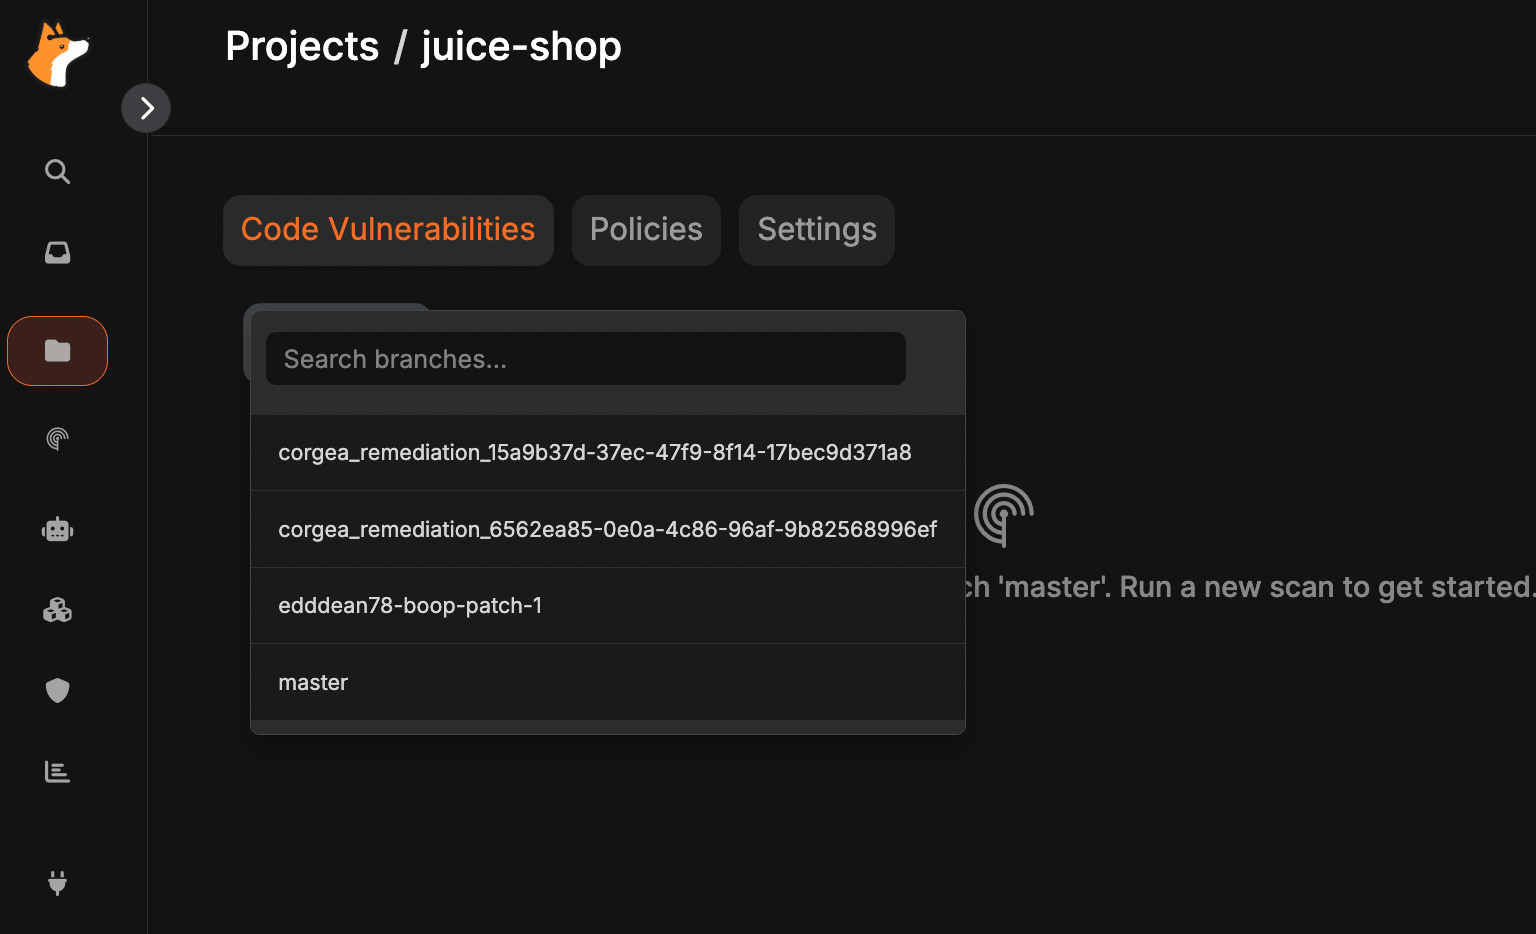
Scan Log
The Scan Log tracks every run you kick off. It records status, duration, branch, and who triggered each scan. Use this page to rerun scans, compare results side by side, and jump into the findings that caused failures.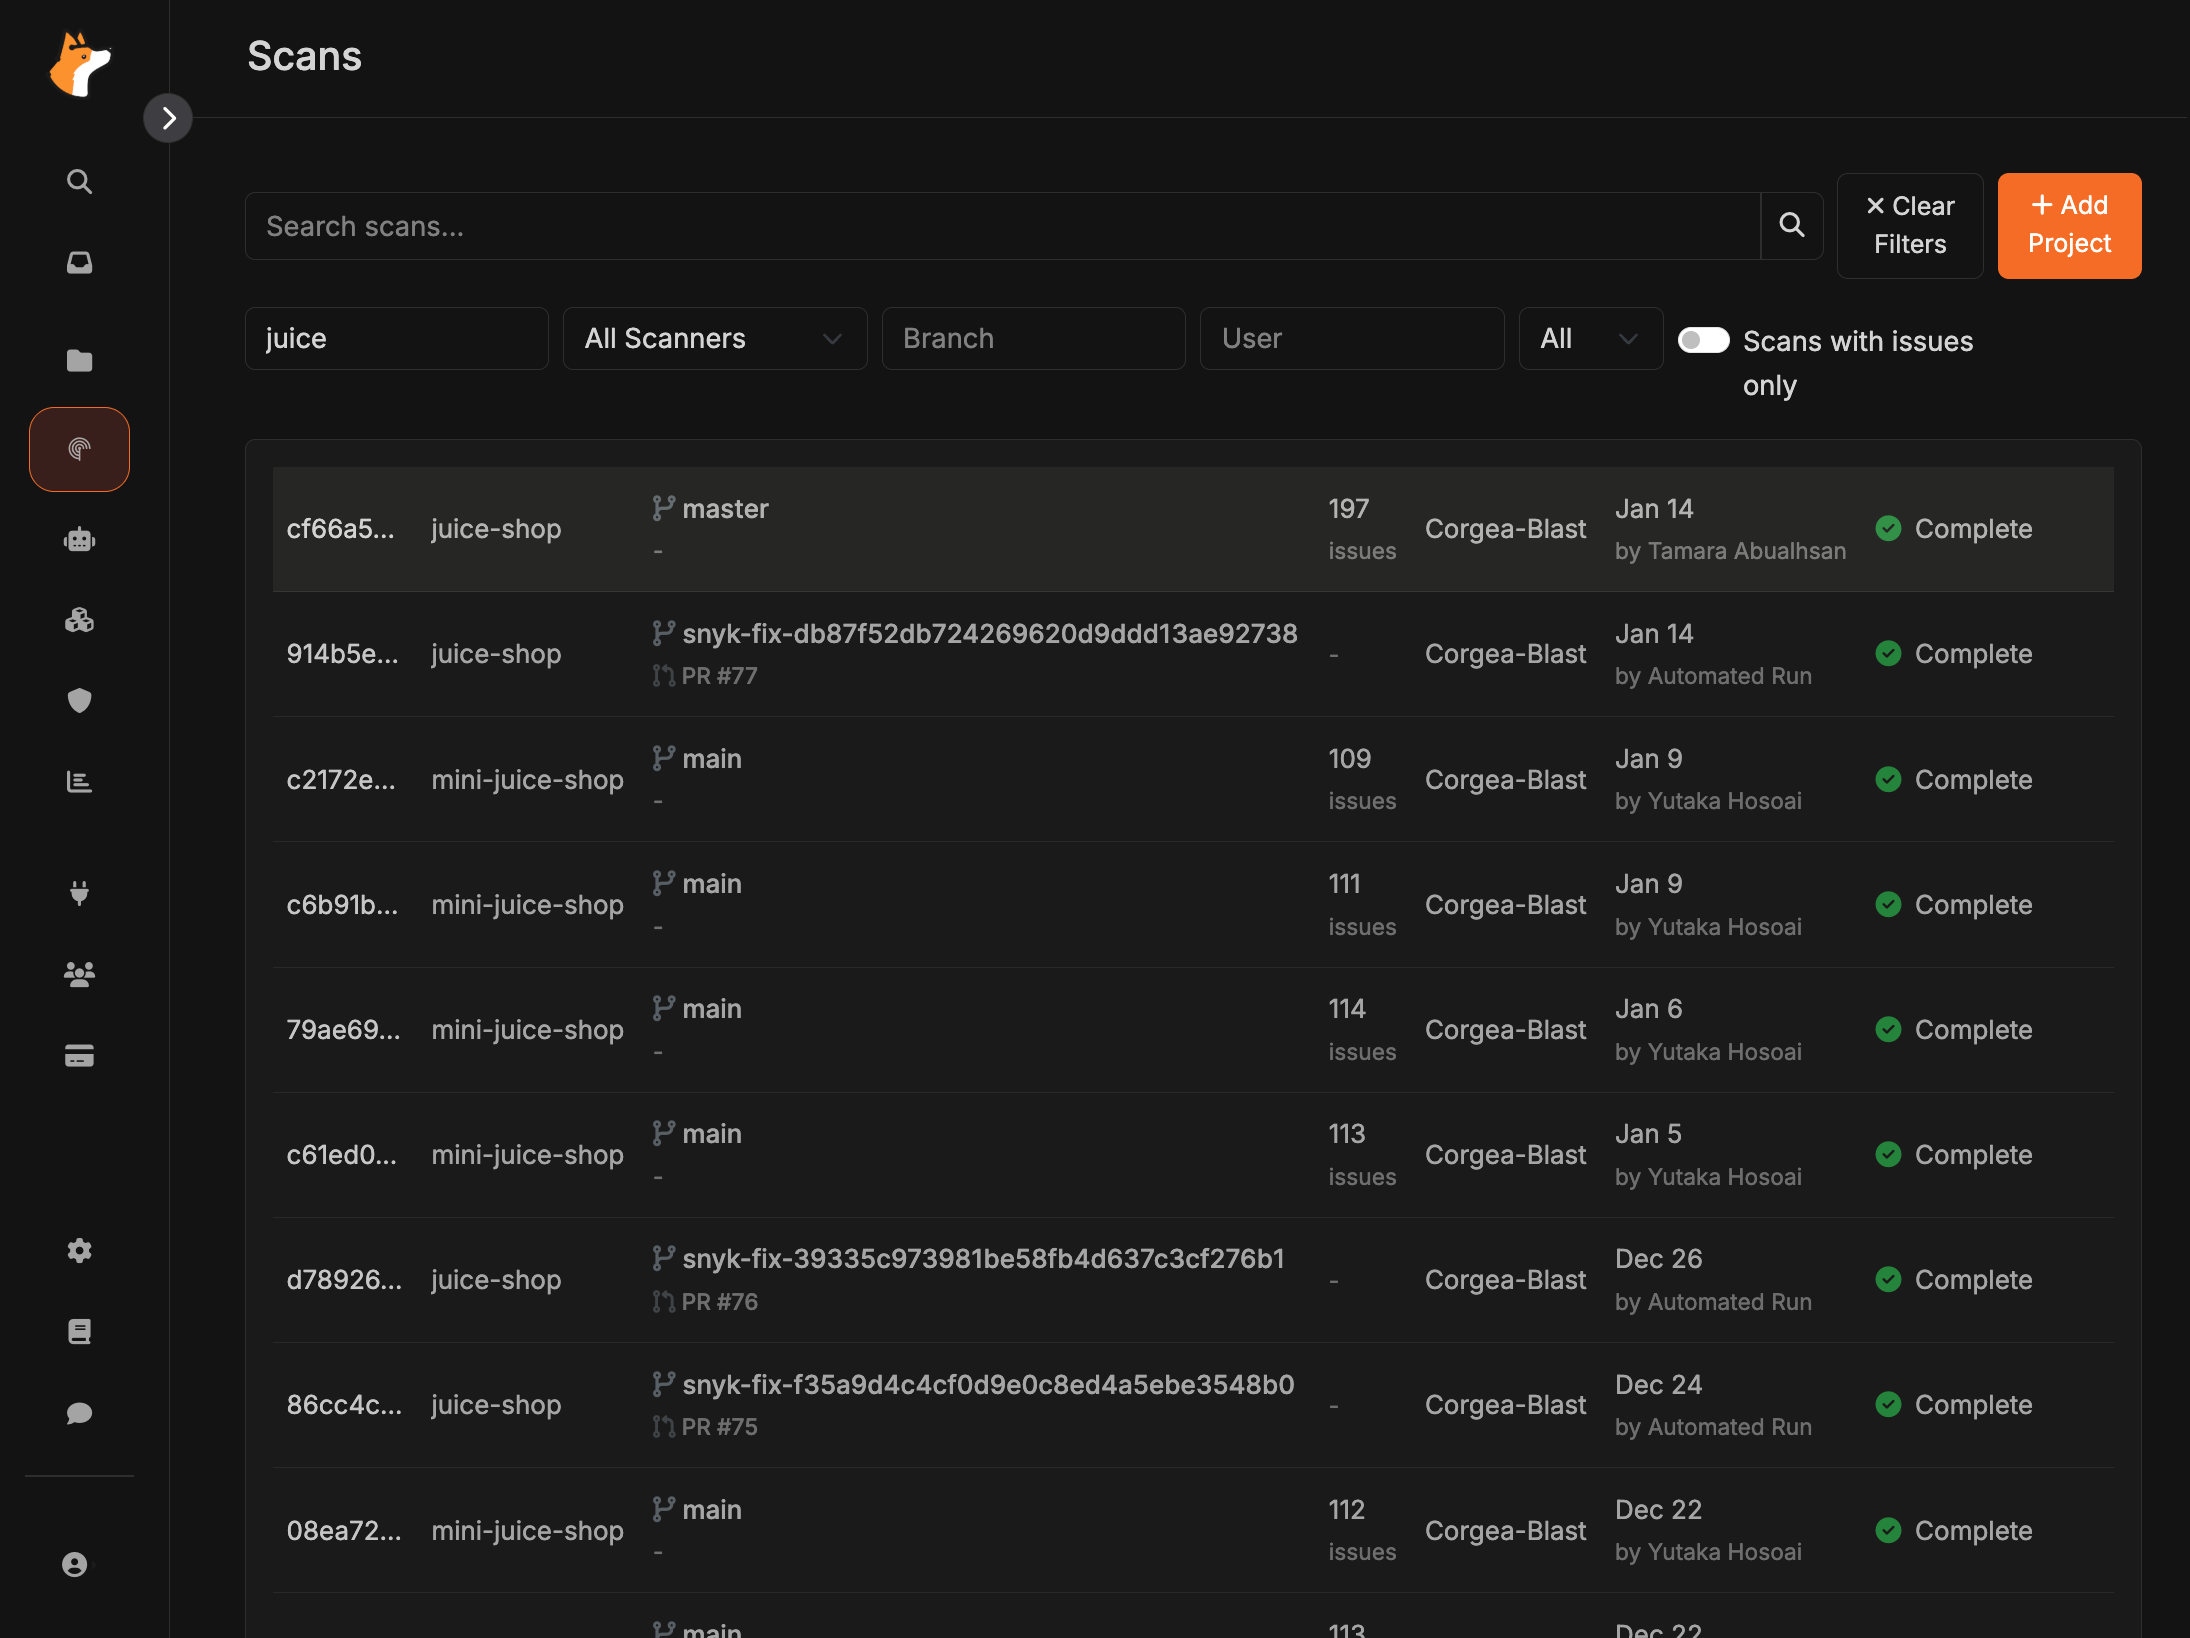
Endpoint Findings Filters
When you switch a scan’s findings table to the Endpoint view, use the Reachable toggle to limit results to issues that are reachable from the endpoint call path. The toggle state is preserved in the URL so you can share or bookmark the filtered view.Advanced Vulnerability Search
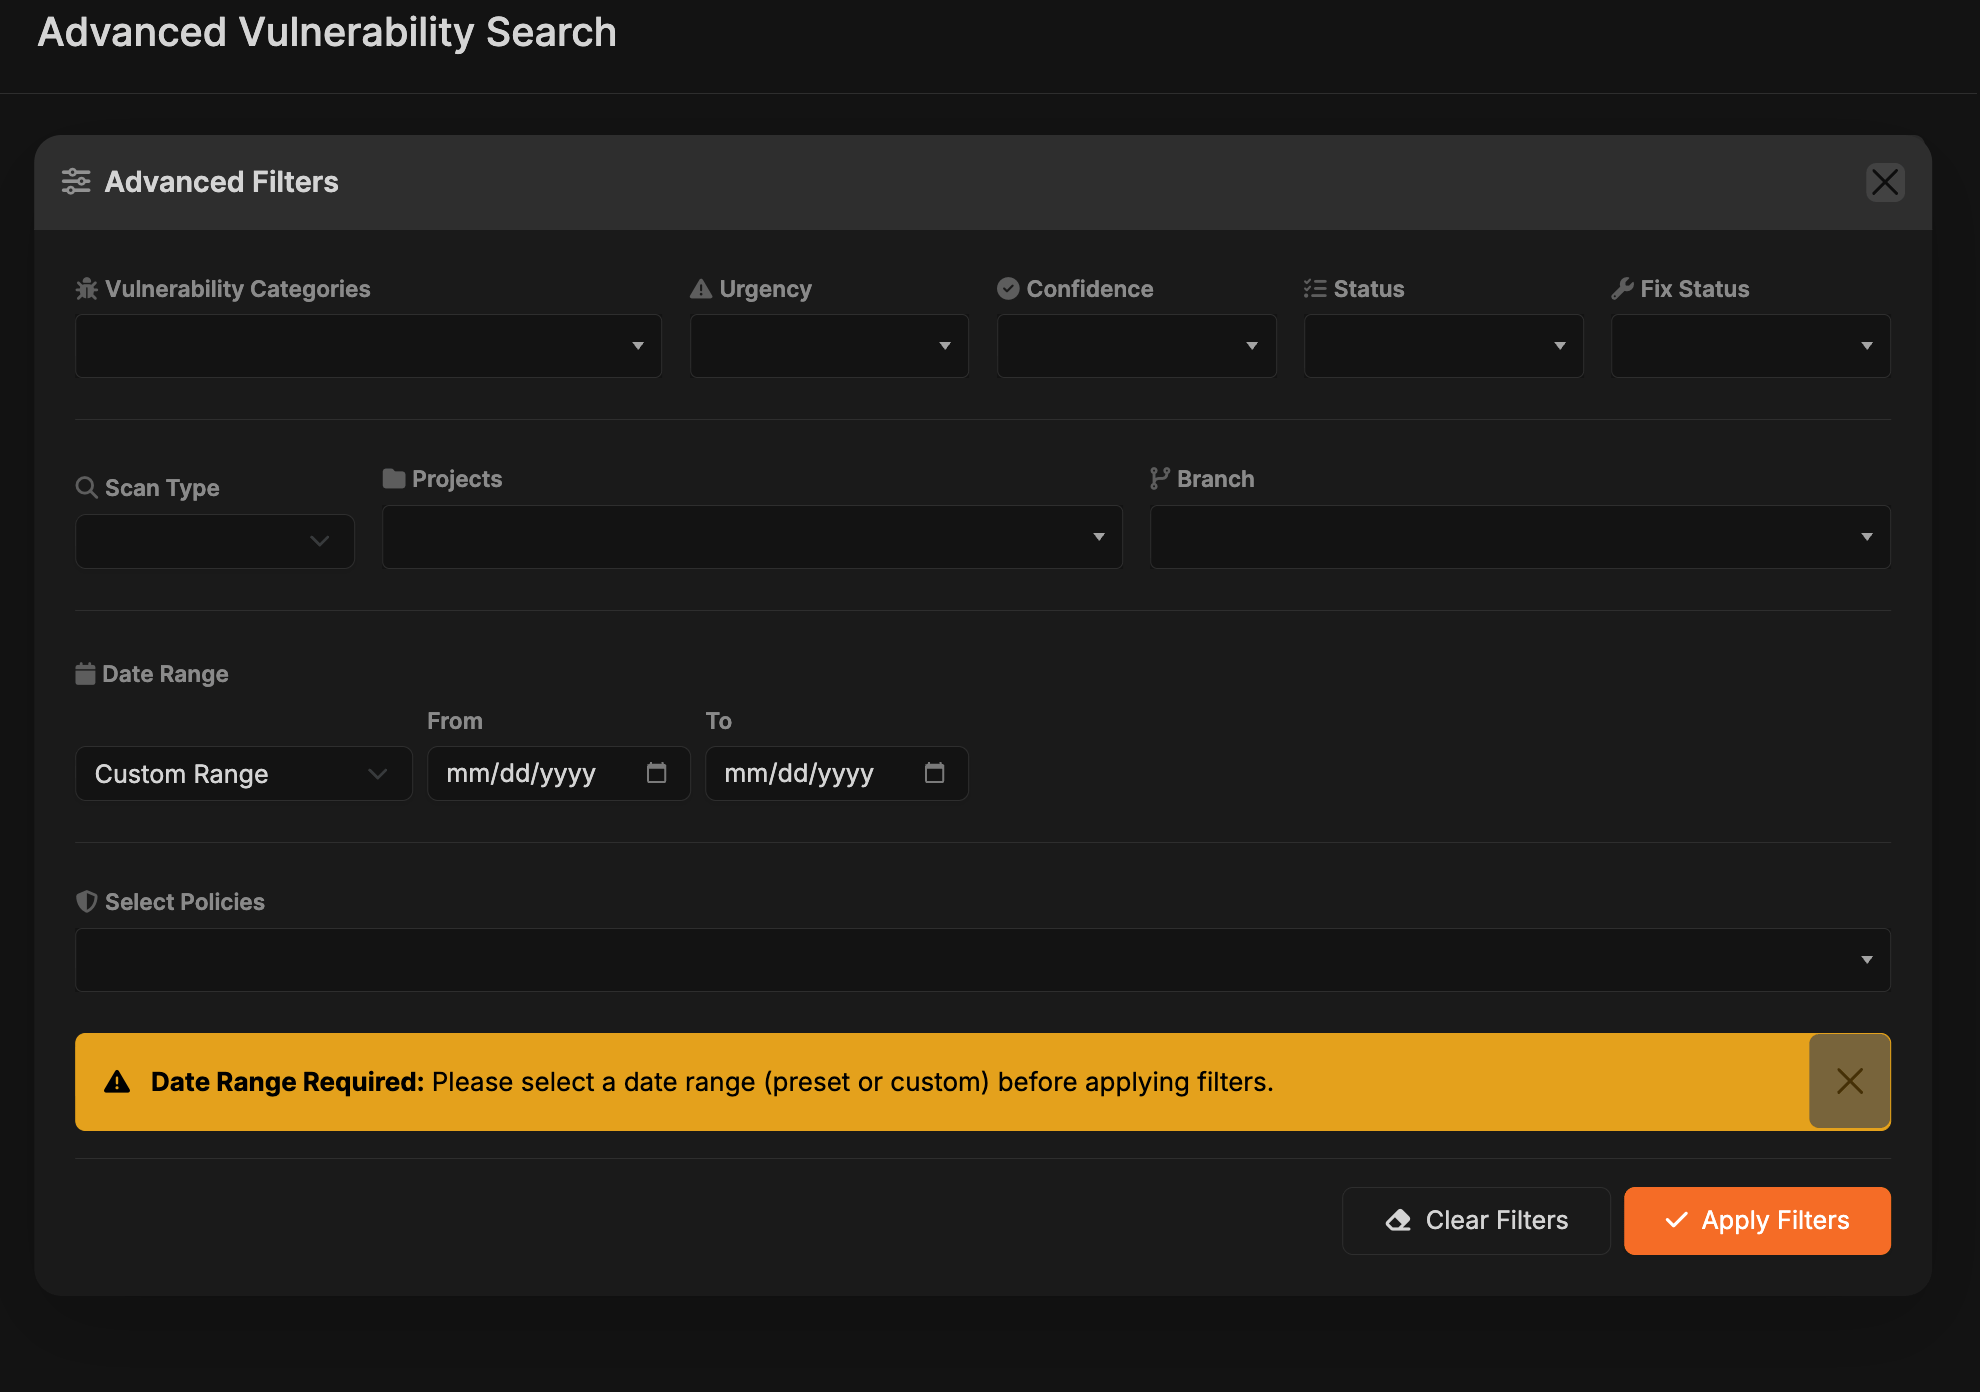
Click the Advanced button on the project page to open the Advanced Vulnerability Search page and zero in on findings across every scan run. The view surfaces totals plus severity counts at the top, and you can expand any project to reveal its files, CWE badges, urgency levels, detection times, and other context without leaving the list.- Filters: Narrow results by Vulnerability Category, Urgency, Confidence, Status, Fix Status, Scan Type, Project, Branch, policies, or other metadata. A Date Range (preset or custom) is required so the system knows which span of time to examine.
- Date reminder: The interface highlights what’s missing if you try to run a search without selecting a date range, and keeps the controls disabled until you pick a preset or custom window.
- Results exploration: Click any row to load more context in the side panel while keeping your active filters in place. This lets you review evidence, remediation guidance, and related scan details without disrupting the list.