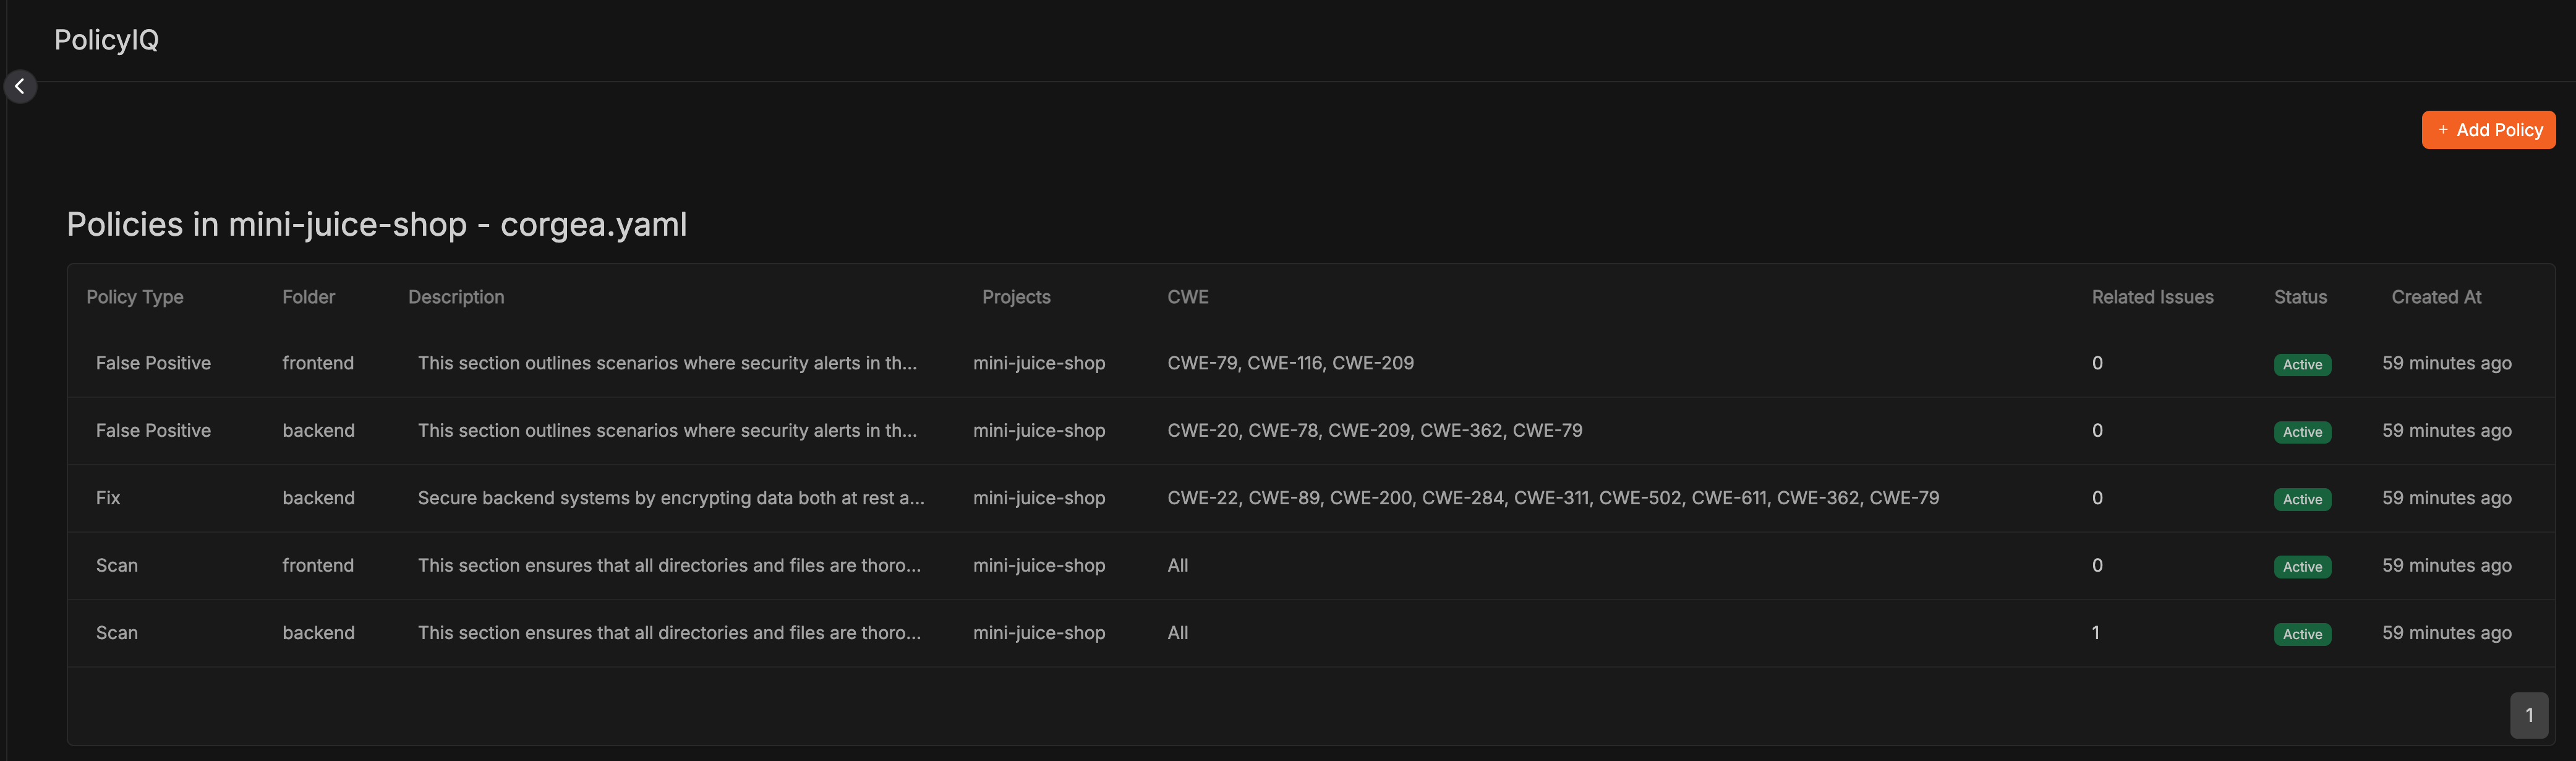
Prerequisite You have completed a scan, and you have PolicyIQ enabled. Reach out to your Corgea contact to enable PolicyIQ.
Important Policy Behaviors
Before diving into policy structure, there are some key behaviors to understand:- Policy Application: New policies only take effect on new scans - they won’t retroactively affect existing results.
-
Policy Precedence:
- More specific policies take precedence over general policies for false positive detection and fixes
- For example, a SSRF-specific false positive policy would override a general false positive policy
- Customer-defined policies always override Corgea’s native policies
-
Policy Grouping: For scanning policies, it’s recommended to group related security concerns together rather than creating individual policies. For example:
- Group authentication, authorization, and permission handling together
- Combine related data validation checks
- Bundle associated security control verifications This approach yields better results as these security concerns often overlap and interact.
Policy Structure
A well-structured policy should include the following components: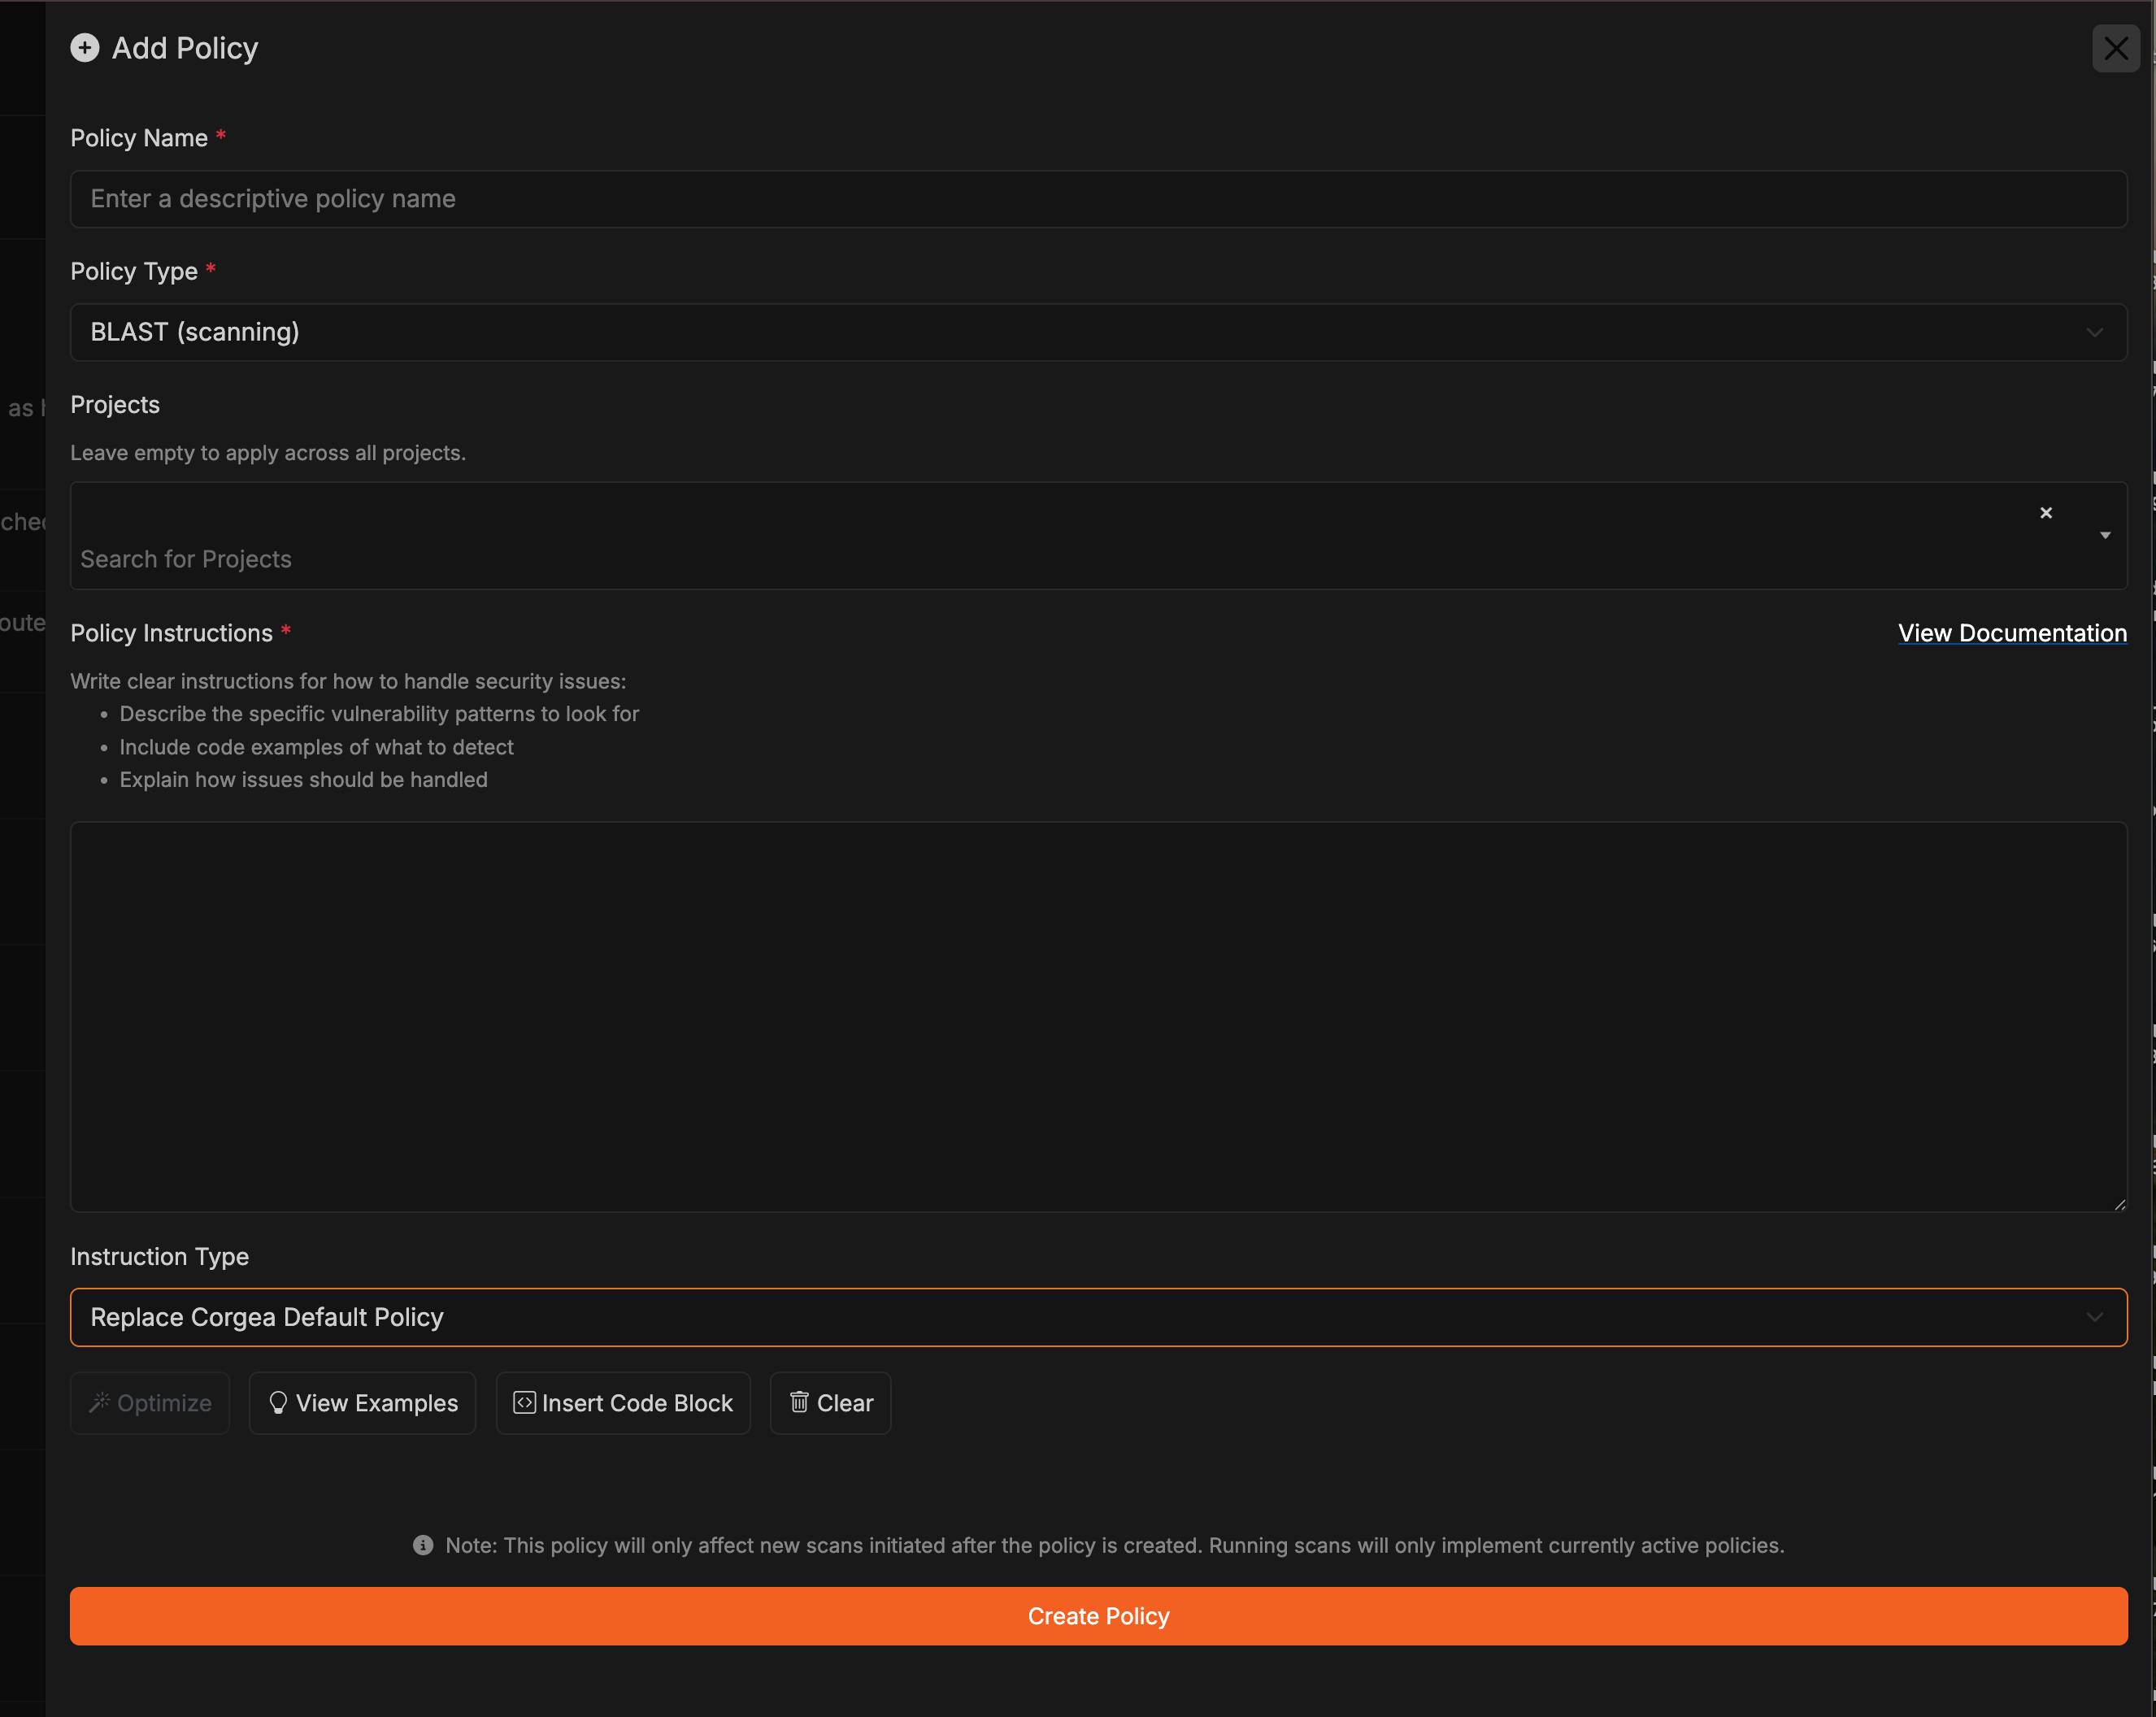
- Policy Type: Specify the type of policy you’re creating, such as BLAST (detecting vulnerabilities), False Positive (identifying false positives), or Fix (suggesting code fixes).
-
Business Context: Provide detailed information about your:
- Business domain and requirements
- Network architecture and security controls
- Environment-specific configurations
- Data classification and handling requirements
- Compliance requirements (e.g., PCI, HIPAA, GDPR)
-
Description: Clear instructions incorporating your context, including:
- Specific vulnerability patterns in your environment
- Code examples relevant to your architecture
- How issues should be handled given your infrastructure
- Vulnerability Types (CWEs): Choose which types of security vulnerabilities this policy should handle, based on your risk profile.
- Projects: Select which projects to apply this policy to, allowing for environment-specific policies. When Project Access Control is enabled, non-admin users can only create or manage policies for projects they can access and must select at least one accessible project. Company admins can still create policies that apply to all projects.
-
File Pattern (Glob): Optionally limit a policy to matching files (for example,
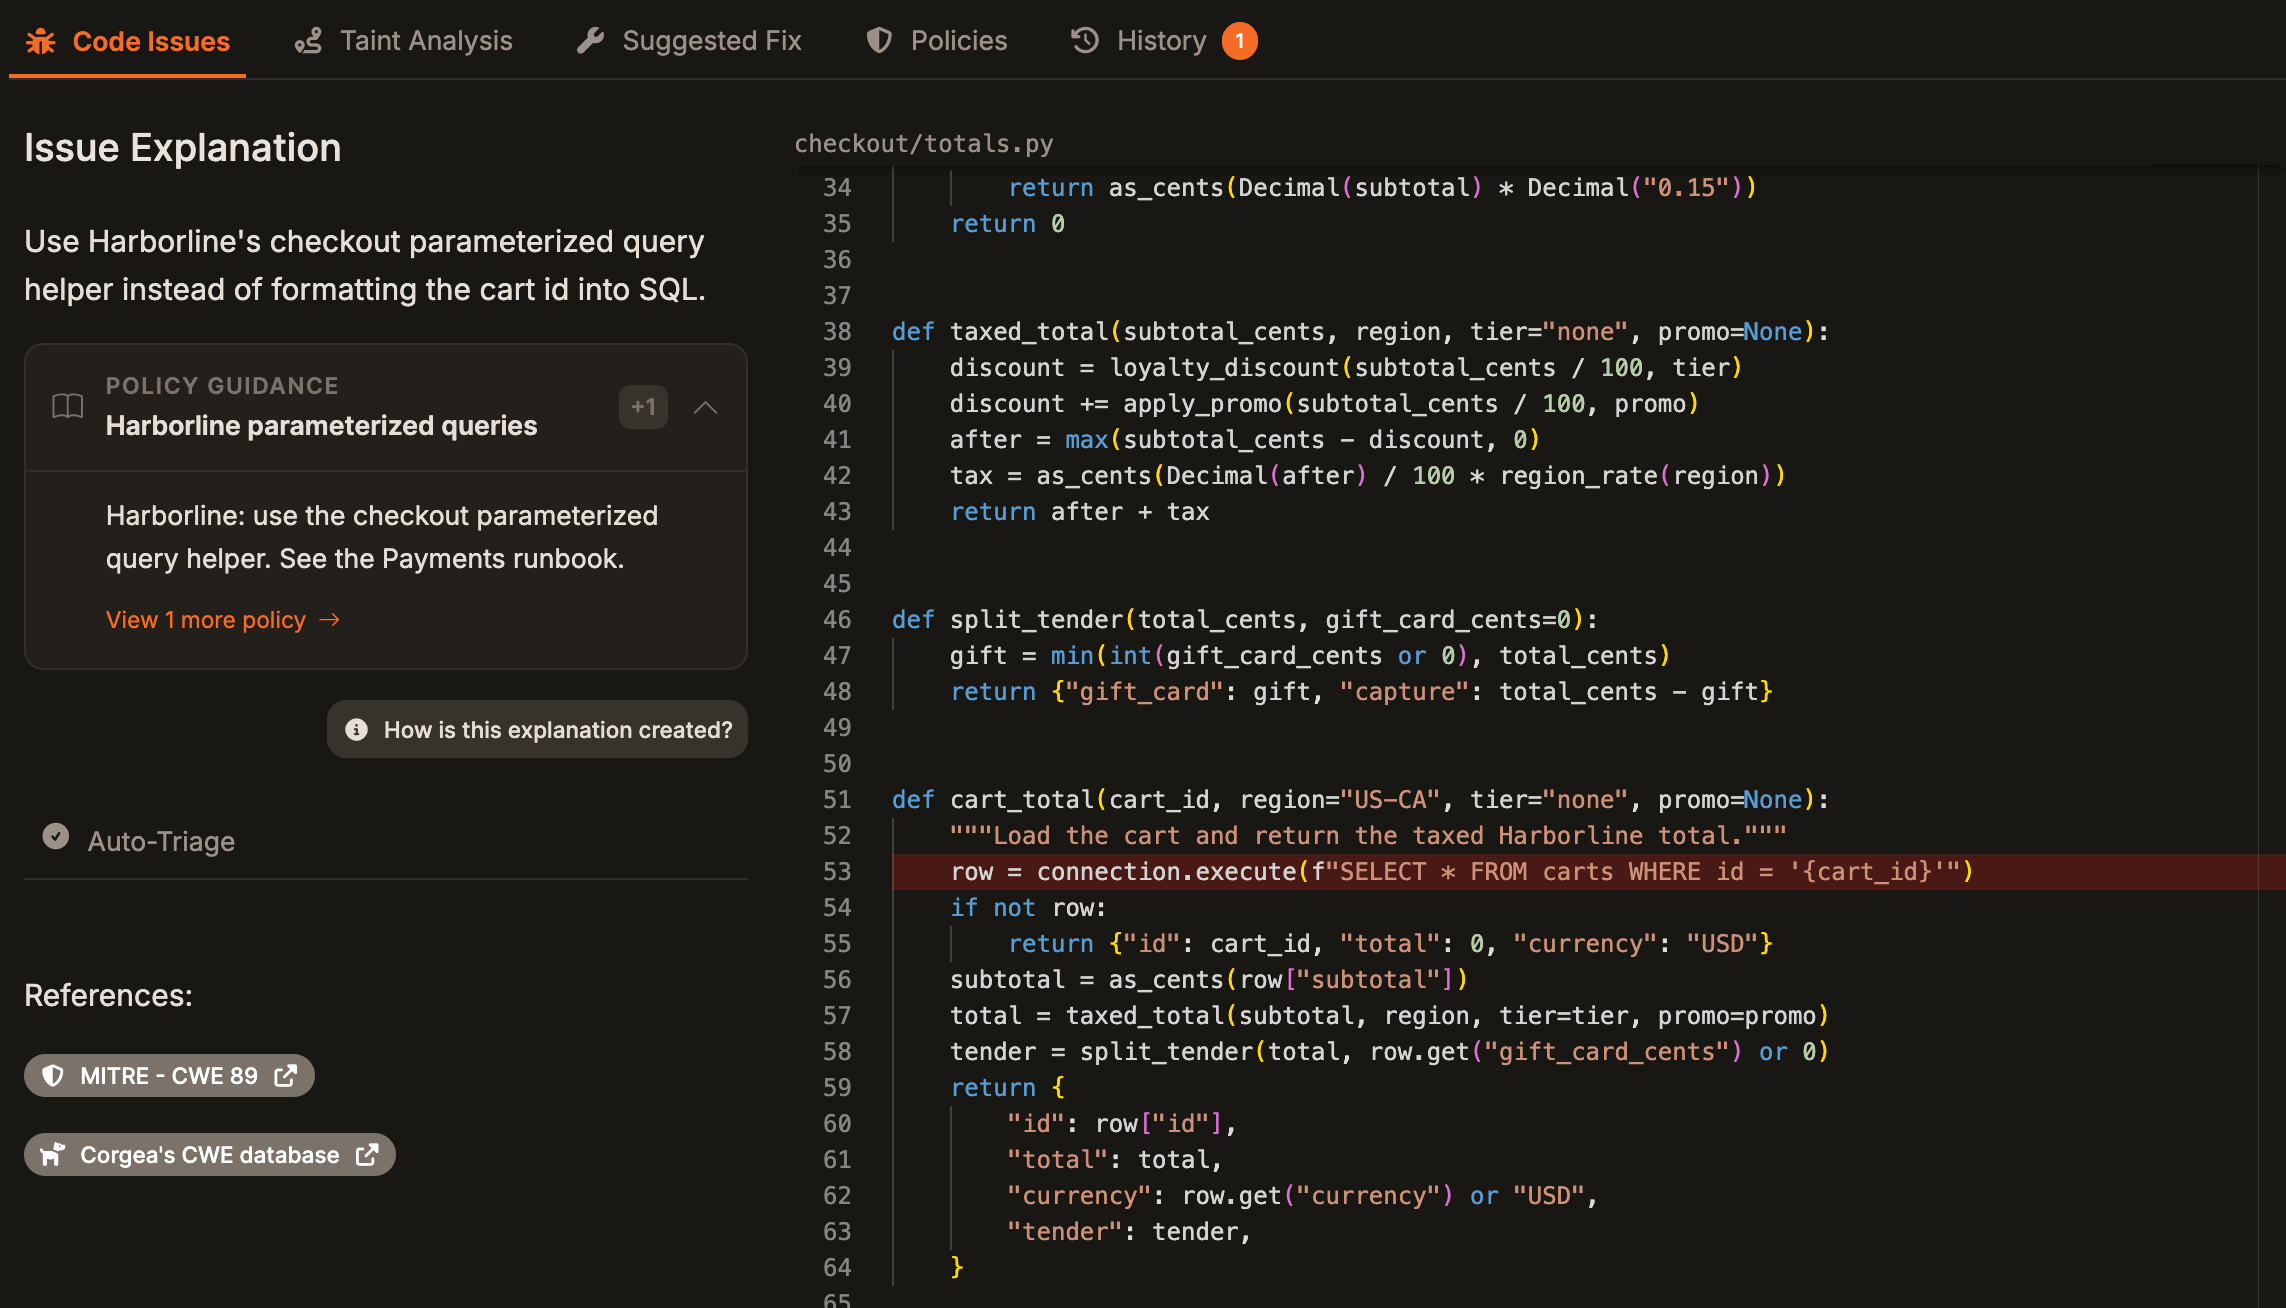
src/**/*.py). Leave empty to apply to all files. - Guidance Notes (Optional): Add static guidance for developers, such as internal remediation notes, links to internal standards, or implementation tips. This guidance is shown on affected issues, including in issue explanations and suggested fixes. False-positive policies can also supply guidance in those views.
- Instruction Type: Choose how your policy instructions interact with Corgea’s built-in policies:
- Append to Corgea Default Policy: Adds your policy instructions to Corgea’s built-in policies, preserving both sets of rules. Use this when you want to enhance the default policies with your specific business context, security controls, or environmental details.
- Replace Corgea Default Policy: Your policy instructions completely override Corgea’s default behavior. Use this when you want full control over how specific scenarios are handled.
Policy Playground
Policy Playground is a side-by-side workspace for creating, updating, and testing policies before they affect your scans. You write the policy on the left and test it against real code on the right, so you can iterate quickly without leaving the page.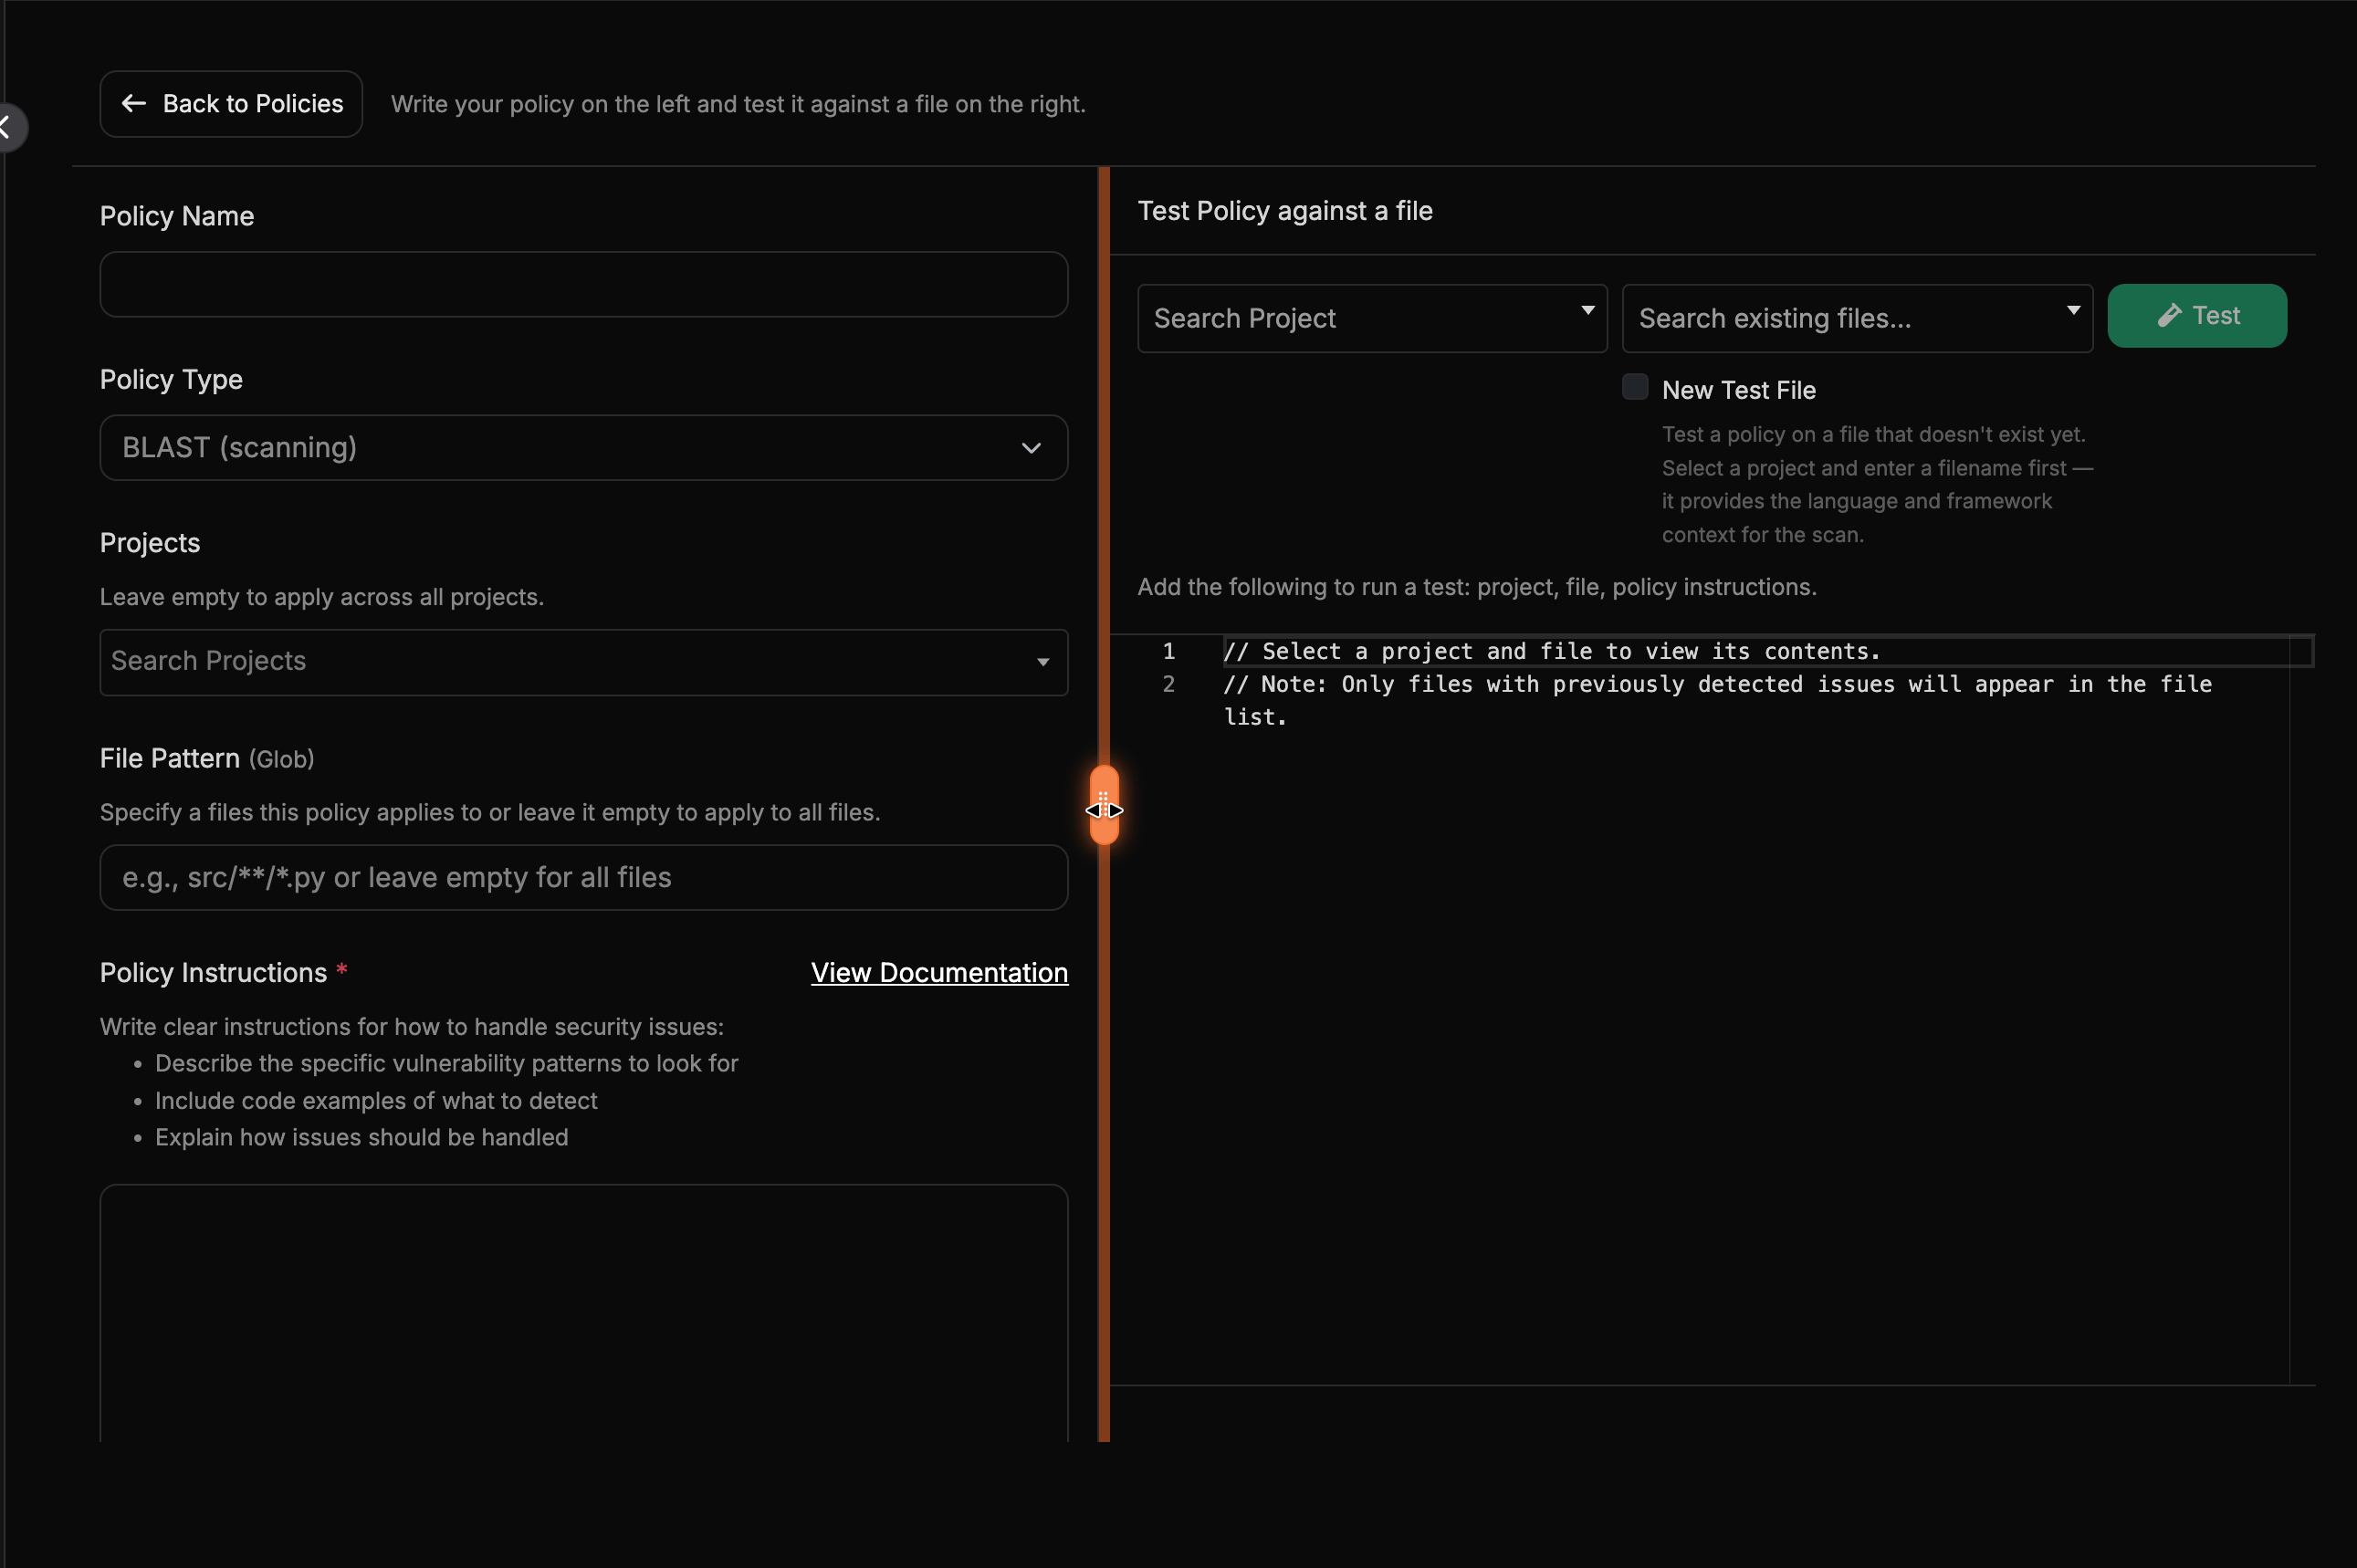
- The workspace is split into a policy editor (left) and a test panel (right), with a draggable divider so you can resize the panes to your preference.
- Use Back to Policies in the top toolbar to return to the Policies table at any time.
- Open an existing BLAST or False Positive policy directly in Policy Playground from the Policies table.
- Search the Policies table by Policy ID, name, type, or description to quickly find a policy.
- Editing and saving in Policy Playground updates the policy by creating a new version.
- Instruction Type in the editor is shown as two clearly explained options: Replace Corgea Default Policy or Append to Corgea Default Policy.
- Leave Projects, File Pattern (Glob), or CWEs empty when you want that policy to apply globally.
- When Project Access Control is enabled, scoped users can view policies visible to them, but can only edit or delete policies that apply entirely to projects they can access.
Only BLAST and False Positive policies can be tested in Policy Playground. Fix policies can still be created from the Policy Center but are shown as Fix (coming soon) in the playground, as testing fixes isn’t supported yet.
Testing a Policy
To test a policy, select a Project and a file, then click Test. The button shows a Testing… spinner while the scan runs and stays disabled until it completes. If anything required is missing, an inline hint below the button lists exactly what to add (project, file, or policy instructions). By default the file picker only lists files that already have detected issues. To test against a file that doesn’t exist yet, enable New Test File, select a project, and type a filename. The project provides the language and framework context for the scan, and you can then write your own code in the editor to test the policy against.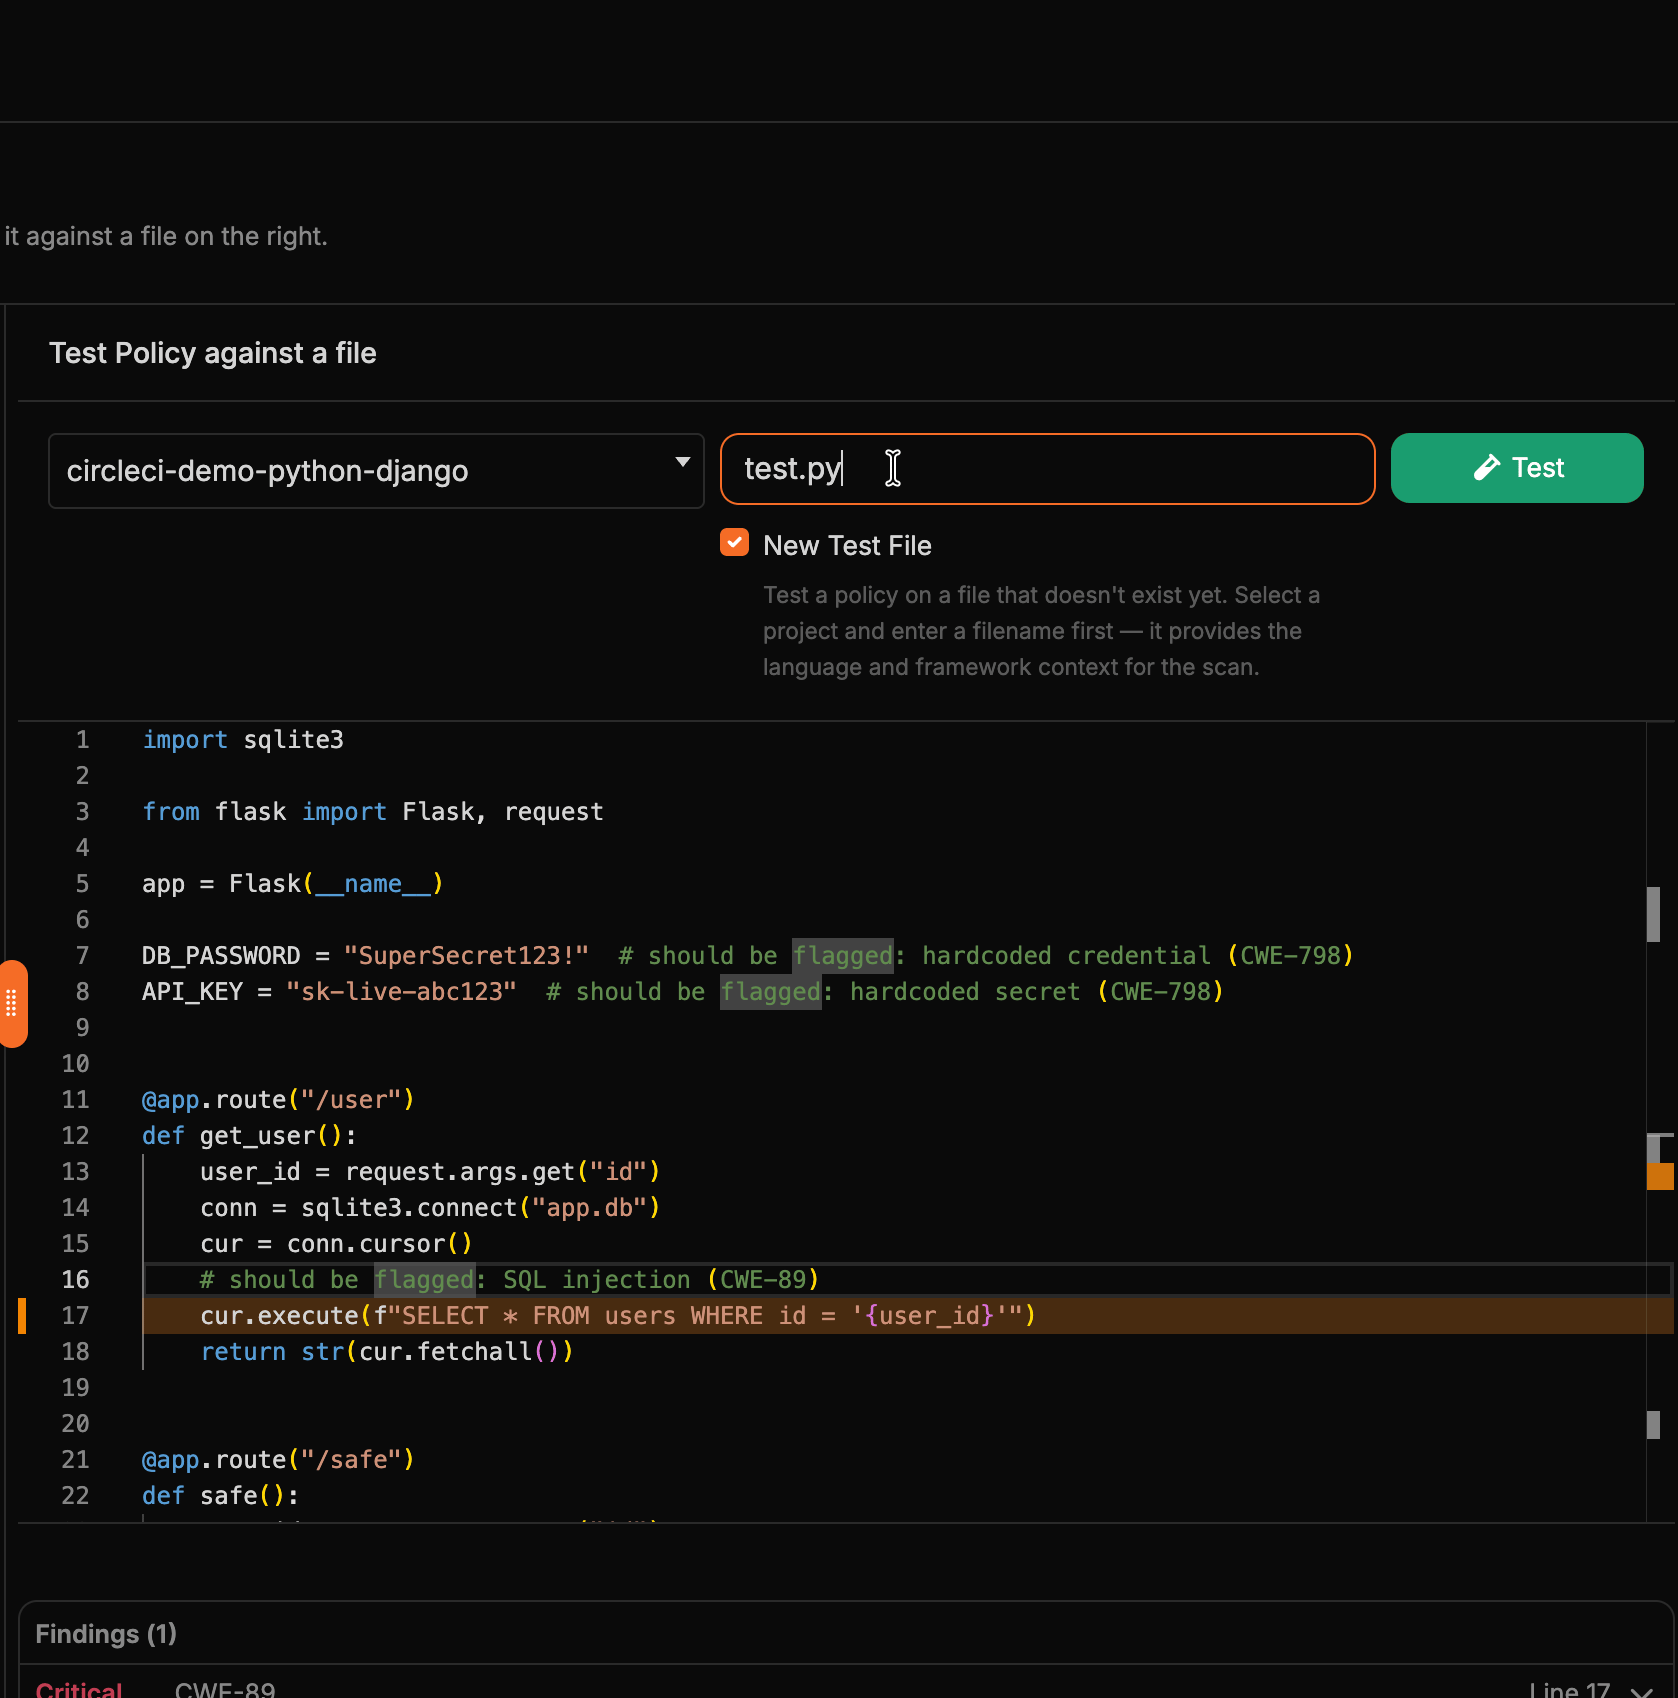
Reviewing Results
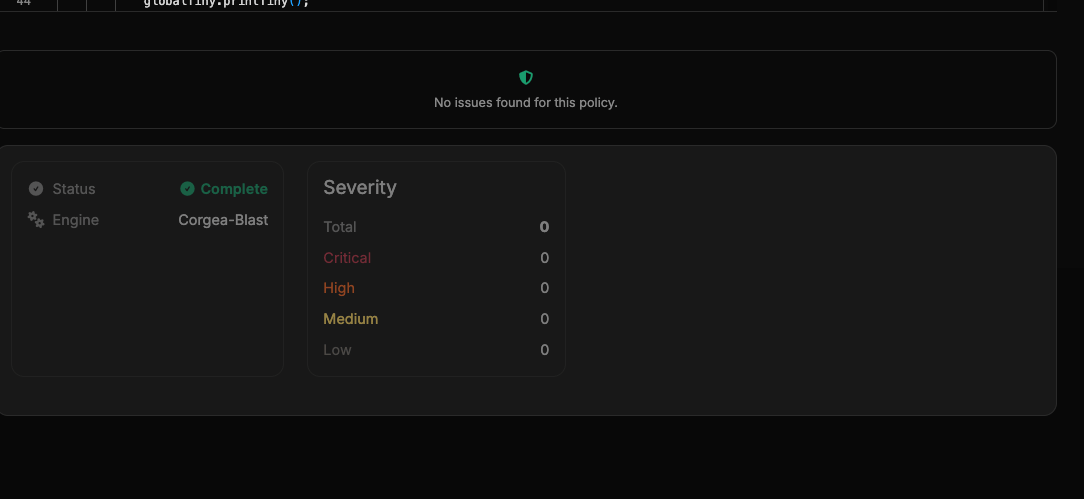
After a scan completes, findings appear in the results panel below the file preview. Each finding is an expandable row showing its severity, CWE, and line number. Expand a finding to read its explanation, and use Jump to line to navigate the file preview to the related line.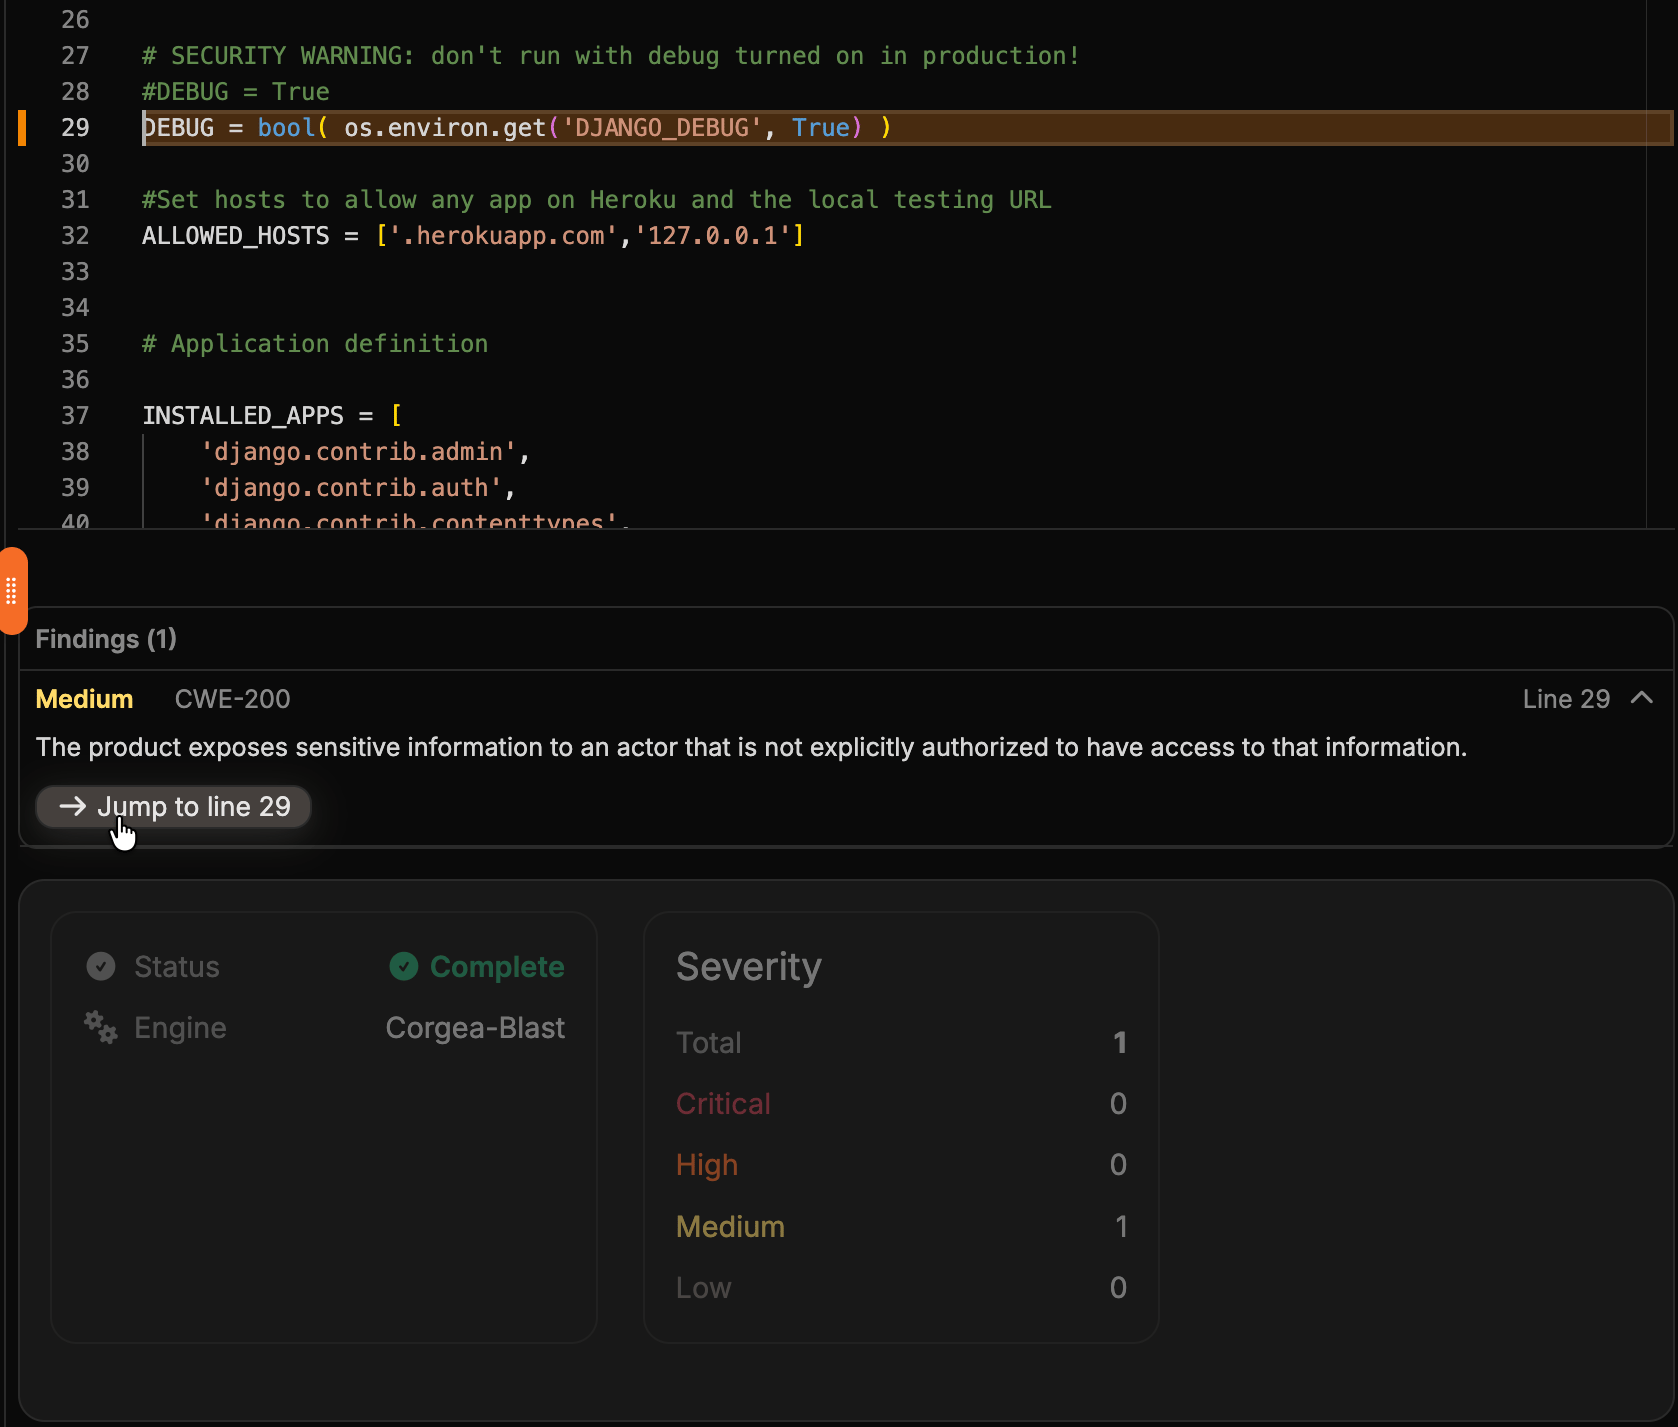
PR Scan & Comment Rules
PR Scan & Comment rules control when Corgea scans pull requests and when it posts finding comments back to the pull request.- Scan Only runs the pull request scan without posting finding comments.
- Scan & Comment runs the scan and comments on findings that match the rule.
- Severity limits matching to selected severity levels. Leave it empty to match any severity.
- Classification to comment limits comments to selected CWE types. Leave it empty to comment on all matching CWEs.
- Projects and Project Tags define where the rule applies. A rule applies when a project is selected directly or has any selected tag; if both fields are empty, the rule applies to all projects.
- Integrations can further limit the rule to pull requests from selected GitHub, GitLab, or Azure DevOps integrations. Leave it empty to use only the project and project tag scope.
Policy Best Practices
When writing policies, follow these best practices to provide effective context:- Be Specific About Your Environment: Detail your infrastructure, security controls, and compensating controls.
- Include Business Logic: Explain business-specific validation rules, data flows, and security requirements.
- Describe Security Architecture: Document your security layers, trust boundaries, and protection mechanisms.
- Define Data Context: Specify how different types of data should be handled in your environment.
- Document Exceptions: Note any legitimate business cases for apparent security issues.
Examples
When creating policy examples, follow these tips to make them more effective:-
Use Multiple Examples: Include 3-5 diverse examples for each policy type to:
- Show different use cases and scenarios
- Cover edge cases specific to your environment
- Demonstrate varying levels of complexity
- Illustrate different security controls and compensating measures
-
Make Examples Relevant: Ensure your examples:
- Reflect your actual infrastructure and architecture
- Include real security controls you use
- Reference your specific tools and frameworks
- Match your development patterns and practices
-
Structure Examples Clearly: Format your examples with:
- Clear section headers and labels
- Consistent formatting and indentation
- Detailed comments explaining key points
- Tags to separate different components
-
Include Context: Each example should provide:
- The specific business scenario
- Relevant infrastructure details
- Security controls in place
- Expected behavior and outcomes
BLAST Policy Example
Policy Type: BLASTFalse Positive Policy Example
Policy Type: False PositiveFix Policy Example
Here’s an example of a Fix policy that uses a custom middleware to protect against XSS vulnerabilities: Policy Type: FixPrework-generated policies
When prework is enabled for your company, Corgea can generate policies from your project context before the main scan completes.- Generated policies appear in the Policies table with
Sourceset to Generated By Corgea Prework. - In scan details, the Policies tab shows all policies applied to that specific scan, including older archived or inactive versions, and lets you open the policy for more details.
- If Policy Review is enabled from Policies > Settings, generated policies are created as Inactive so your team can review and activate them manually.
Generating a Policy
You can manually trigger policy generation directly from the PolicyIQ page at any time.1
Click Generate Policy
On the PolicyIQ page, click the Generate Policy button in the top-right area.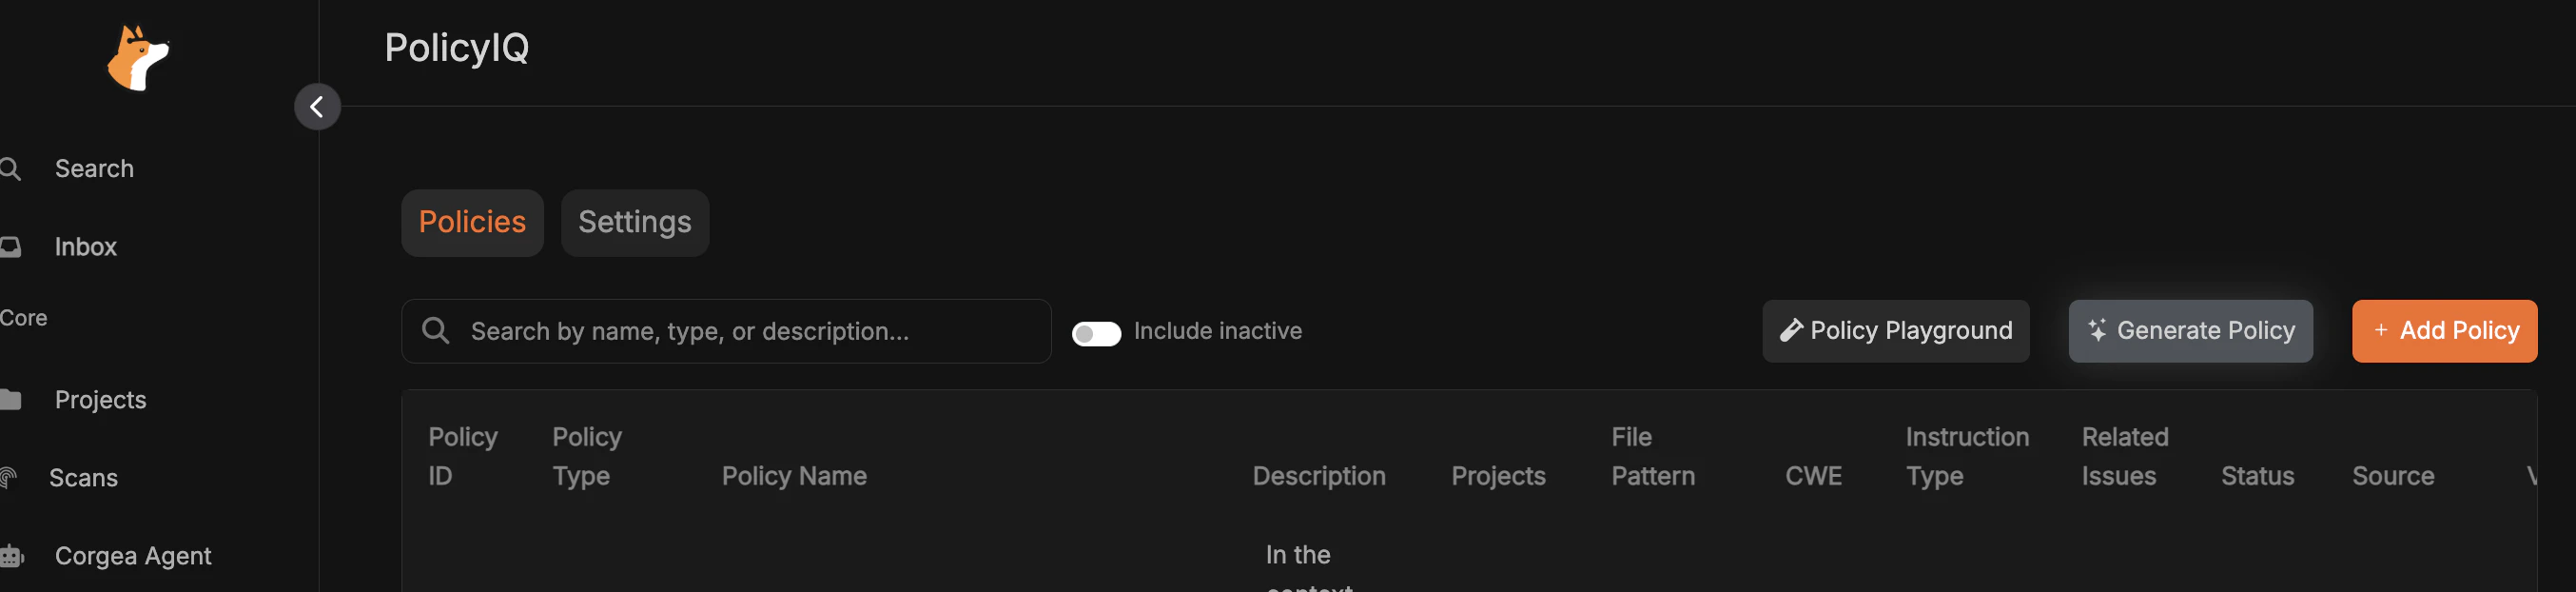
2
Fill Out the Generation Form
In the dialog, select a Pattern (e.g., Authentication), choose a Project, and select a Policy Type. Click Generate to start.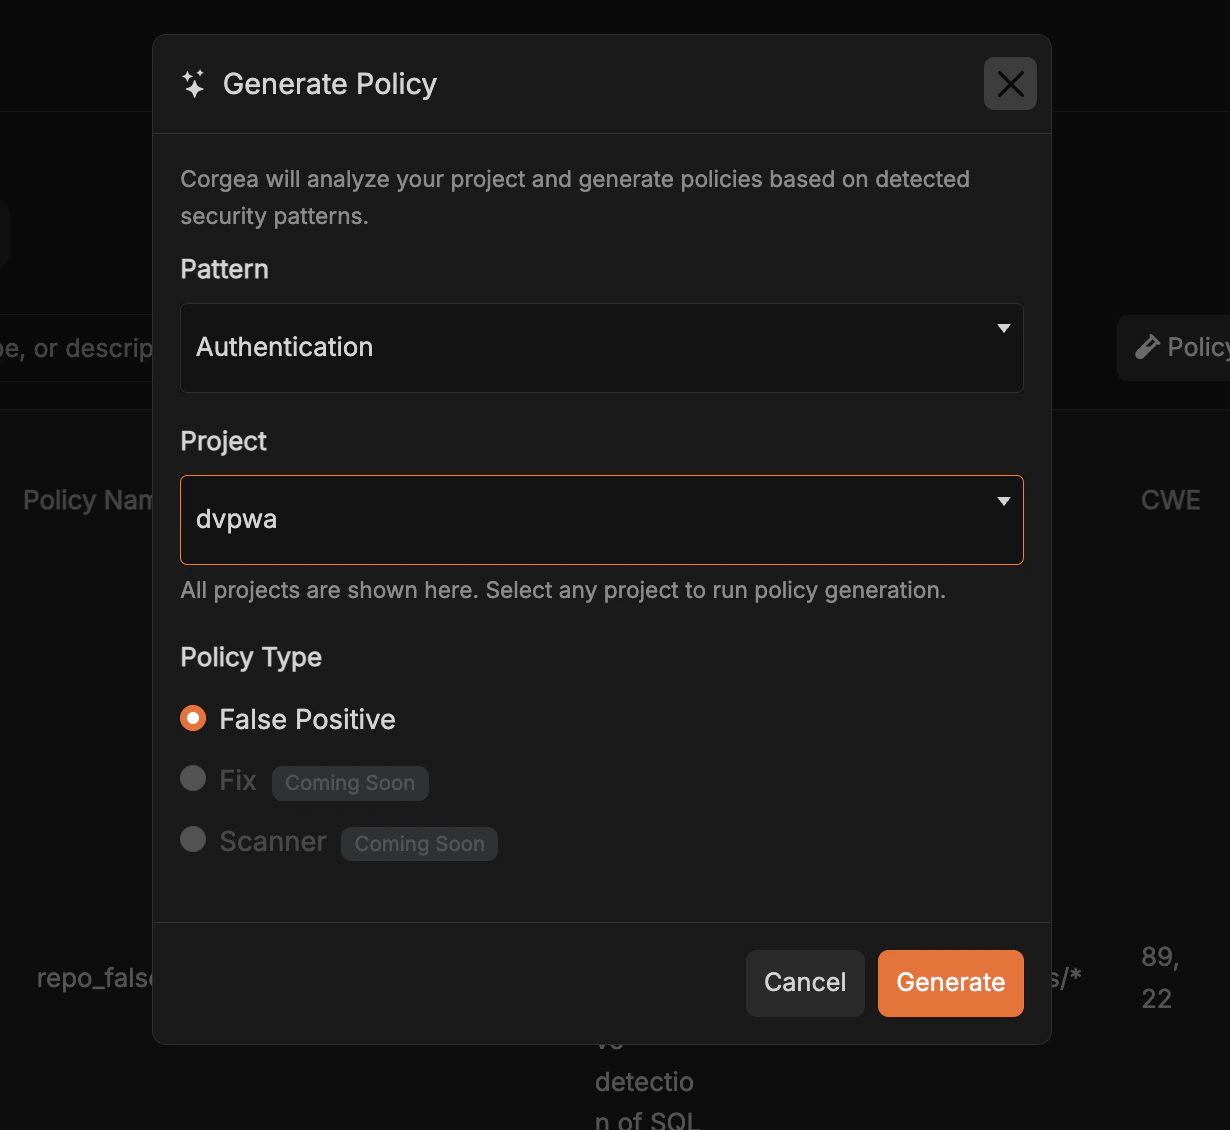
3
Wait for Prework to Complete
Corgea runs a Corgea-Prework scan in the background to analyze your project. You can monitor its progress from the Scans page.
4
Review the Generated Policy
Once complete, the generated policy appears in the Policies table. Click on it to review the policy details, including the description populated with real code patterns found in your project.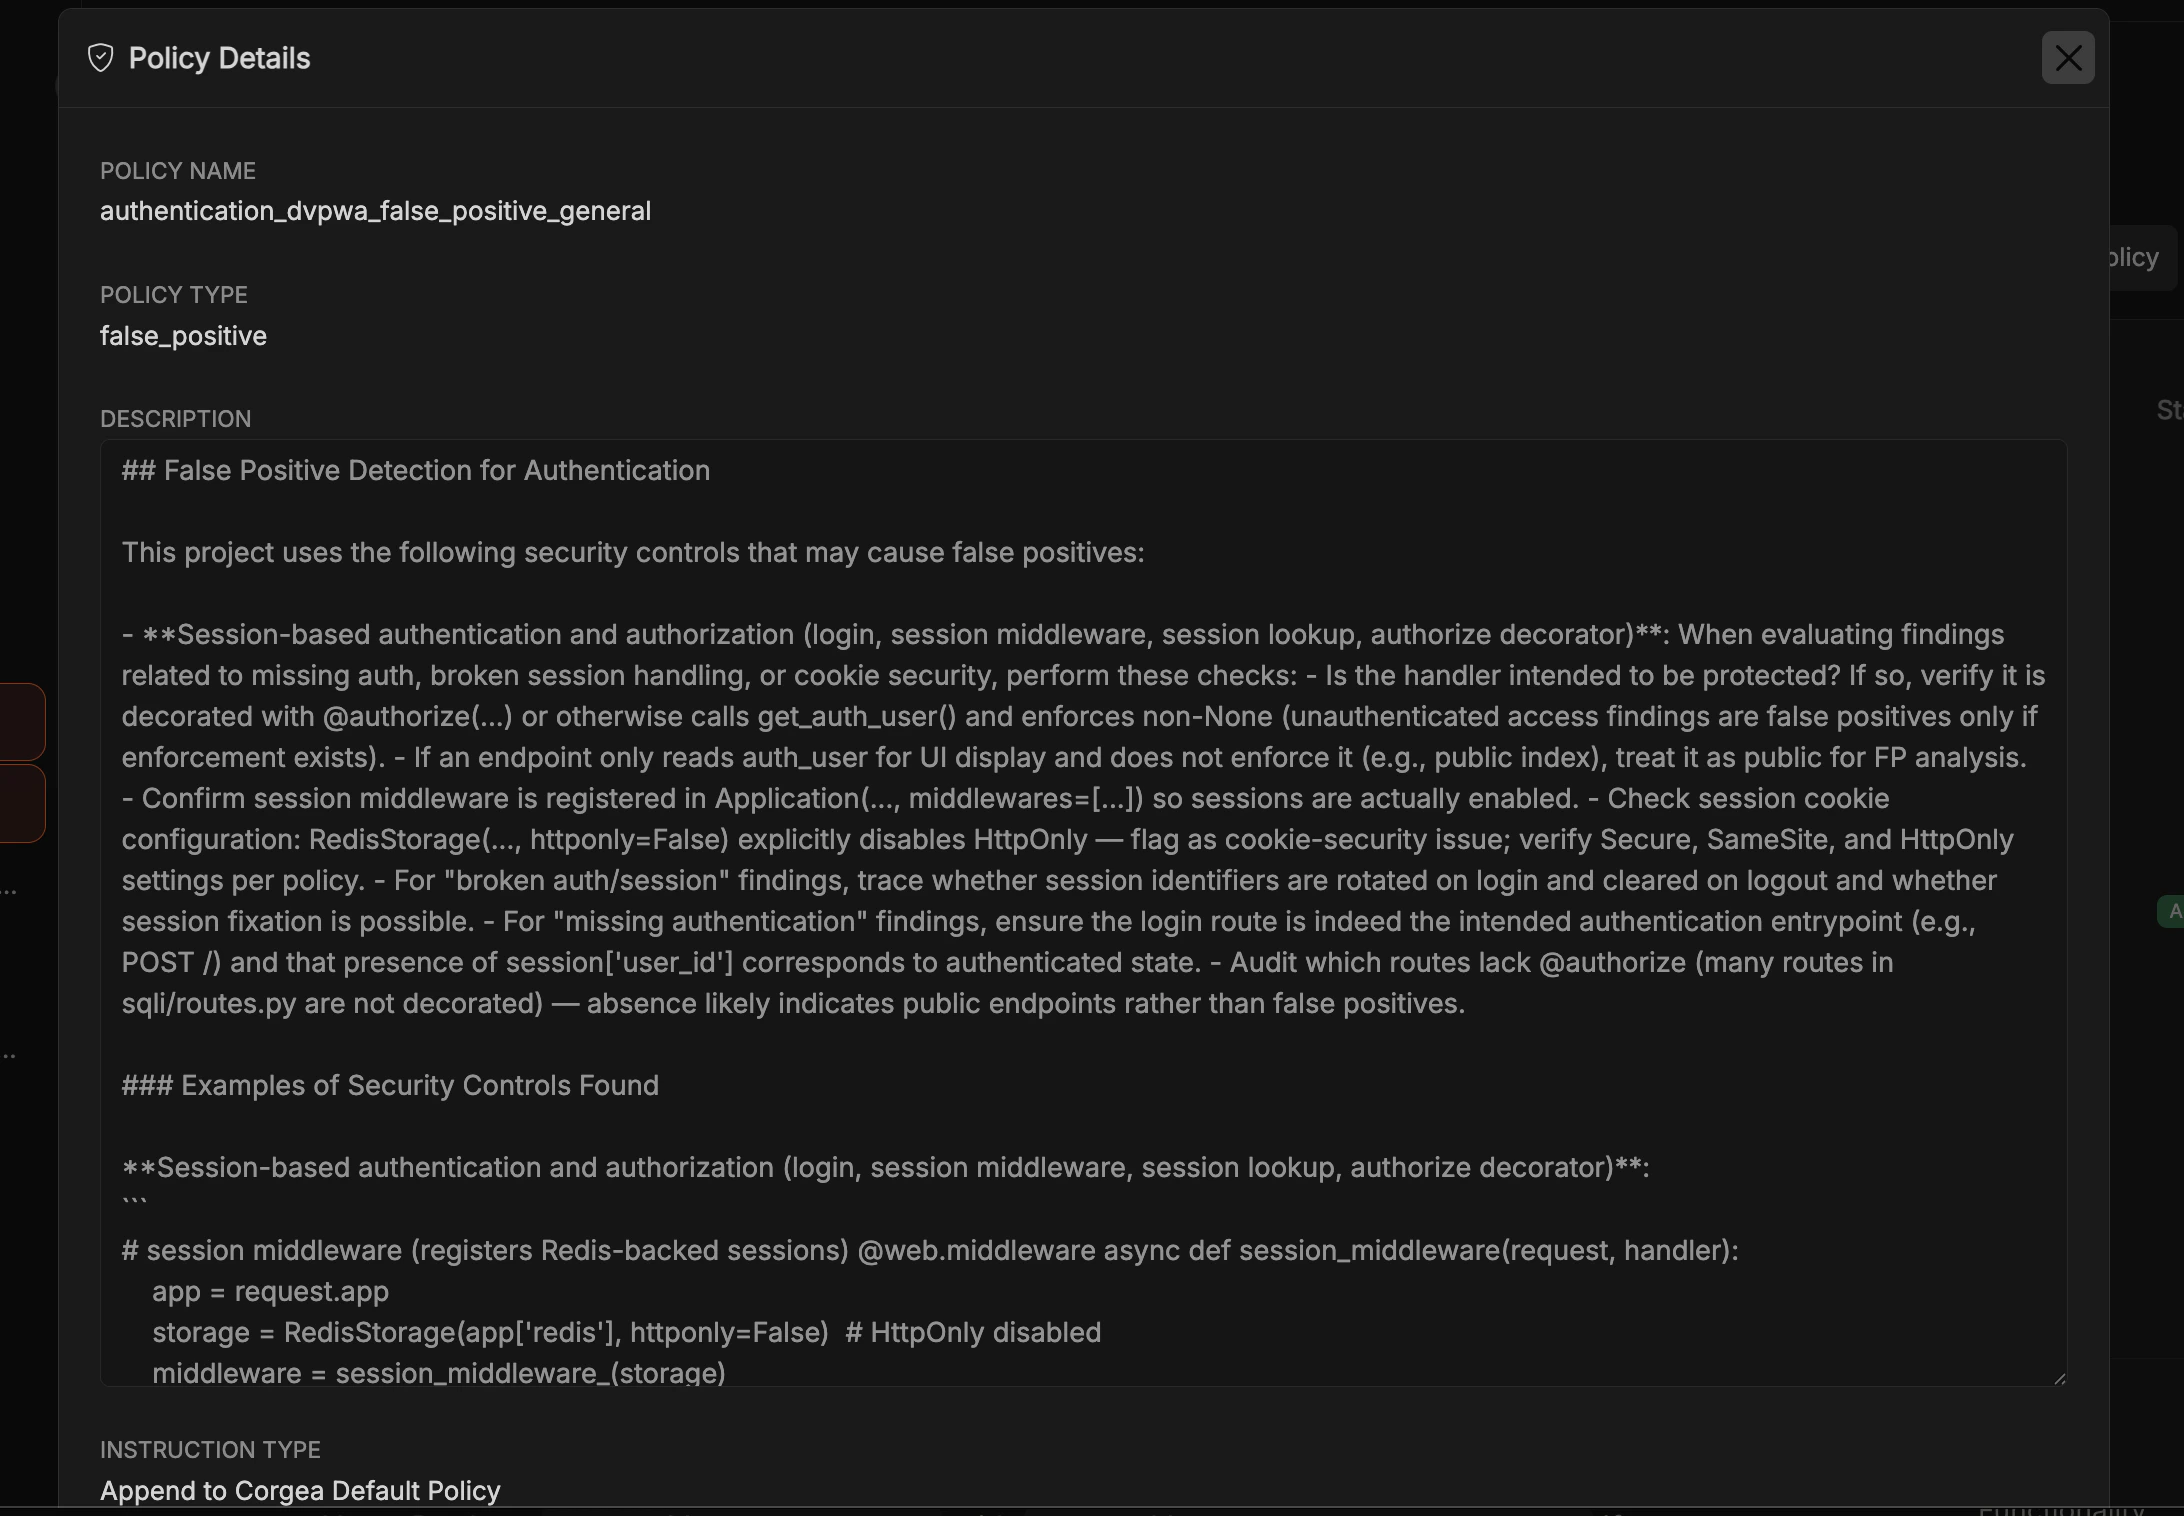
Corgea Policy YAML Configuration Support
Customers can now define security policies for their projects using acorgea.yaml file. This configuration file enables the specification of detailed security policies, such as:
- Specific CWE identifiers
- Policies tailored to sub-folders
- Testing new policies on a separate branch
Scale or Enterprise plan and requires additional enablement. Please contact us at https://corgea.com/contact for more information.
For reference, you can view an example repository here: Example Repository.
You can have - Main Policies for general policy.
Examples of sub-folder specific policies can be found in sub-folders like:
These configurations help identify vulnerabilities by considering the context of each folder’s responsibilities. This is particularly useful for monorepos, allowing developers to configure the right context.
Workflow for Updating corgea.yaml
1
Create Branch and Trigger Scan
Create a new branch with the corgea.yaml file and open a pull request. This will automatically trigger a scan on the branch. Alternatively, you can manually trigger a scan from the project page.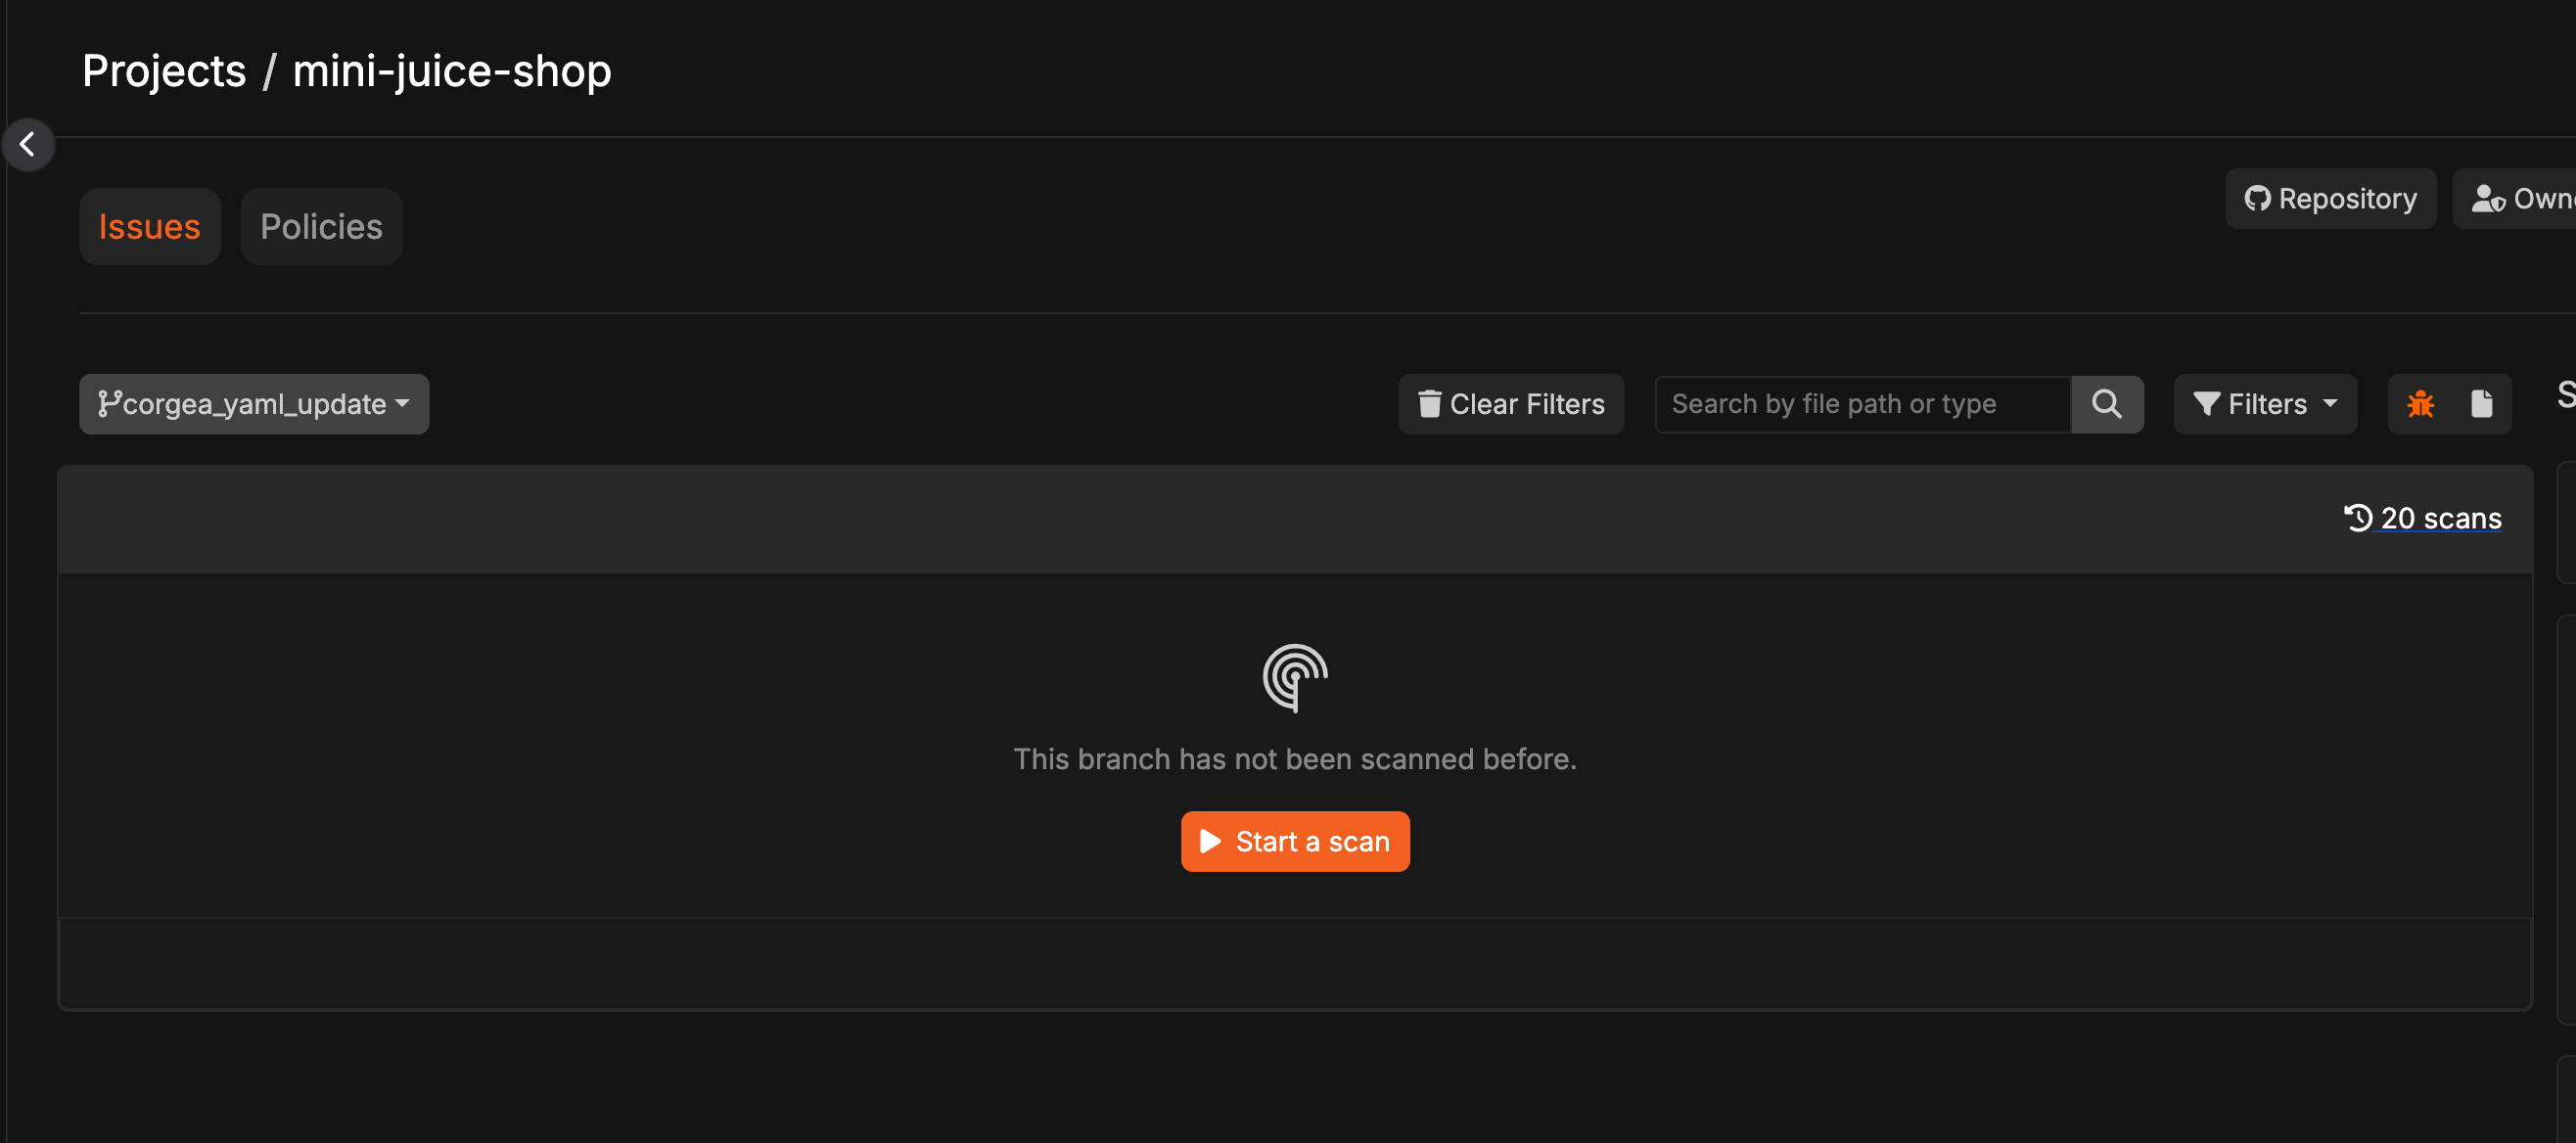
2
Review Policy File
Go to the PoliciesIQ page, where you will find a section labeled 
Policy File in Repos.3
Review Policies from Policy File
Click on the section to review the specific policies generated by the corgea.yaml file.
4
Click on Associated Issues
Click on the 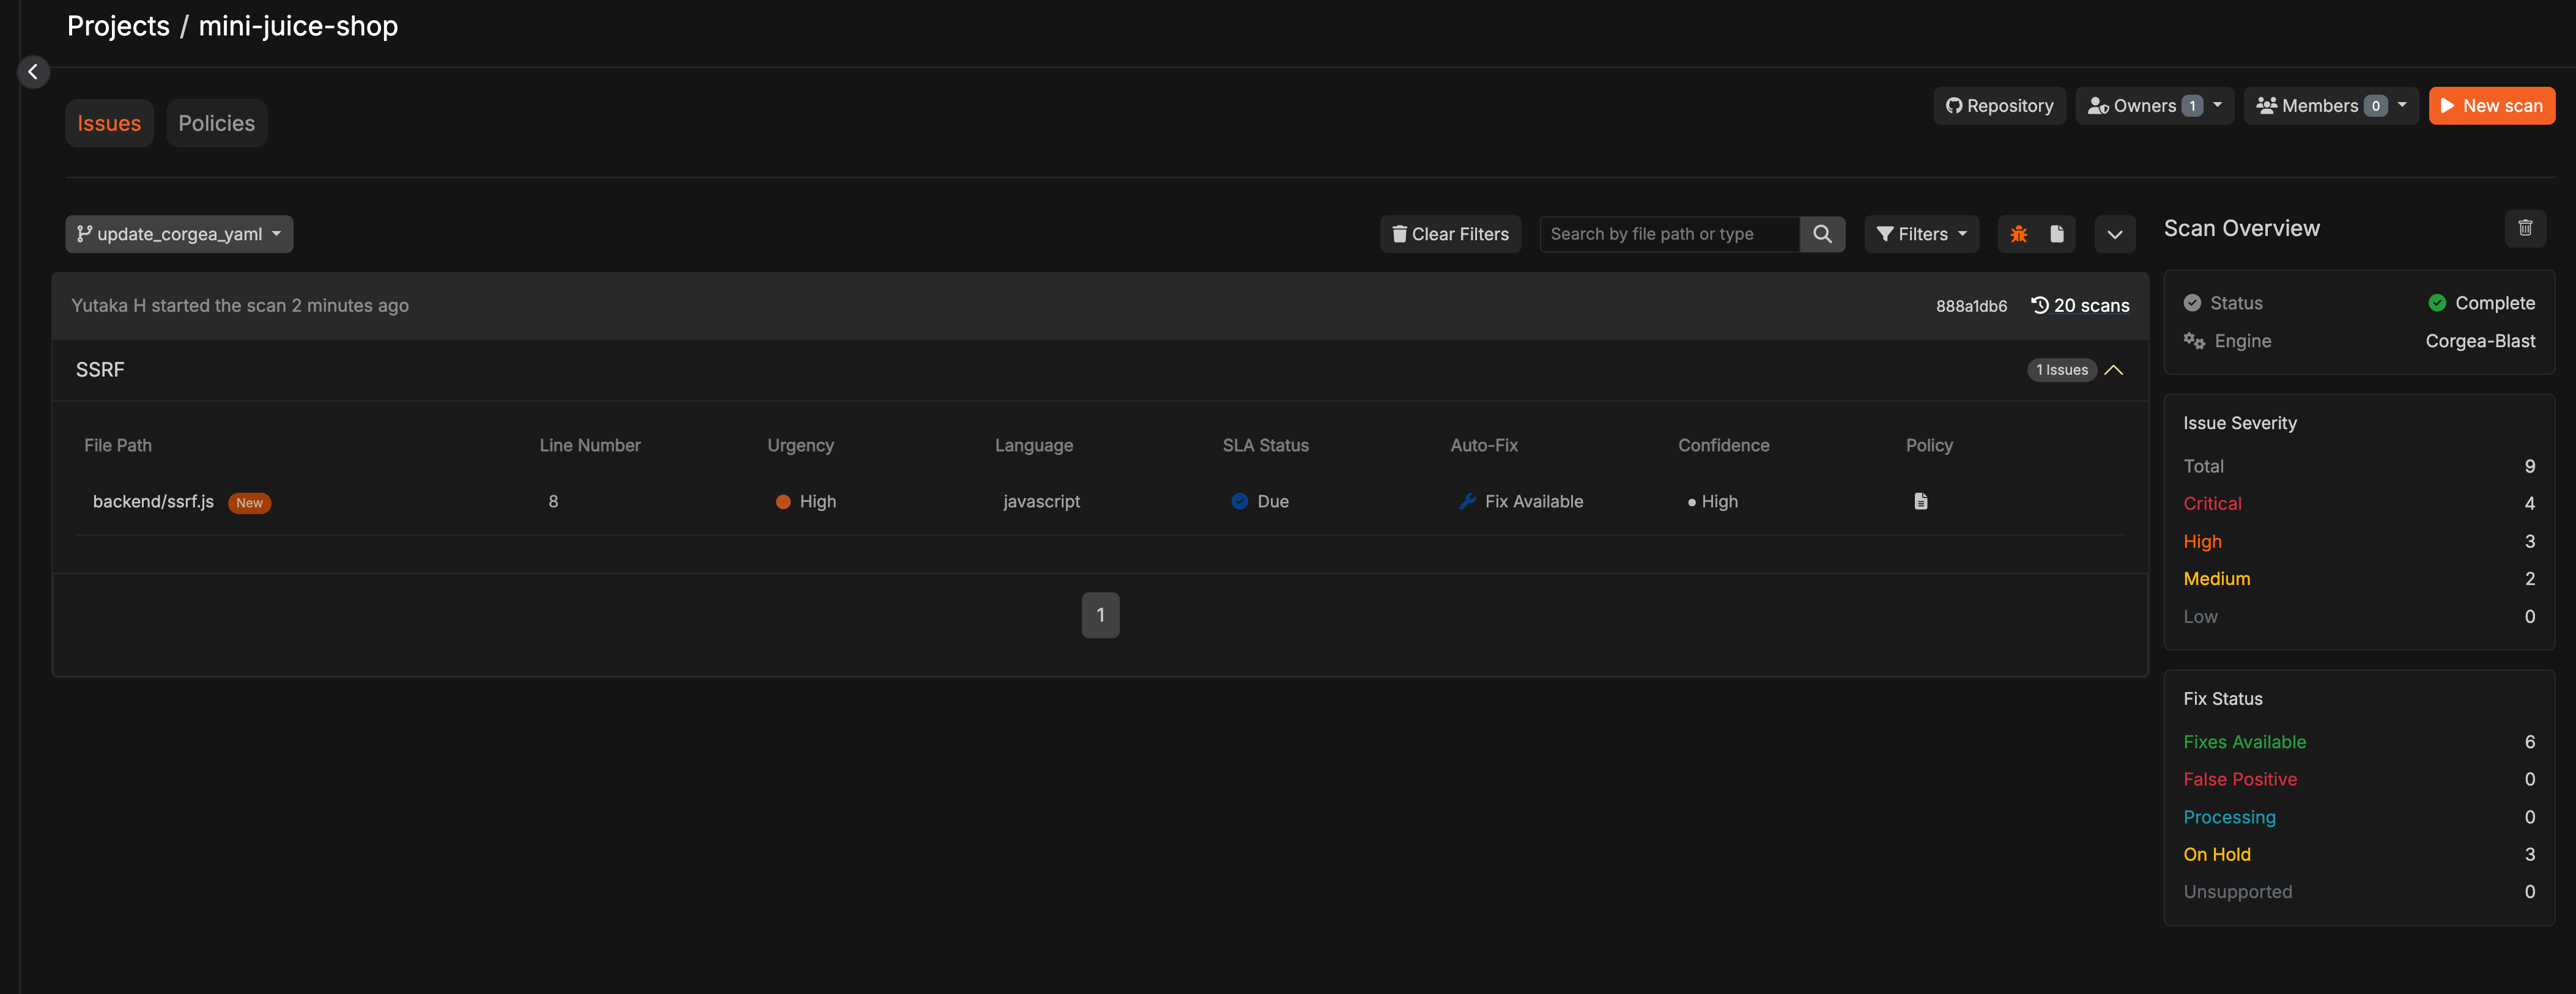
Associated Issues column to see issues triggered from this policy.5
Update and Experiment or Merge Your PR
Make further modifications until the results meet your expectations, then merge your pull request to include the corgea.yaml file in the main branch.
Basic configuration for corgea.yaml
Basic configuration of corgea.yaml looks like this :type: type of policy. This can be one of “scan”, “false_positive”, “fix”descriptioncontents of policy. Explain additional context or internal security guidelines to tailor security vulnerabilities findings.
Advanced configuration for corgea.yaml
Optionally, you can add these fieldsinstruction_type: Determines how your policy instructions interact with Corgea’s built-in policies. Can be set to"append"or"overwrite". When set to"append", your policy instructions are added to Corgea’s built-in policies, preserving both sets of rules. When set to"overwrite"(default), your policy instructions completely replace Corgea’s default behavior.guidance_text: Optional static guidance shown to developers when viewing issues associated with the policy, including in issue explanations and suggested fixes. Use this for team-specific instructions, internal links, or remediation context.
cwes: Only applicable to “fix”, or “false_positive”. It can apply specific policy to specific cwes. As an example,
excludes: If you want to exclude some paths for a specific policy scan, you can list those files using a glob expression.
ignore_paths: If you want to exclude folders globally from all scans and new issue creation, you can specify them here. (Note: these file paths are ignored globally, not just for a specific policy. Patterns such as**/vendor/**match at any directory depth.)
path: Instead of having separate corgea.yaml files under sub-folders, you can manage everything centrally by setting path.
1
On the PolicyIQ page, you will see five policies generated.

2
You can view all the different policies with their respective paths.