Prerequisites
Before setting up the JIRA integration, ensure that you have the following:- A JIRA account with administrative privileges
- Your JIRA instance URL (e.g.,
https://mycompany.atlassian.net) - A JIRA API token (How to create a JIRA API token)
Setting up the Integration
1
Access Integrations Page
Log in to your Corgea account and navigate to the “Integrations” page.
2
Open JIRA Integrations
Locate the “JIRA” integration and click the “Add” or “Edit” button to open the JIRA integrations page.
3
Configure Integration
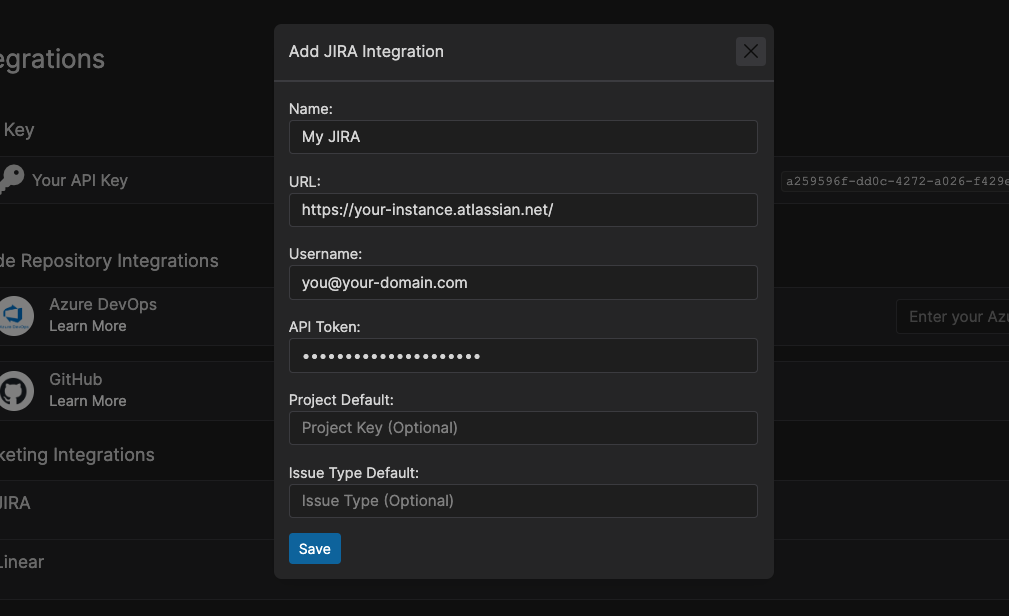
- Name: A friendly name for the integration (e.g., “My JIRA Instance”)
- Base URL: Your JIRA instance URL (e.g.,
https://mycompany.atlassian.net) - Username: Your JIRA username
- API Token: Your JIRA API token
- Project Key (optional): The default JIRA project key to use when creating issues
- Issue Type (optional): The default JIRA issue type to use when creating issues
4
Save Configuration
Click “Save” to complete the integration setup.
Creating JIRA Issues
1
Navigate to Issues
Navigate to either a code issue or dependency issue in Corgea and open the issue details page.
2
Access Issue Details
On the issue details page, select the ticket icon button (tooltip: “Create Ticket”).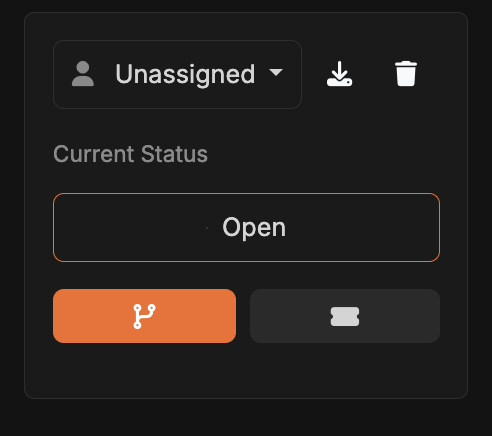
3
Configure Ticket
If you haven’t specified default values for the project key and issue type during the integration setup, you’ll need to provide them here. Corgea will automatically fetch your projects and the issue types for you to select.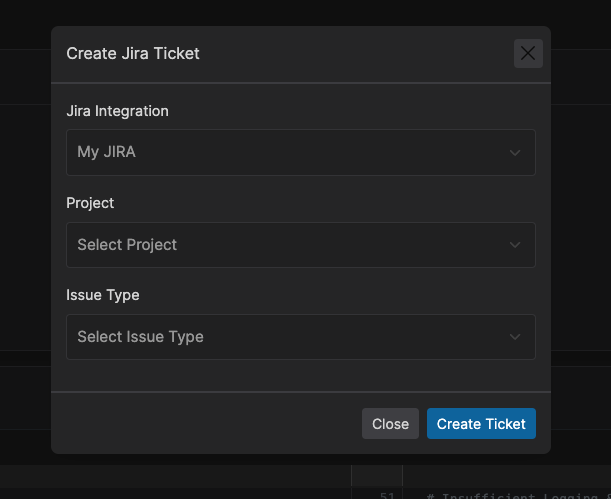
4
Create Ticket
Click the “Create JIRA Ticket” button. Corgea will create a new JIRA issue with the relevant details.
5
Confirm Creation
You’ll receive a confirmation message with a link to the newly created JIRA ticket.
Customizing JIRA Ticket Details
By default, Corgea populates the JIRA ticket with the following information:- Summary:
- Code issues: issue classification and file location
- Dependency issues: CVE, affected package, and affected version
- Summaries that exceed Jira’s length limit are automatically shortened
- Description:
- Vulnerability details (location/package, category, severity)
- Issue explanation
- Proposed fix (if available)
- Link to the issue details page in Corgea