Prerequisite You have a connected repository (GitHub, GitLab, Azure DevOps, or Harness) and Scheduled Scans enabled on your plan. See Corgea pricing to enable this feature.
Viewing Scheduled Scans
Open Policies → Scheduled Scans in the sidebar. The Security Scan Schedules page lists all configured schedules for your organization, along with their status, frequency, scope, and last-run outcome.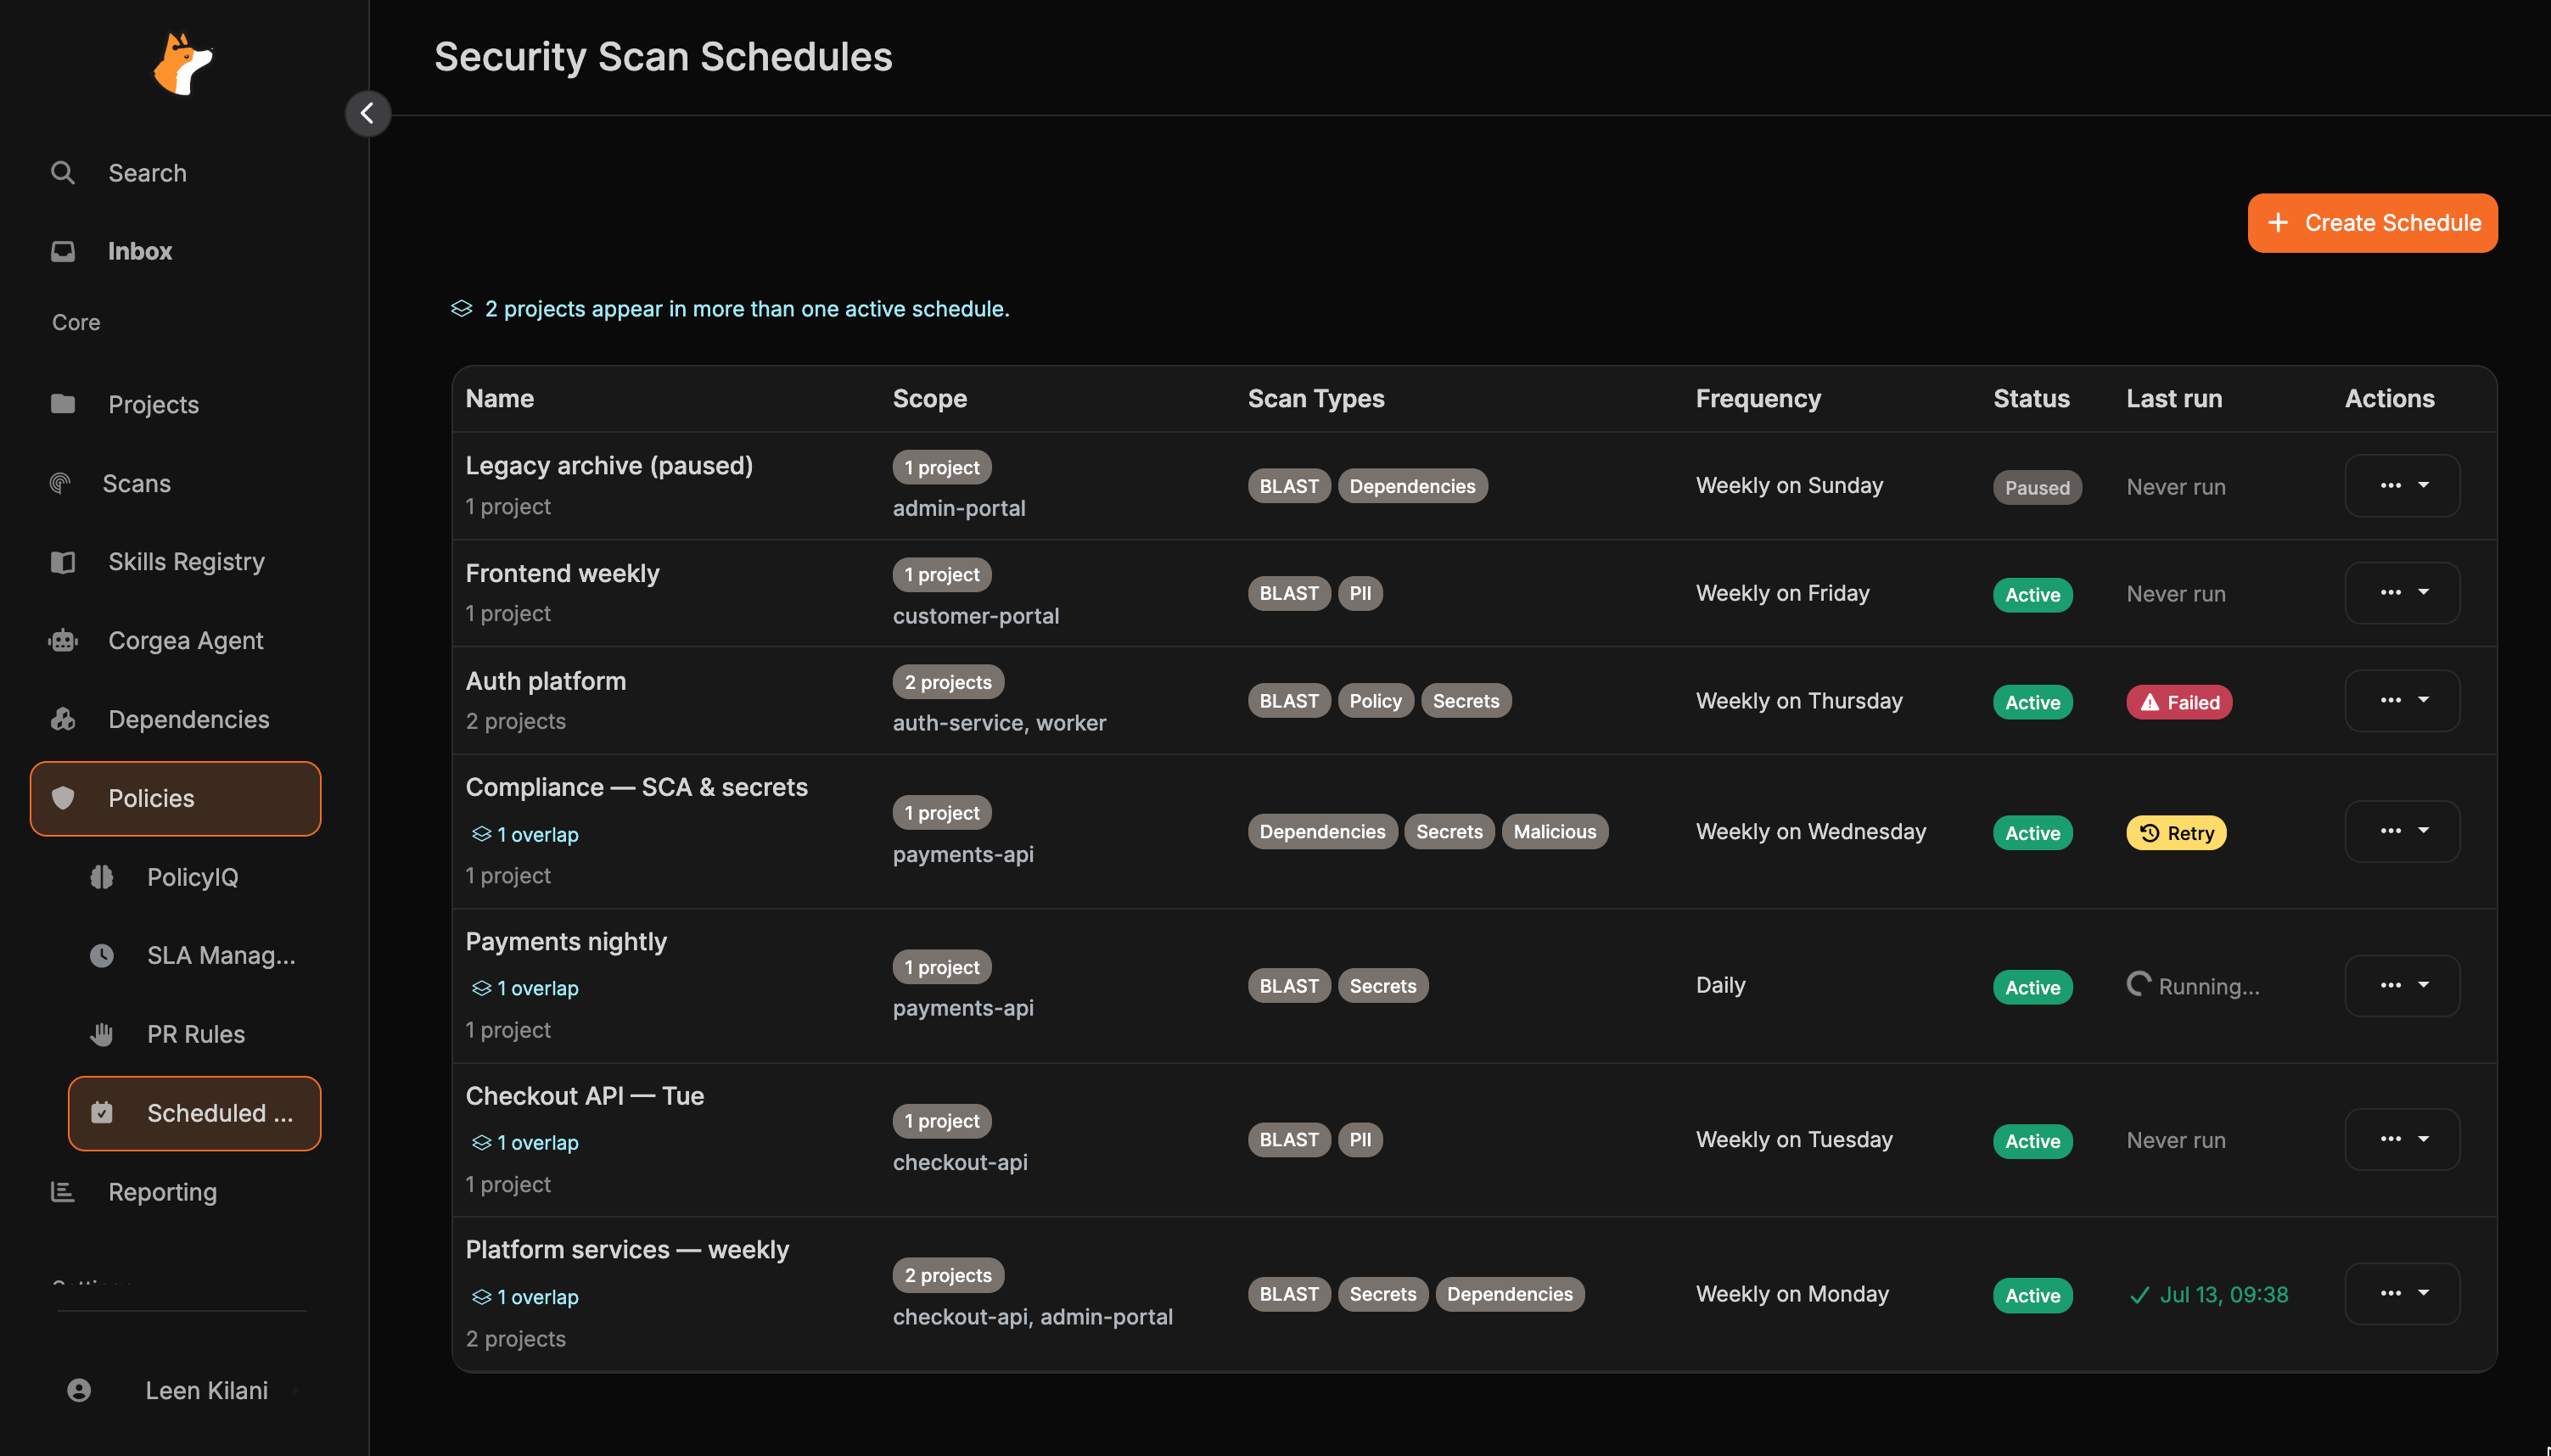
- Name — a label for the schedule (plus an overlap link when the same project appears on another active schedule)
- Scope — how many projects are targeted, plus the project names when three or fewer are selected, the tag names for a tag-scoped schedule, or the team names for a team-scoped schedule
- Scan Types — which scanners will run (e.g., BLAST, Secrets, PII)
- Frequency — how often the scan runs
- Status — whether the schedule is active or paused
- Last run — the outcome of the most recent attempt
From the list you can edit, pause/resume, run immediately, or delete any schedule.
Overlapping coverage
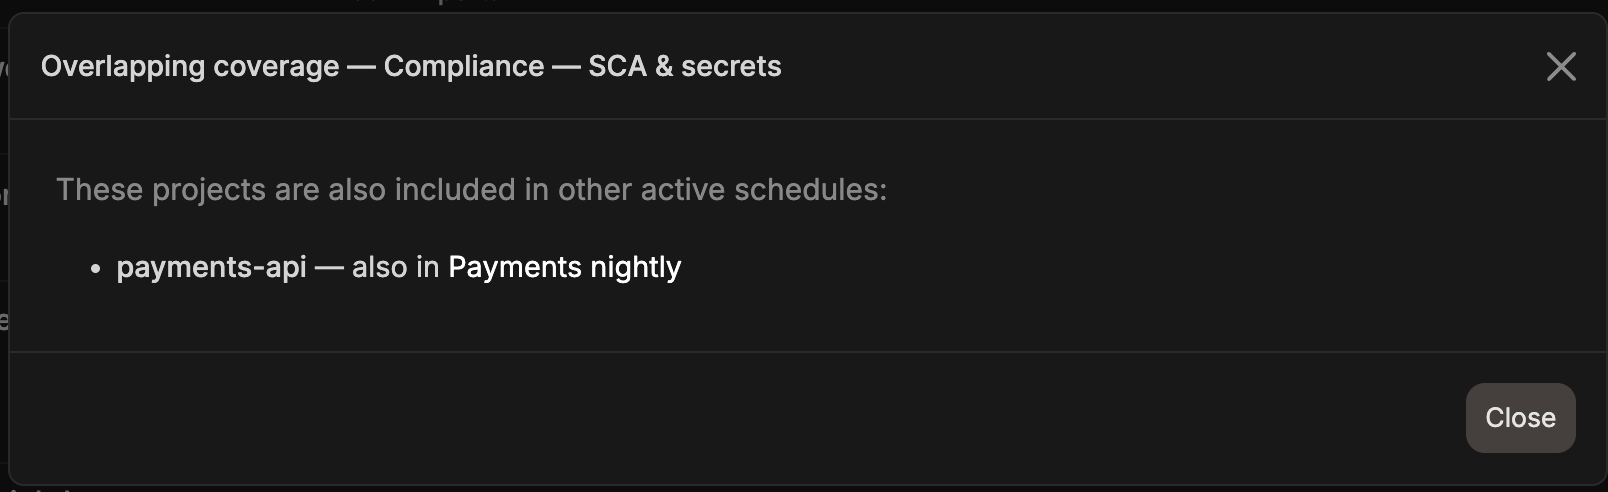
When the same project is included in more than one active, project-scoped schedule, Corgea surfaces that overlap so you can see where scans may run more often than expected.- A banner at the top of the list shows how many projects appear in more than one active schedule
- Affected schedules show an overlap link under the name — select it to see which projects are shared and which other schedules include them
Overlap detection currently applies to project-scoped schedules only. Tag- and team-scoped coverage is not included in overlap warnings yet.
Creating a Scheduled Scan
Click Create Schedule to open the schedule creation form.1
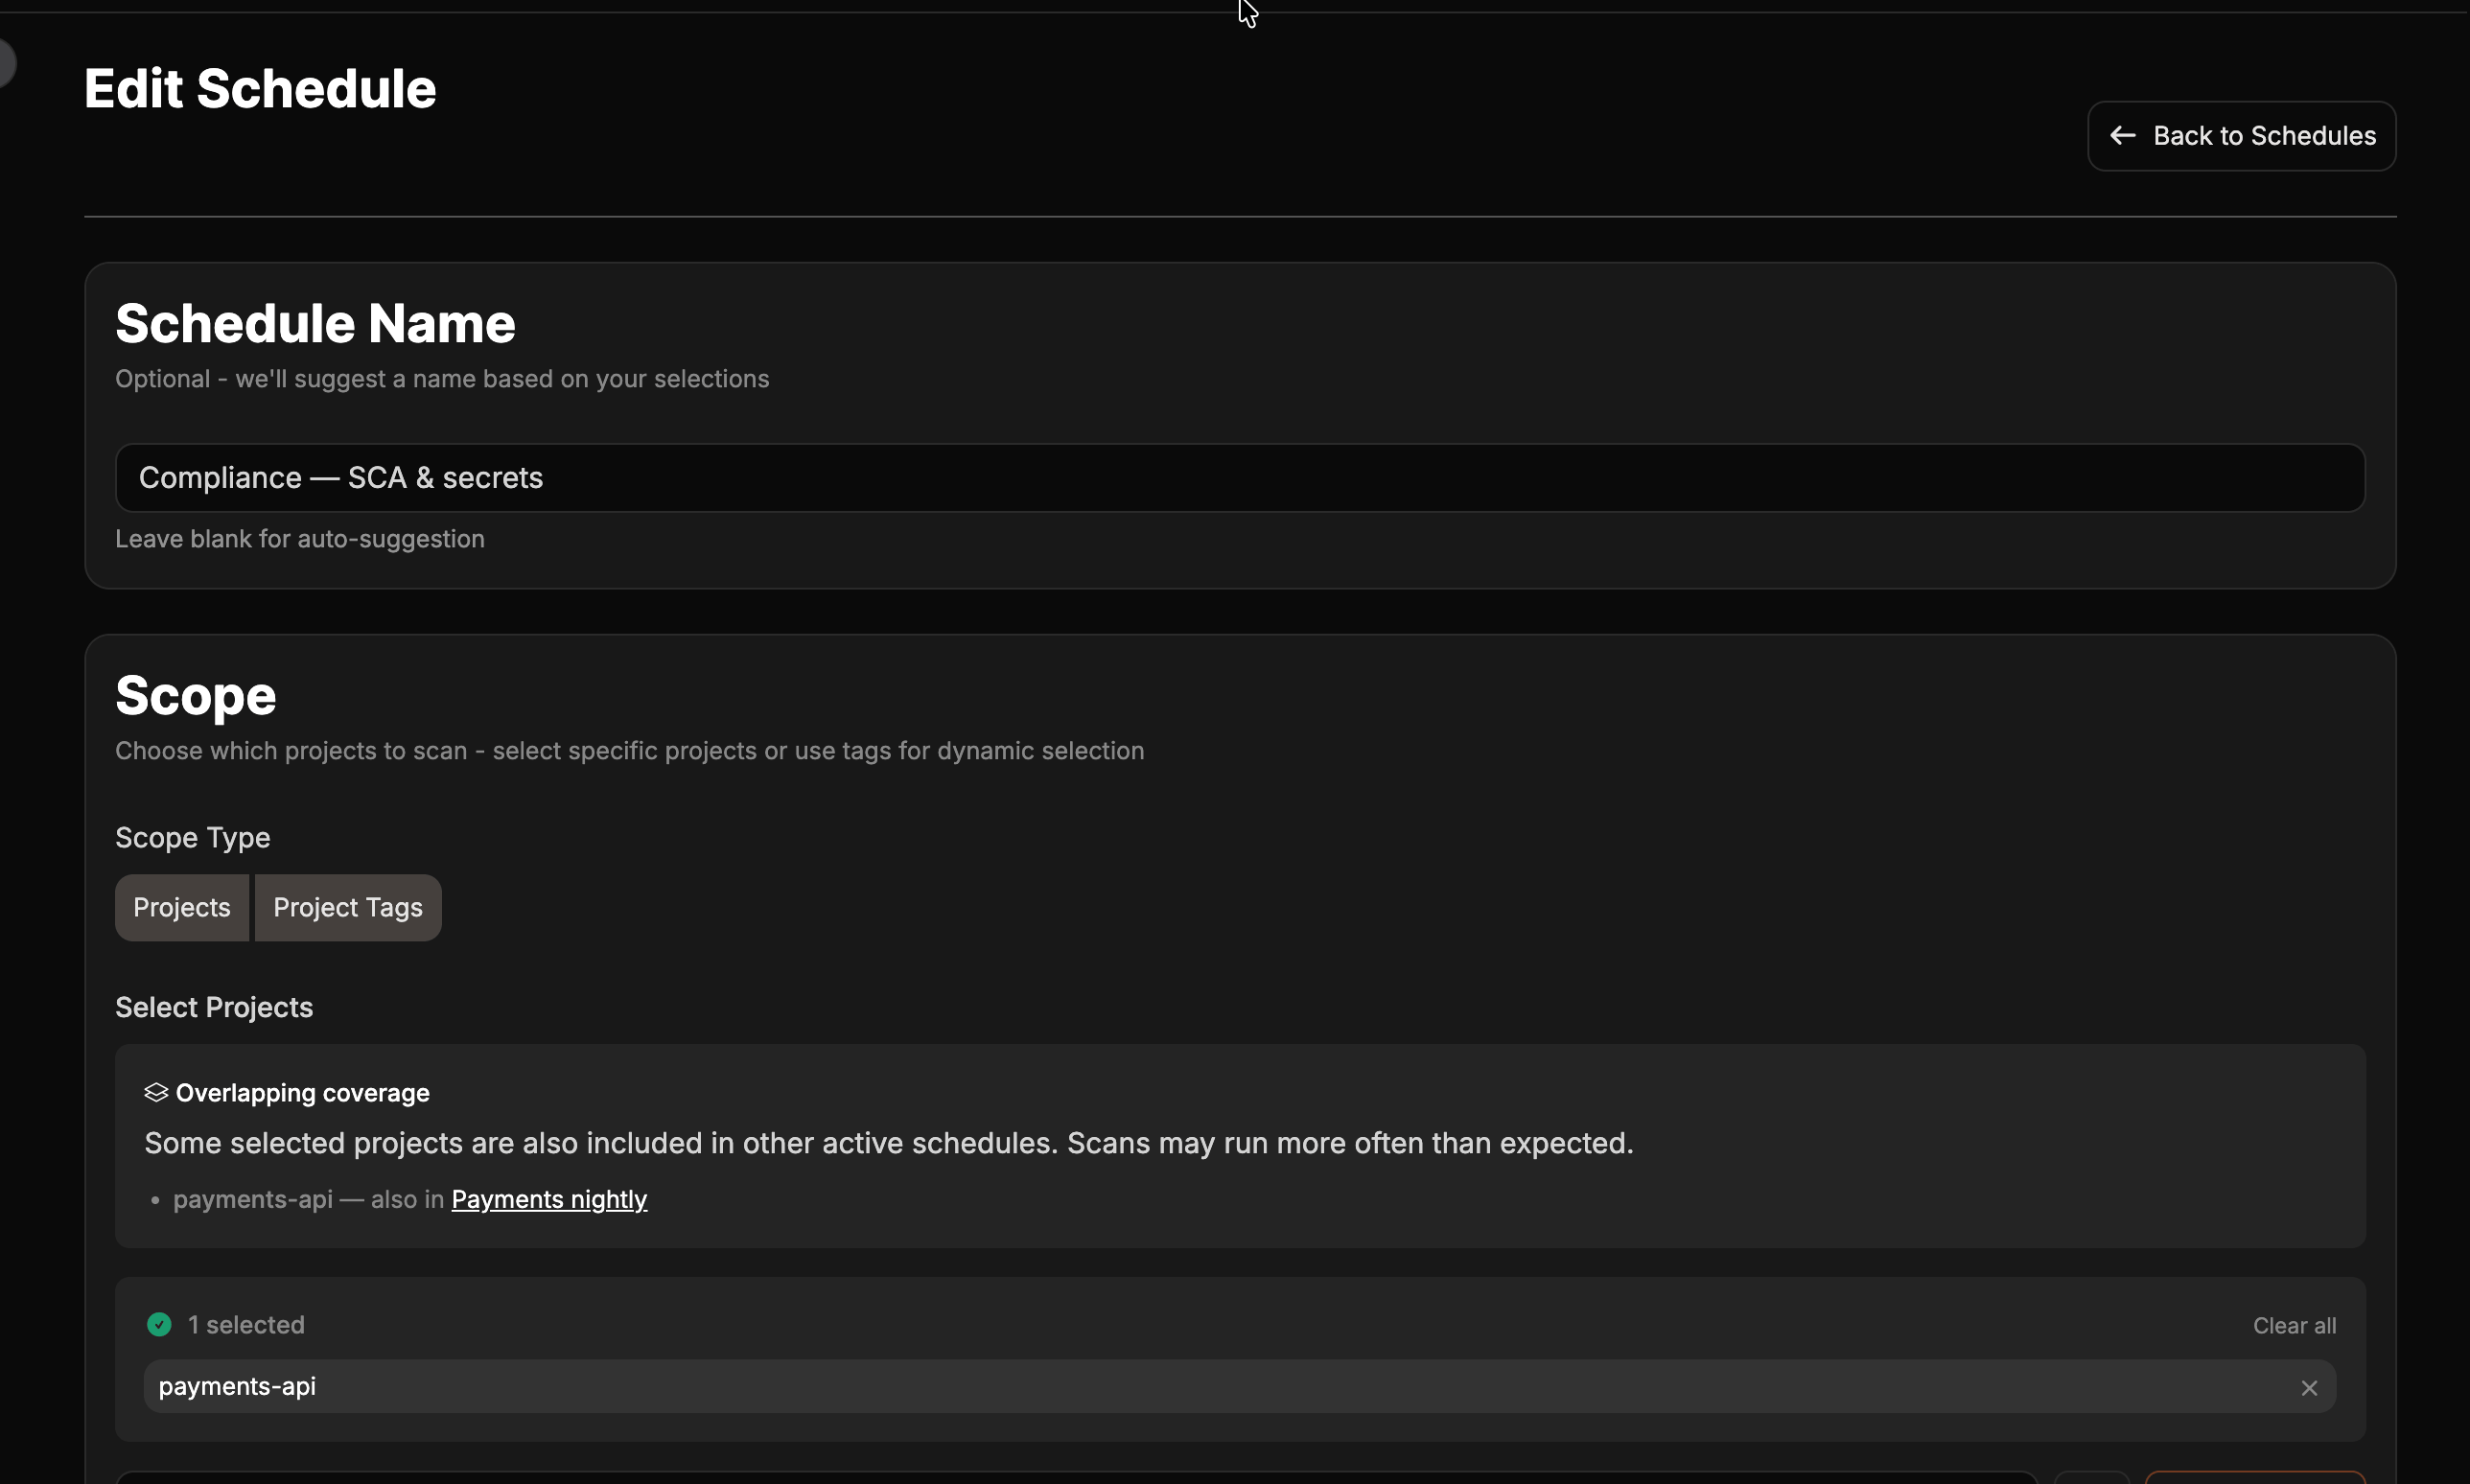
Name the schedule
Give your schedule a descriptive name. If left blank, Corgea will auto-generate one based on the scope and frequency.
2
Select the scope
Choose how to target projects:
- Projects — pick one or more specific repositories from your connected integrations
- Tags — target all projects that share one or more labels (useful for scanning a service tier, team, or environment)
- Teams — target projects that are assigned to one or more selected teams
3
Choose scan types
Select which scanners to run. Multiple scan types can be combined in a single schedule.
Dependencies schedules report reachability status for each finding when reachability analysis is enabled on your plan. This applies to every dependency scan, not just scheduled ones.
4
Set the frequency
Select how often the scan should run:
Daily is only offered if daily scheduled scans are enabled on your plan. If you do not see it, the other frequencies are still available.
5
Save and activate
Click Create. The schedule is immediately set to active and Corgea will calculate the next run time based on your chosen frequency. When editing an existing schedule, the same button is labeled Save.
Running a Scan Immediately
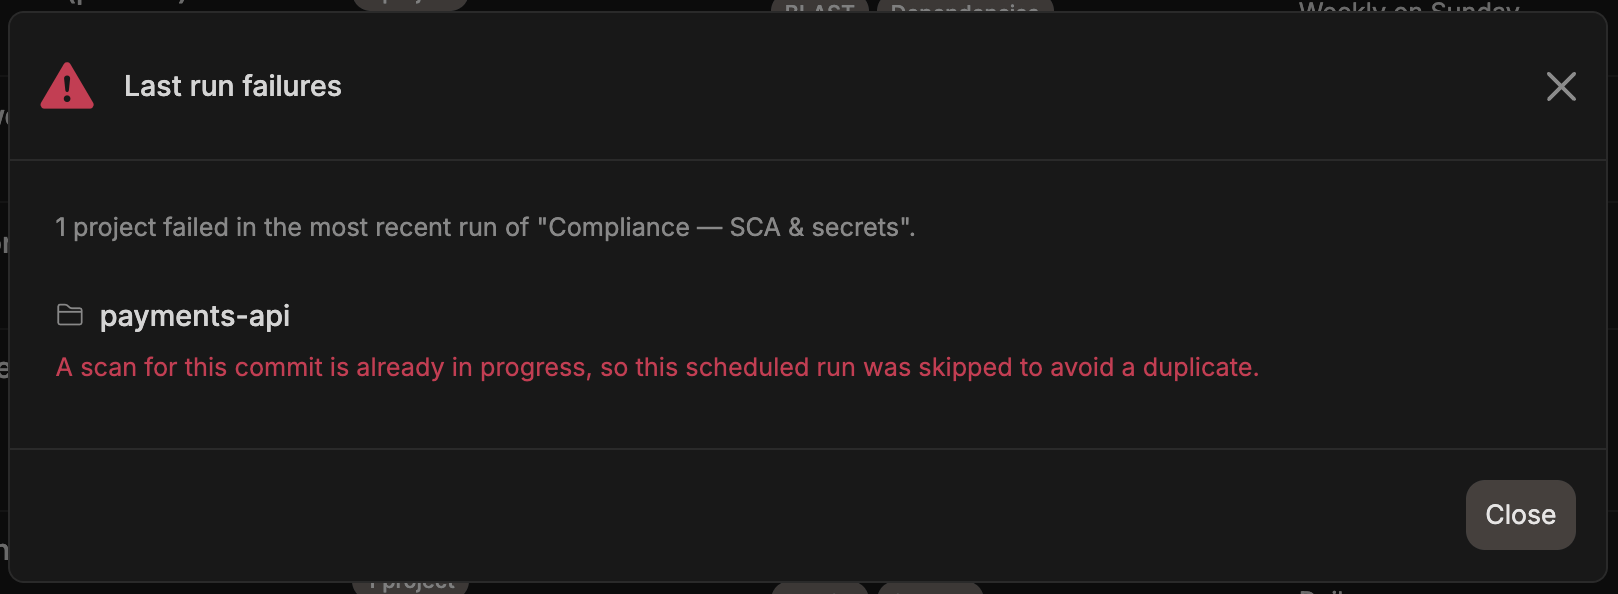
You can trigger any schedule to run right away by selecting Run Now from the schedule’s actions menu. The Last run column shows Running… while the run is in progress, then updates to a success timestamp, Failed, or Retry. Corgea enforces a 24-hour cooldown after a successful run or while a run is already active. Failed attempts and retryable skips can be retried immediately with Run Now. If a run does not finish (for example, an interrupted attempt), the schedule stays retryable instead of remaining blocked for a full 24 hours — select Run Now again.Last run failures
When Last run shows Failed, select the badge to open Last run failures. The modal lists each affected project and the reason it failed: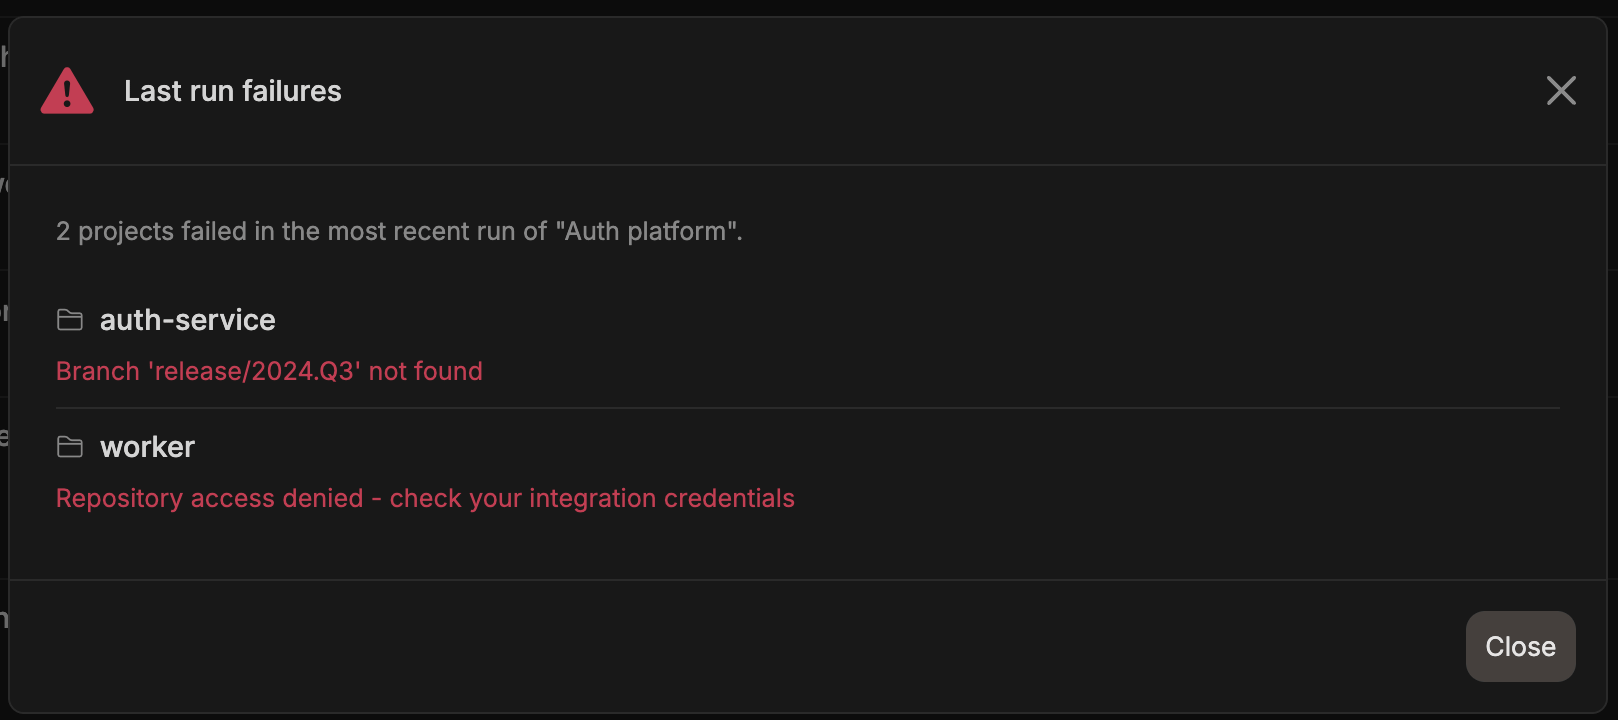
Managing Schedules
Pausing and Resuming
Toggle a schedule between active and paused from the list view. Paused schedules will not run automatically until reactivated, and they are excluded from overlap warnings.Editing
Click Edit on any schedule to modify its name, scope, scan types, or frequency. Changes take effect on the next scheduled run. Overlap warnings update as you change the project selection.Deleting
Click Delete to permanently remove a schedule. This does not affect scans that have already been executed.How Scans Are Executed
When a scheduled scan runs, Corgea:- Resolves the target projects (directly selected, or matched via tags or teams)
- Downloads the latest code from the configured branch (defaults to the project’s default branch)
- Runs the selected scan types against the code
- Creates a scan record linked to the schedule run
Daily Report
When scheduled scan runs from the last 24 hours turn up new findings, Corgea sends a daily summary email to everyone in the company who has the Daily Scan Report notification enabled — it is on by default for all users, and admins can change the company default or limit delivery to selected teams. Runs that produced no new findings are left out, and no email is sent if there is nothing new to report. Subscribed webhooks receive the same report. See Notifications to configure delivery preferences and view the webhook payload schema.Troubleshooting
Scheduled Scans is not visible
Scheduled Scans is not visible
Scheduled Scans requires a compatible plan and must be enabled for your organization. Contact your Corgea account team to enable it.
No projects found for schedule
No projects found for schedule
If a schedule has scope type Projects but no projects are selected, scope type Tags but no projects match the configured tags, or scope type Teams but no projects are assigned to the selected teams, the scan will be skipped. Edit the schedule to verify the scope configuration.
Scan failed for a project
Scan failed for a project
The schedule list shows Failed if one or more project scans fail. Select the badge to view the failure reason for each affected project. Common causes:
- The repository is not accessible (check your integration credentials)
- The configured branch does not exist
- The project has no connected integration
A project is no longer included in scheduled runs
A project is no longer included in scheduled runs
When the same project fails the same schedule three times in a row for a persistent reason, such as a missing branch or expired credentials, Corgea emails the project owners and company admins and stops including that project in the schedule’s automatic runs. Other projects on the schedule continue to run as normal.Fix the underlying problem, then use Run Now to retry — Run Now always attempts every project in scope, including skipped ones. The project is included in automatic runs again once a scan succeeds for it. See Notifications for the email and its delivery settings.
Last run shows Retry
Last run shows Retry
Corgea prevents duplicate scans for the same project and commit. If another run is already in progress or still registering the scan, the schedule shows Retry instead of reporting a successful run. Select the badge for the skip reason, wait briefly, then select Run Now again.
Run Now is blocked
Run Now is blocked
If the schedule completed successfully within the last 24 hours or is still running, Run Now remains blocked. Check the Last run column before retrying.Failed runs and Retry outcomes are retryable immediately.
Projects appear in more than one schedule
Projects appear in more than one schedule
The list banner and per-schedule overlap links highlight projects that are selected on multiple active, project-scoped schedules. Review the overlapping coverage modal, then edit one of the schedules if you want to reduce duplicate coverage. Overlap is a warning only — schedules still run as configured.