> ## Documentation Index
> Fetch the complete documentation index at: https://docs.corgea.app/llms.txt
> Use this file to discover all available pages before exploring further.
# Uploading Scans
> Start generating fixes for your repository
Users have a choice between two options: the Corgea Dropsite and the Corgea CLI.
**Prerequisite** You registered in Corgea
**SAST Scanner** You have a SAST scanner like Checkmarx, CodeQL, Semgrep, Fortify, Coverity, or Snyk. Corgea currently supports these scanners, with Veracode and Sonarqube support on the roadmap.
## Corgea Dropsite
The Corgea Dropsite is a web interface that allows you to easily add your project to Corgea for analysis. It provides several options to upload your code and reports from various security scanners. The Dropsite has a file size limit of 200MB. For larger projects, please use the Corgea CLI.
### Adding a Project
To add a project to Corgea, follow these steps:
Navigate to the Dropsite page by clicking on the "Add Project" button in the Corgea Projects page or the Scans page.
 On the Dropsite page, you will see several options to add your project:
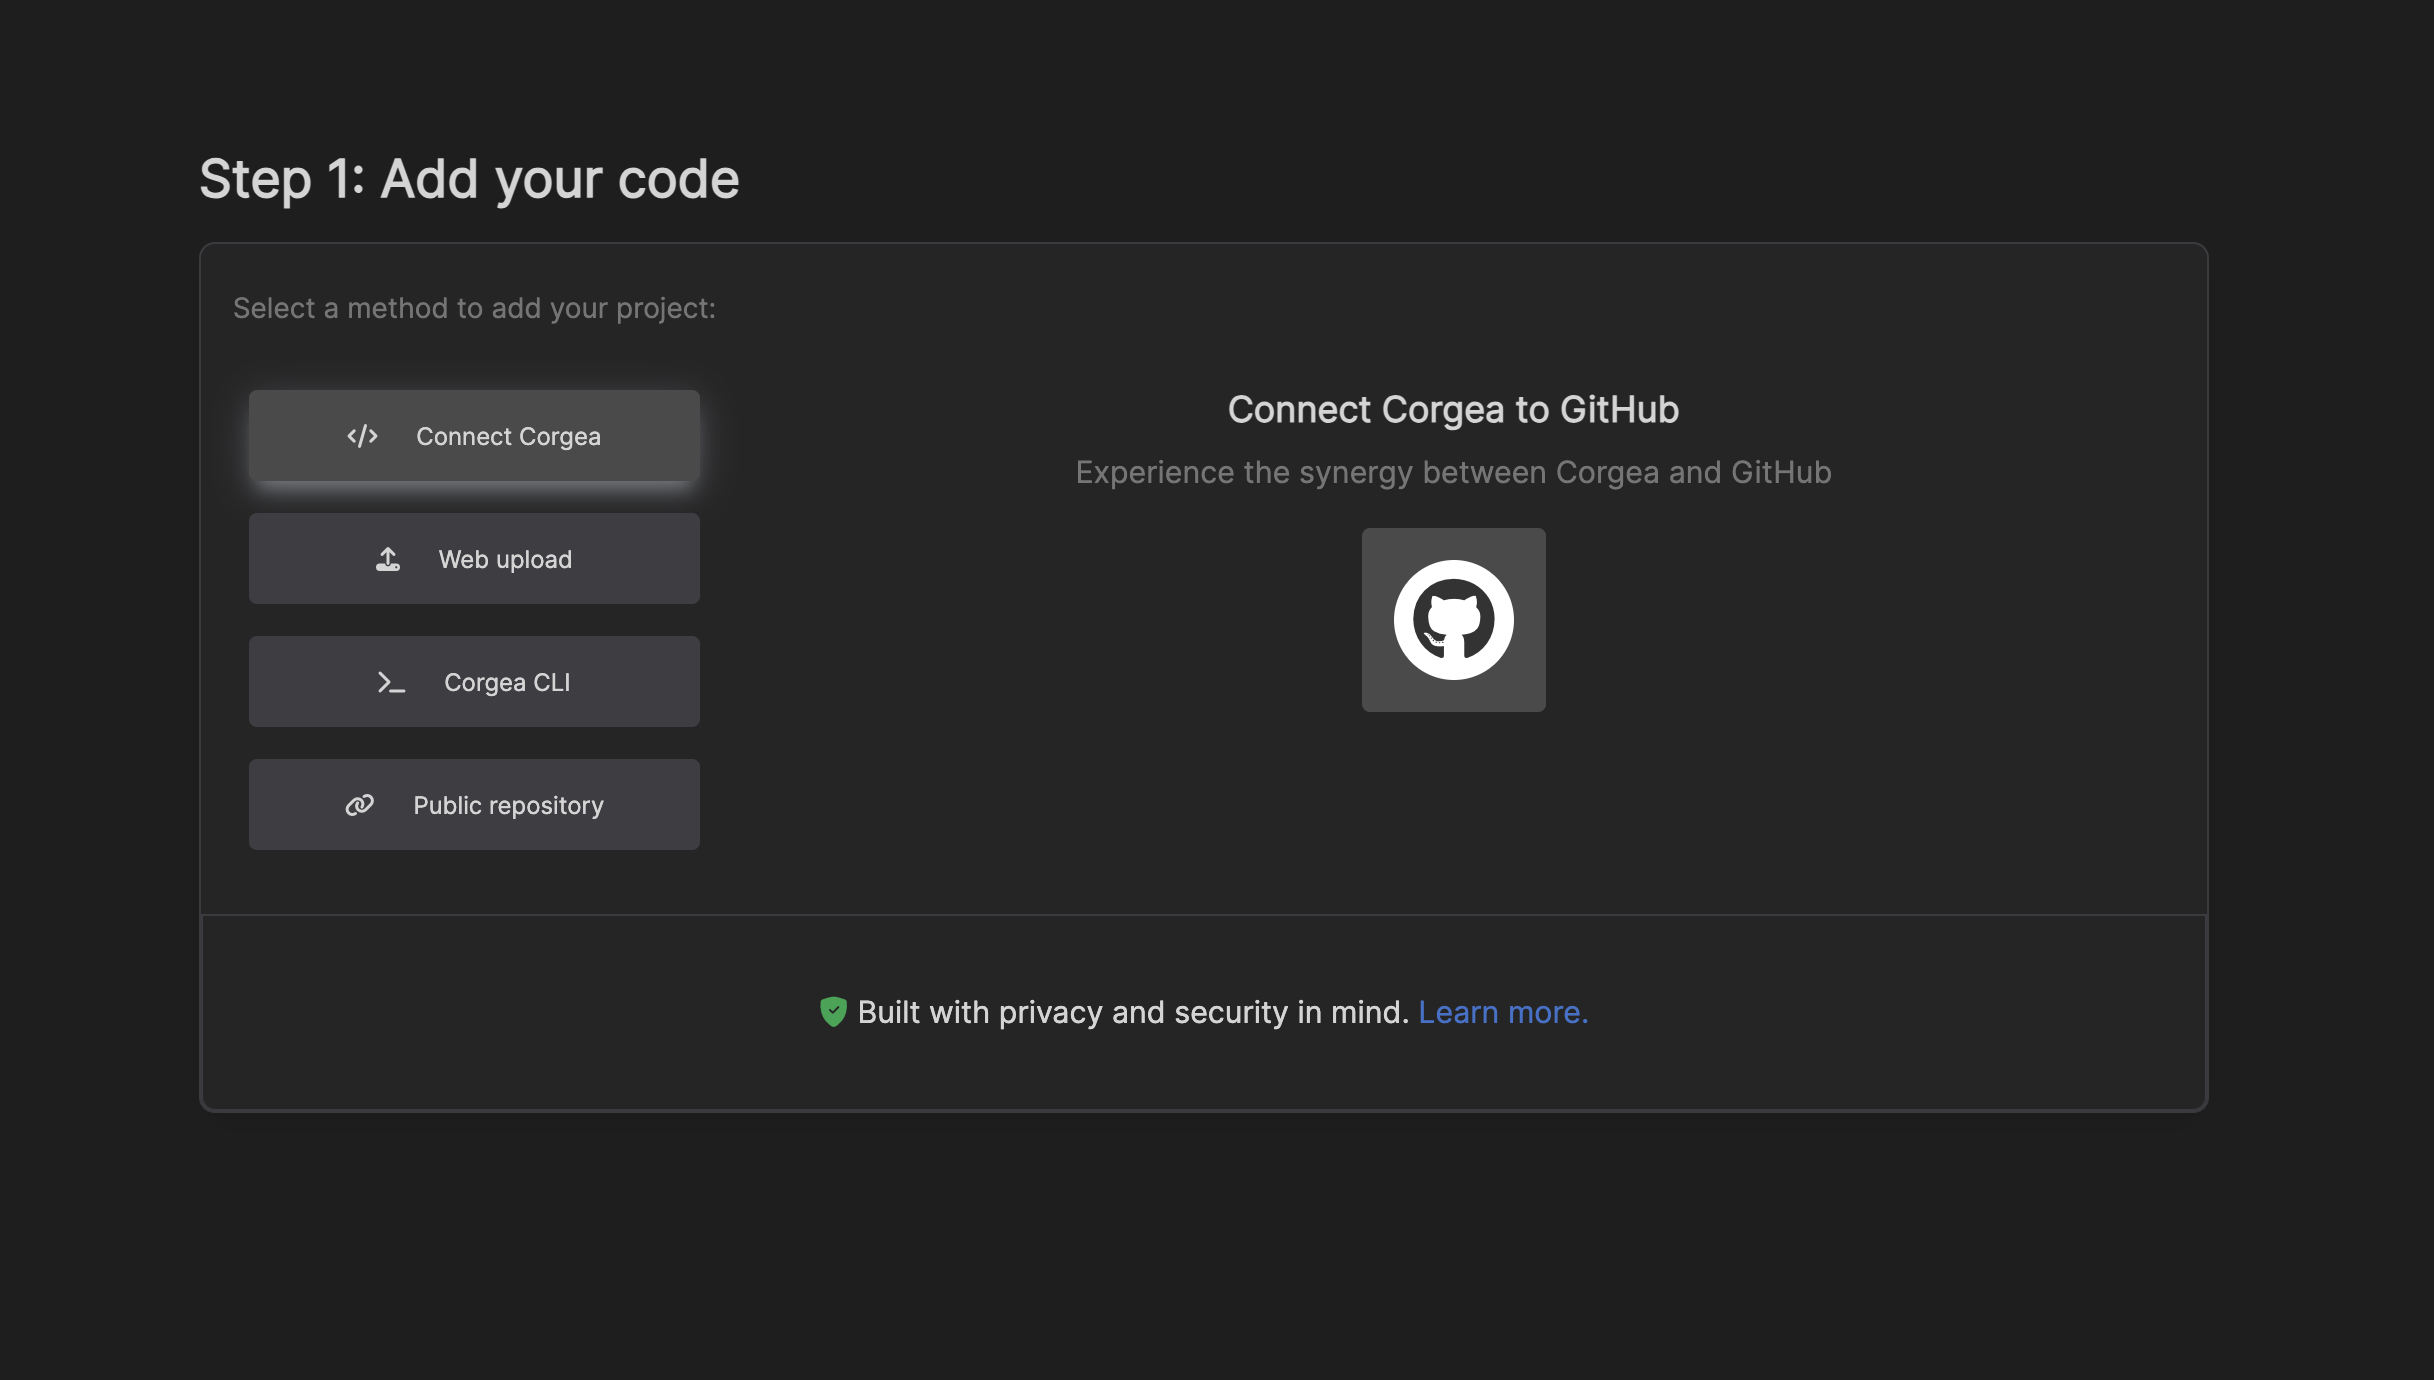 #### Connect Your Repository (Recommended)
This option allows you to connect your code repository directly to Corgea using a configured source control integration, including GitHub, GitLab, Azure DevOps, Bitbucket, or Harness.
Click the appropriate source control integration to authorize Corgea to access your repositories.
Select the repository you want to add to Corgea.
#### Add a Public Repository
If your repository is publicly accessible, you can provide the URL to add it to Corgea.
Click on the "Add a public repository" accordion.
2\. Enter the URL of your public repository in the input field.
Click the "Add" button.
#### Web Upload
This option allows you to upload a ZIP file containing your project's code.
Click on the "Web upload" accordion.
Click the "Upload" button and select the ZIP file containing your project's code.
To reduce file size and improve processing speed, exclude third-party libraries and build artifacts (e.g., node\_modules, vendor, dist) when uploading your project. This can be done by downloading a zip from your repository directly.
Remember that the web upload has a 200MB file size limit. For larger projects, use the Corgea CLI.
After adding your project, you can proceed to the next step to upload a report from a supported security scanner.
#### Uploading a Report
#### Connect Your Repository (Recommended)
This option allows you to connect your code repository directly to Corgea using a configured source control integration, including GitHub, GitLab, Azure DevOps, Bitbucket, or Harness.
Click the appropriate source control integration to authorize Corgea to access your repositories.
Select the repository you want to add to Corgea.
#### Add a Public Repository
If your repository is publicly accessible, you can provide the URL to add it to Corgea.
Click on the "Add a public repository" accordion.
2\. Enter the URL of your public repository in the input field.
Click the "Add" button.
#### Web Upload
This option allows you to upload a ZIP file containing your project's code.
Click on the "Web upload" accordion.
Click the "Upload" button and select the ZIP file containing your project's code.
To reduce file size and improve processing speed, exclude third-party libraries and build artifacts (e.g., node\_modules, vendor, dist) when uploading your project. This can be done by downloading a zip from your repository directly.
Remember that the web upload has a 200MB file size limit. For larger projects, use the Corgea CLI.
After adding your project, you can proceed to the next step to upload a report from a supported security scanner.
#### Uploading a Report
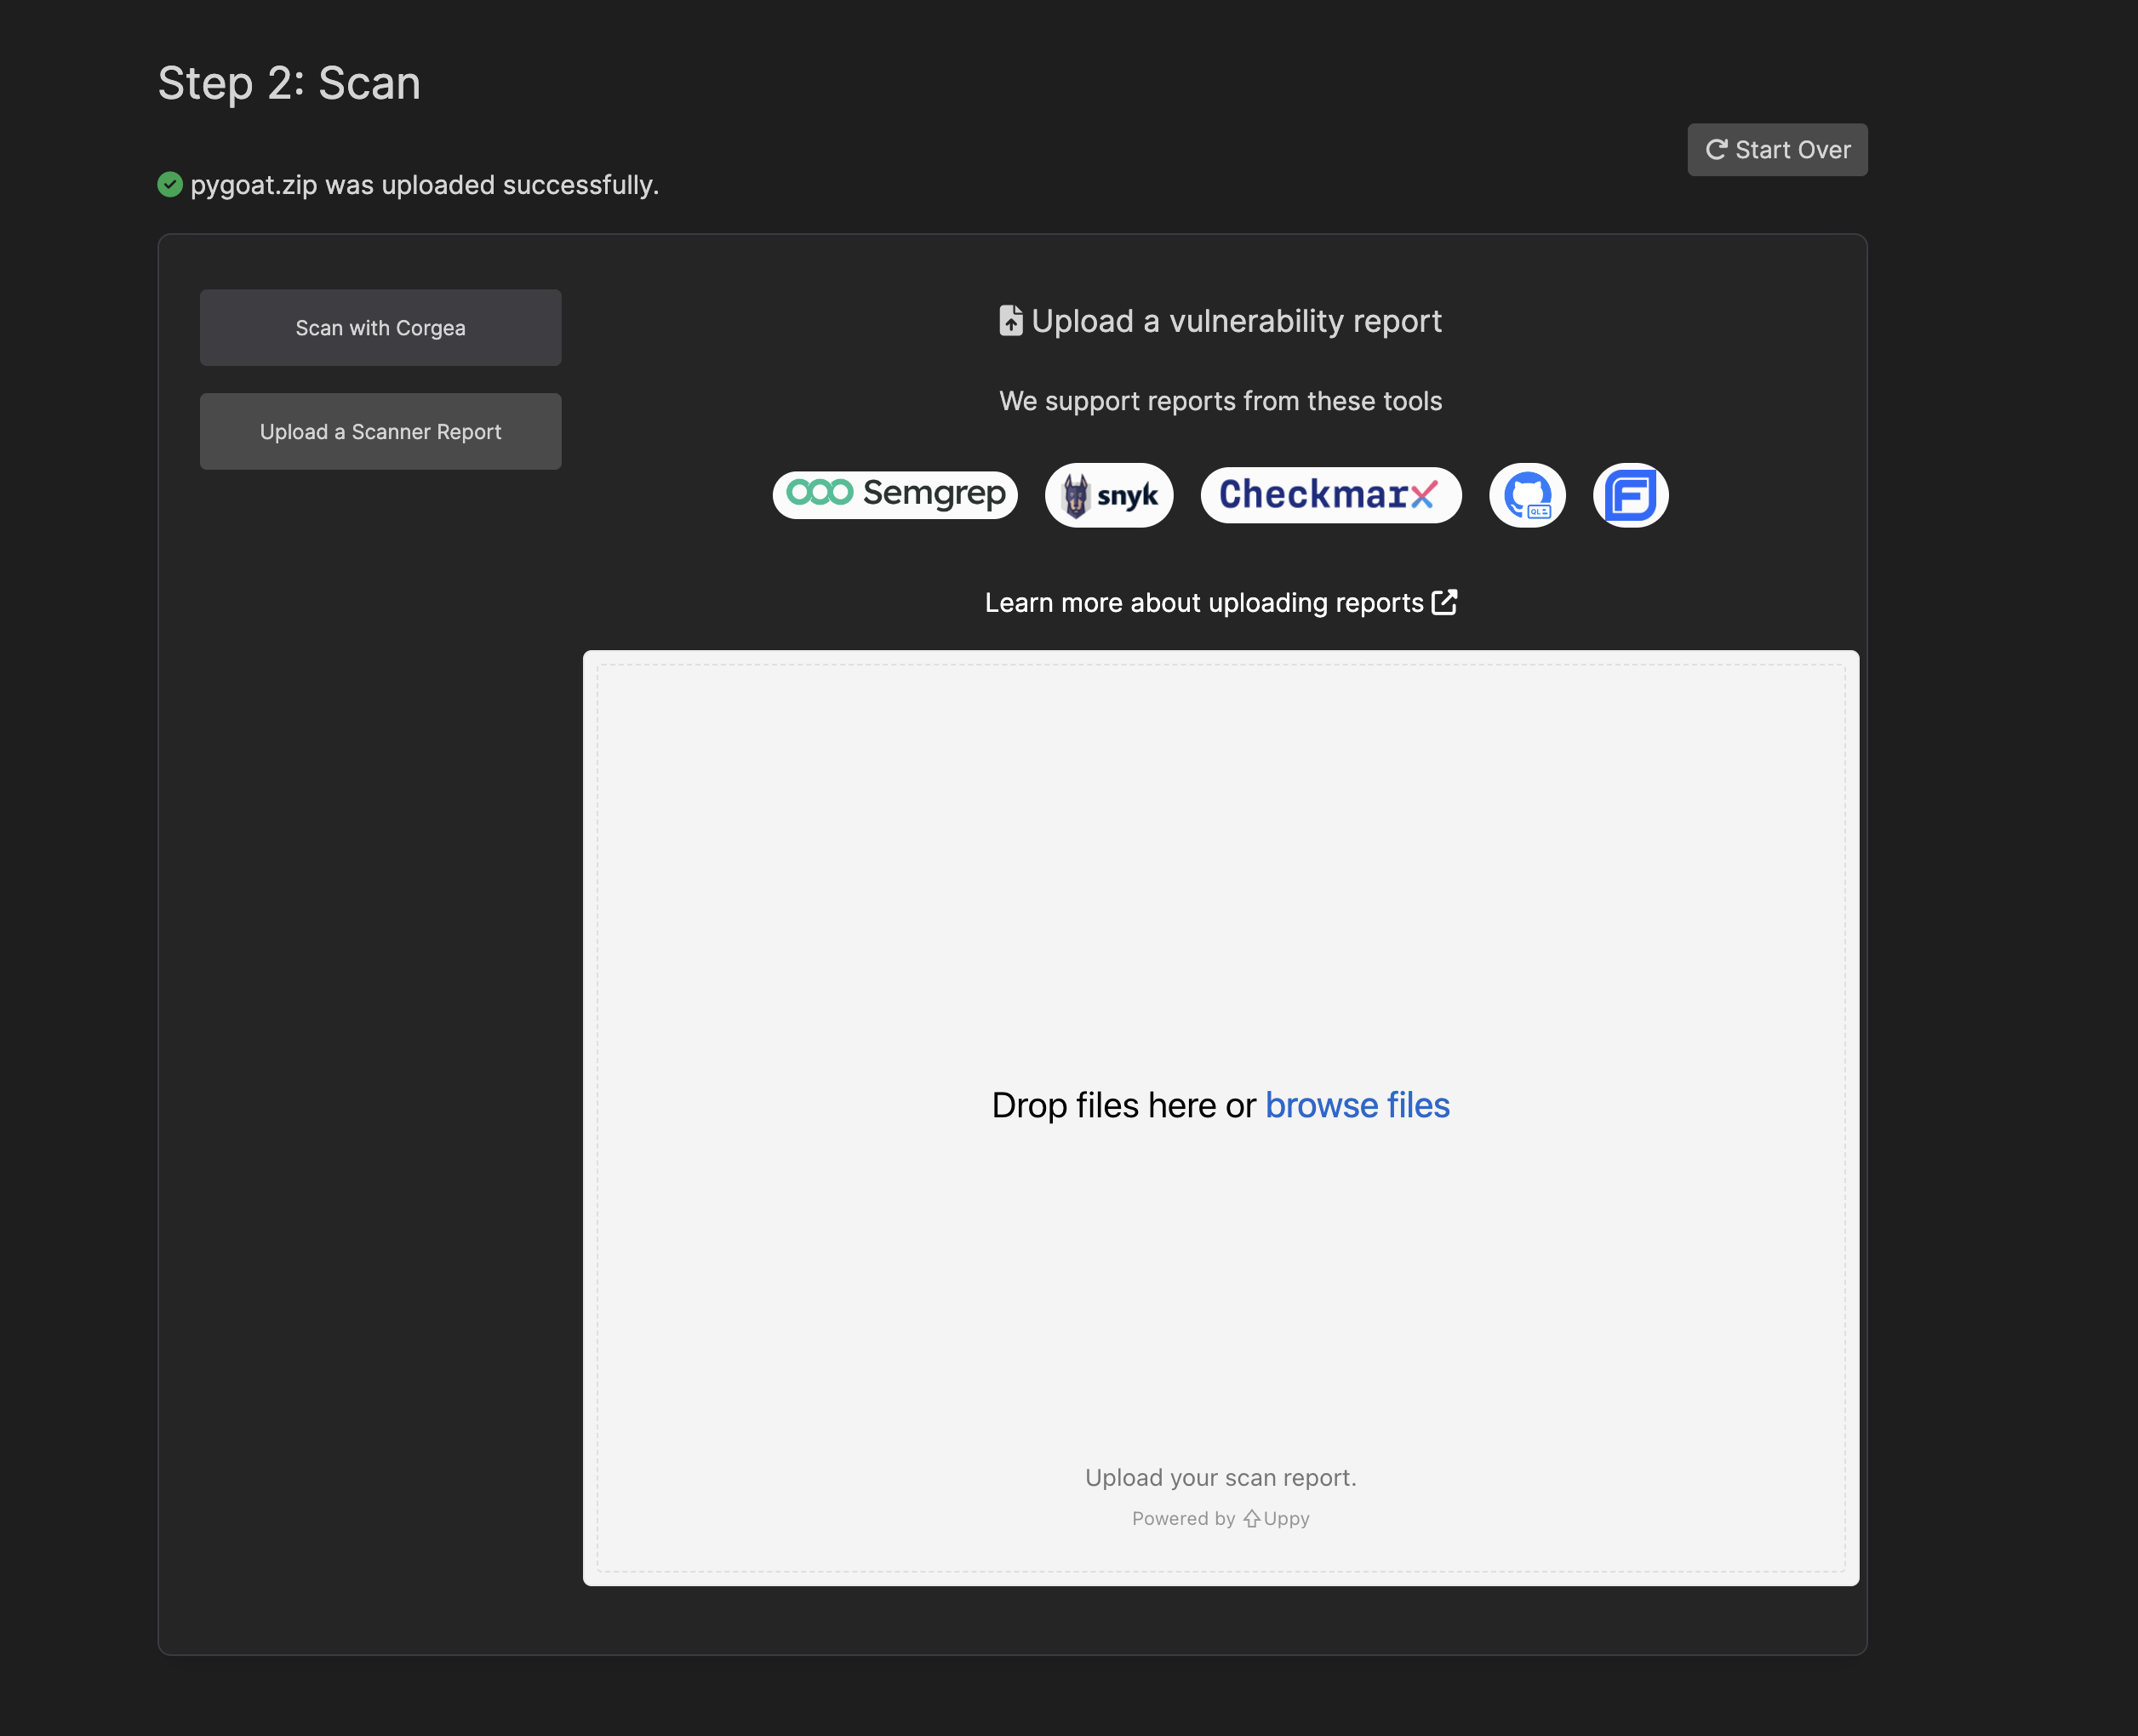 Select the report file (typically a JSON file) from your local machine, and drop it into the upload box.
Corgea supports Checkmarx (JSON), CodeQL (JSON), Snyk (SARIF), Semgrep (JSON), Fortify (FPR), and Coverity (XML) scans.
Once the report is uploaded successfully, Corgea will process your project and report.
You will be redirected to the Corgea dashboard, where you can view the analysis results for your project.
By following these steps, you can easily add your project and upload security reports to Corgea for analysis and remediation.
### Corgea CLI
The Corgea CLI (Command-Line Interface) provides advanced features for integrating Corgea with your CI/CD pipeline, performing custom scans, and uploading large projects (>200MB).
Click on the "Corgea CLI" accordion to learn more about installing and using the [CLI](install_cli).
You can install the Corgea CLI using pip:
```bash theme={null}
pip install corgea-cli
```
[More on the CLI here](install_cli)
#### Upload with the CLI
Go to the repository you want to scan:
```bash Bash theme={null}
cd <>
```
```bash Semgrep theme={null}
corgea scan semgrep
```
```bash Snyk theme={null}
corgea scan snyk
```
```bash Custom project name theme={null}
corgea upload report.json --project-name my-service
```
```bash Checkmarx theme={null}
# Create a scan with a JSON output for example:
cx scan create --project-name juice-shop -s . --branch master --scan-types sast --report-format json --output-name report
#Upload the vulnerability report to Corgea
corgea upload report.json
```
```bash CodeQL theme={null}
corgea upload
```
```bash Fortify theme={null}
corgea upload
```
```bash Coverity theme={null}
corgea upload
```
Once a scan is completed a scan report will be generated in the repository folder and a copy will be sent to Corgea for processing.
Select the report file (typically a JSON file) from your local machine, and drop it into the upload box.
Corgea supports Checkmarx (JSON), CodeQL (JSON), Snyk (SARIF), Semgrep (JSON), Fortify (FPR), and Coverity (XML) scans.
Once the report is uploaded successfully, Corgea will process your project and report.
You will be redirected to the Corgea dashboard, where you can view the analysis results for your project.
By following these steps, you can easily add your project and upload security reports to Corgea for analysis and remediation.
### Corgea CLI
The Corgea CLI (Command-Line Interface) provides advanced features for integrating Corgea with your CI/CD pipeline, performing custom scans, and uploading large projects (>200MB).
Click on the "Corgea CLI" accordion to learn more about installing and using the [CLI](install_cli).
You can install the Corgea CLI using pip:
```bash theme={null}
pip install corgea-cli
```
[More on the CLI here](install_cli)
#### Upload with the CLI
Go to the repository you want to scan:
```bash Bash theme={null}
cd <>
```
```bash Semgrep theme={null}
corgea scan semgrep
```
```bash Snyk theme={null}
corgea scan snyk
```
```bash Custom project name theme={null}
corgea upload report.json --project-name my-service
```
```bash Checkmarx theme={null}
# Create a scan with a JSON output for example:
cx scan create --project-name juice-shop -s . --branch master --scan-types sast --report-format json --output-name report
#Upload the vulnerability report to Corgea
corgea upload report.json
```
```bash CodeQL theme={null}
corgea upload
```
```bash Fortify theme={null}
corgea upload
```
```bash Coverity theme={null}
corgea upload
```
Once a scan is completed a scan report will be generated in the repository folder and a copy will be sent to Corgea for processing.
 Depending on the size of the results in the scan, it may take sometime for results to show up. For a couple of hundred findings, it should take 10 mins.
Go to [fixes](fixes) to learn more.
## Troubleshooting
This error happens because you haven't installed the Corega CLI or its not available in your PATH.
```
bash: corgea: command not found
```
Follow the instructions in the [install CLI section](http://localhost:3001/install_cli) to install the CLI.
Double check you have logged into the CLI with the correct token from [https://www.corgea.app/integrations/](https://www.corgea.app/integrations/)
You might receive an error that you're not logged into your SAST/SCA tool.
Some tools require you to login to use the tool. For example, you can login to Semgrep with the following command:
```
semgrep login
```
You might receive an error that you're not logged into your SAST/SCA tool.
Some tools require you to login to use the tool. For example, you can login to Semgrep with the following command:
```
Command failed with output:
fatal: not a git repository (or any of the parent directories): .git
Failed to run 'git show -s --format=%B'. Possible reasons:
- the git binary is not available
- the current working directory is not a git repository
- the current working directory is not marked as safe
(fix with `git config --global --add safe.directory $(pwd)`)
Try running the command yourself to debug the issue.
Could not start scan Command failed with exit code: 128
```
Depending on the size of the results in the scan, it may take sometime for results to show up. For a couple of hundred findings, it should take 10 mins.
Go to [fixes](fixes) to learn more.
## Troubleshooting
This error happens because you haven't installed the Corega CLI or its not available in your PATH.
```
bash: corgea: command not found
```
Follow the instructions in the [install CLI section](http://localhost:3001/install_cli) to install the CLI.
Double check you have logged into the CLI with the correct token from [https://www.corgea.app/integrations/](https://www.corgea.app/integrations/)
You might receive an error that you're not logged into your SAST/SCA tool.
Some tools require you to login to use the tool. For example, you can login to Semgrep with the following command:
```
semgrep login
```
You might receive an error that you're not logged into your SAST/SCA tool.
Some tools require you to login to use the tool. For example, you can login to Semgrep with the following command:
```
Command failed with output:
fatal: not a git repository (or any of the parent directories): .git
Failed to run 'git show -s --format=%B'. Possible reasons:
- the git binary is not available
- the current working directory is not a git repository
- the current working directory is not marked as safe
(fix with `git config --global --add safe.directory $(pwd)`)
Try running the command yourself to debug the issue.
Could not start scan Command failed with exit code: 128
```