> ## Documentation Index
> Fetch the complete documentation index at: https://docs.corgea.app/llms.txt
> Use this file to discover all available pages before exploring further.
# SLA Management
> Configure and manage Service Level Agreements (SLAs) for security issues
SLA Management lets you define remediation and escalation timeframes by urgency for **SAST (code)** and **SCA (dependency)** findings. When deadlines are missed, Corgea can notify your team by **email** and/or **webhook** (`sla.violation` events).
## Who it's For
Project managers, security teams, and developers who need predictable response times for open findings.
## Key Features
* Separate SLAs for **Code Vulnerability (SAST)** and **Dependency Vulnerability (SCA)**
* Configurable remediation and escalation timeframes per urgency (Critical, High, Medium, Low)
* **Email** summaries when deadlines are missed (recipients depend on issue type and deadline stage)
* **Webhook** notifications via Corgea webhooks (`sla.violation` event) — use an existing integration webhook or create one from the SLA form
* Daily automated checks for breached deadlines (`overdue` / `escalated`)
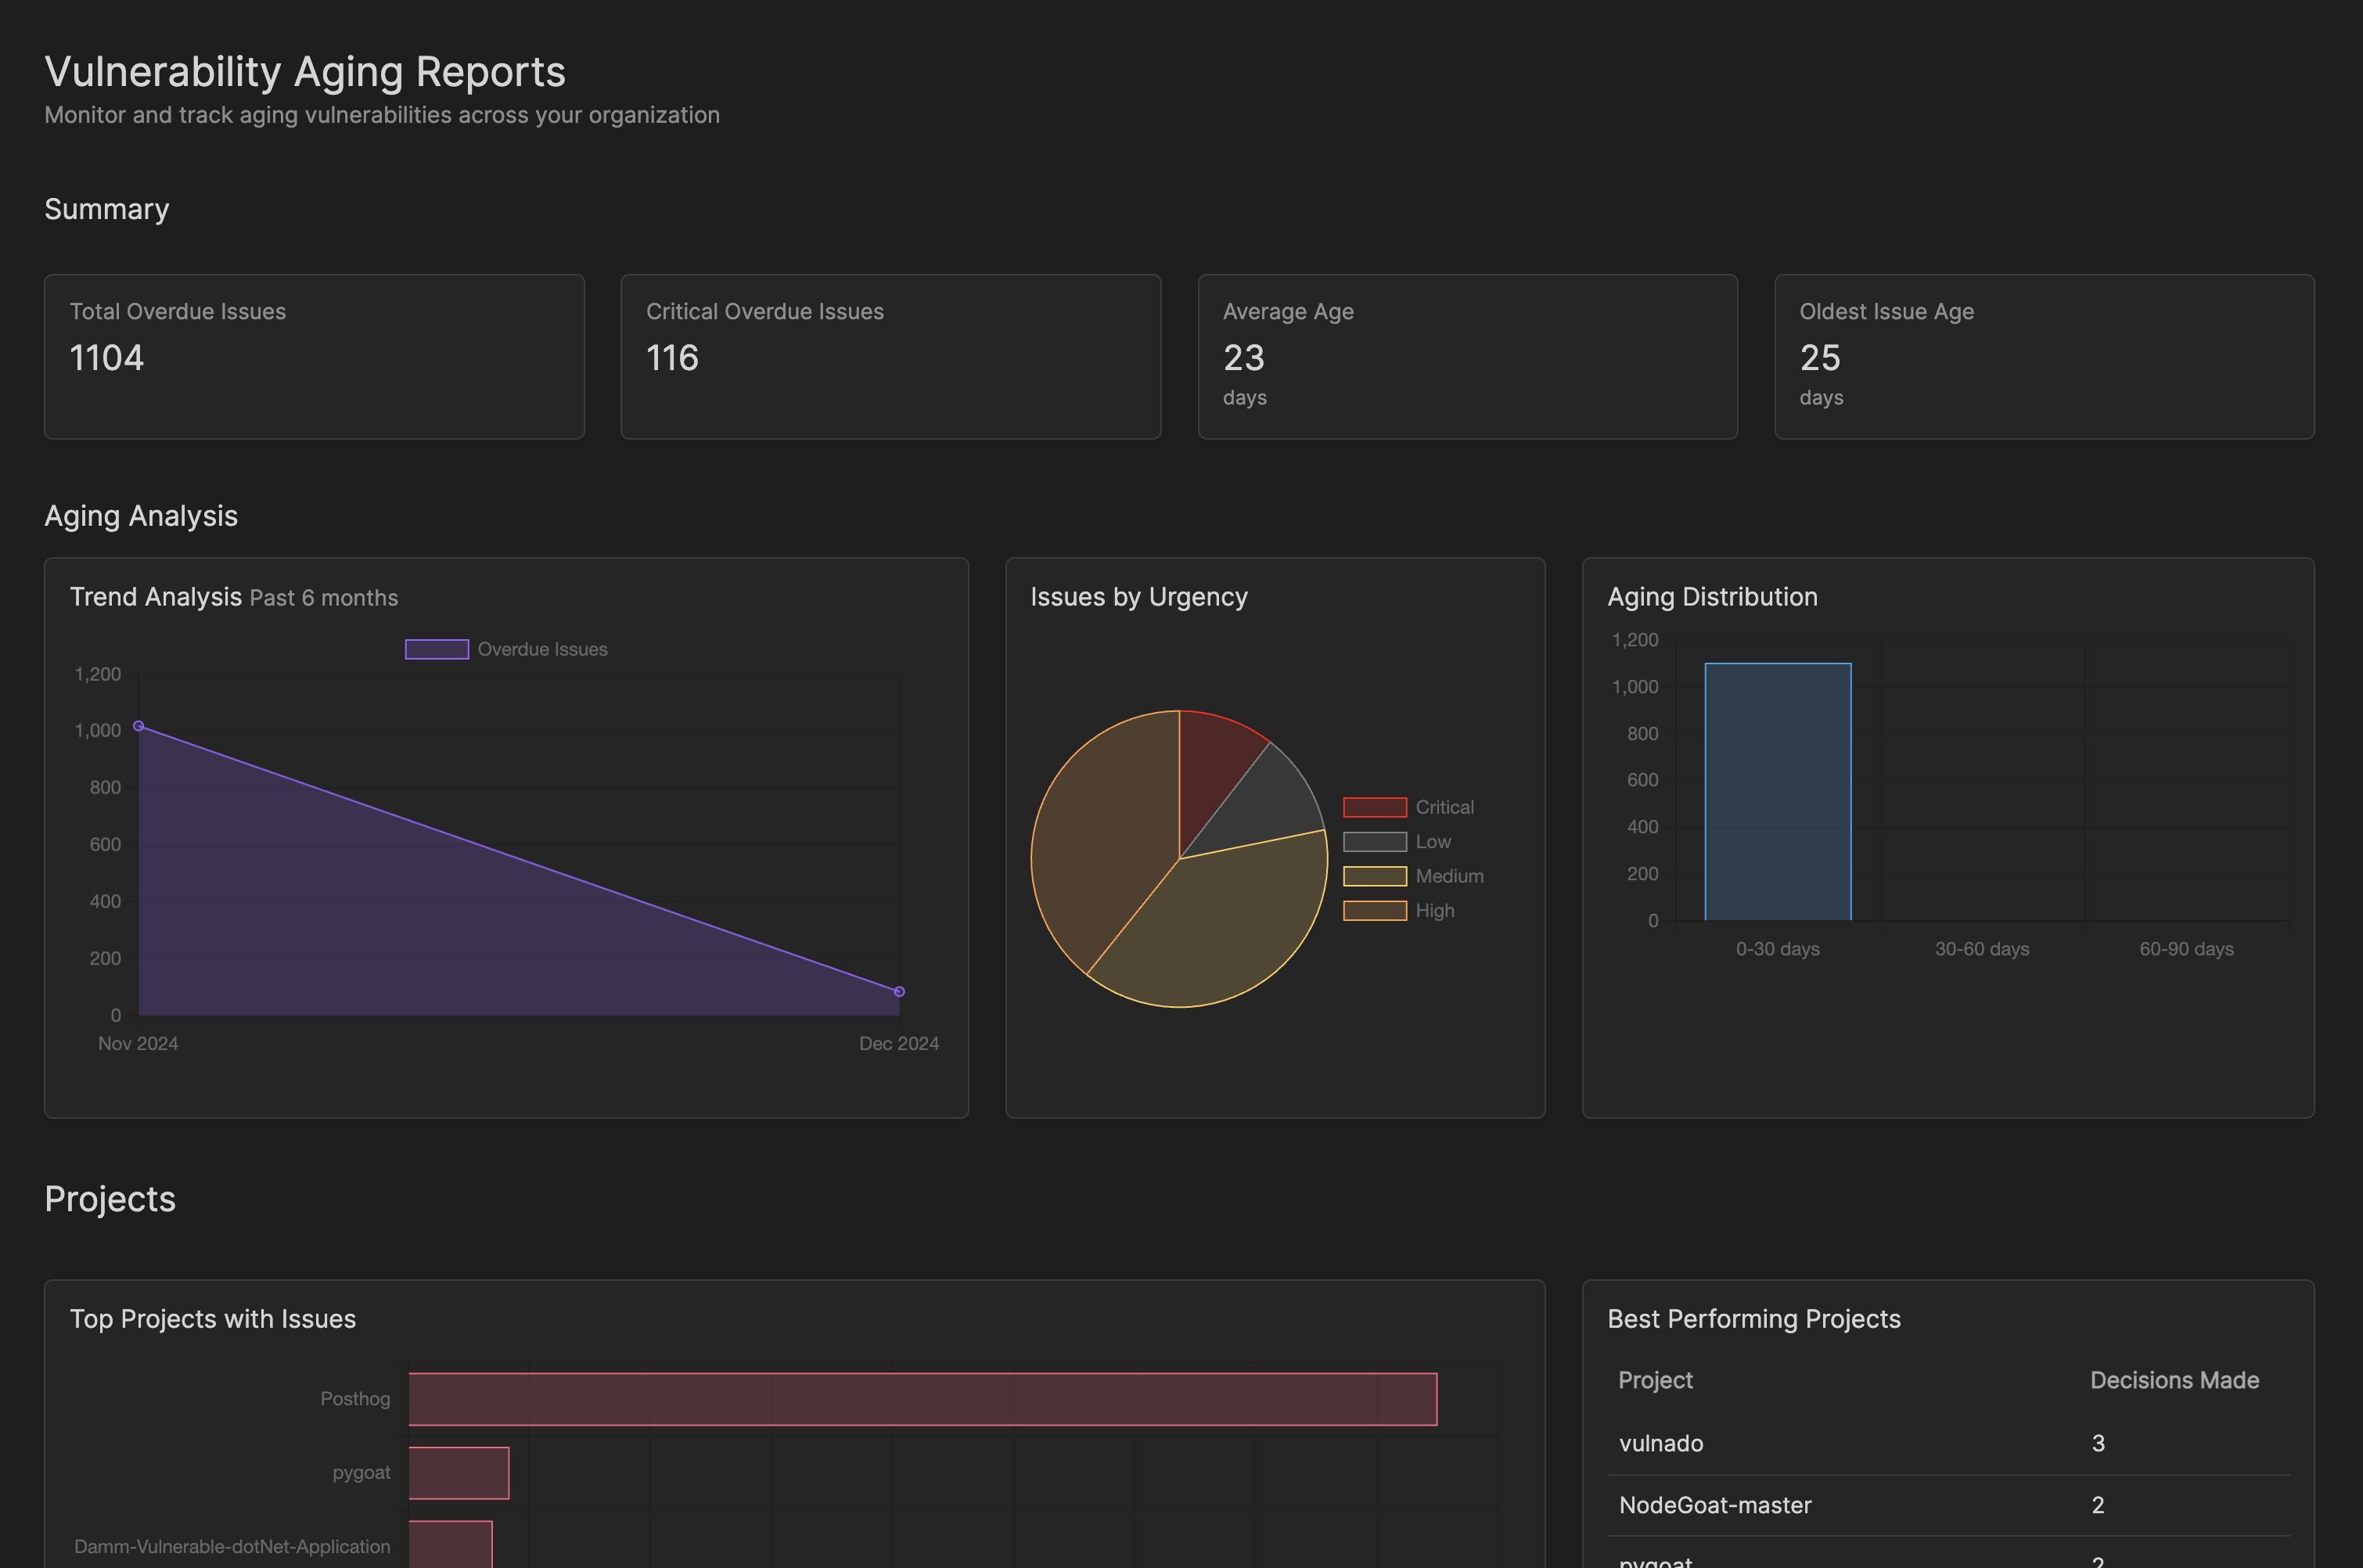
* SLA breach status on issues and in **Issue Aging** reporting (SAST)
## How to Access
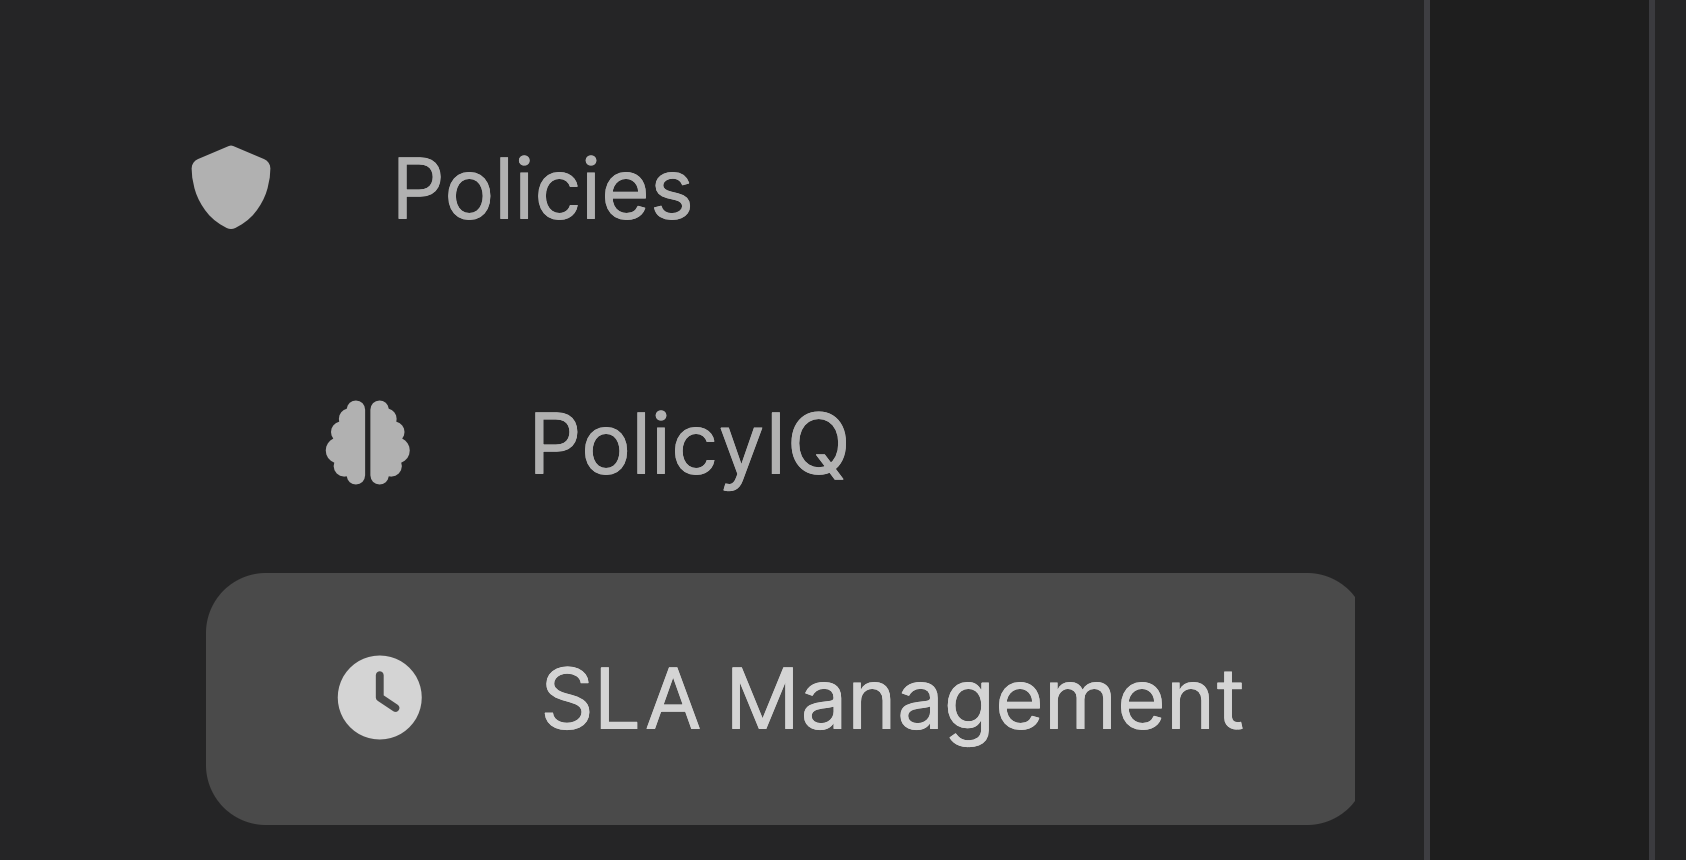
Go to **Policies → SLA Management**. Requires the appropriate plan and `Issue SLA` permissions.
## Setup Instructions
Navigate to **Policies** and open **SLA Management**.
 Click **Create Issue SLA**.
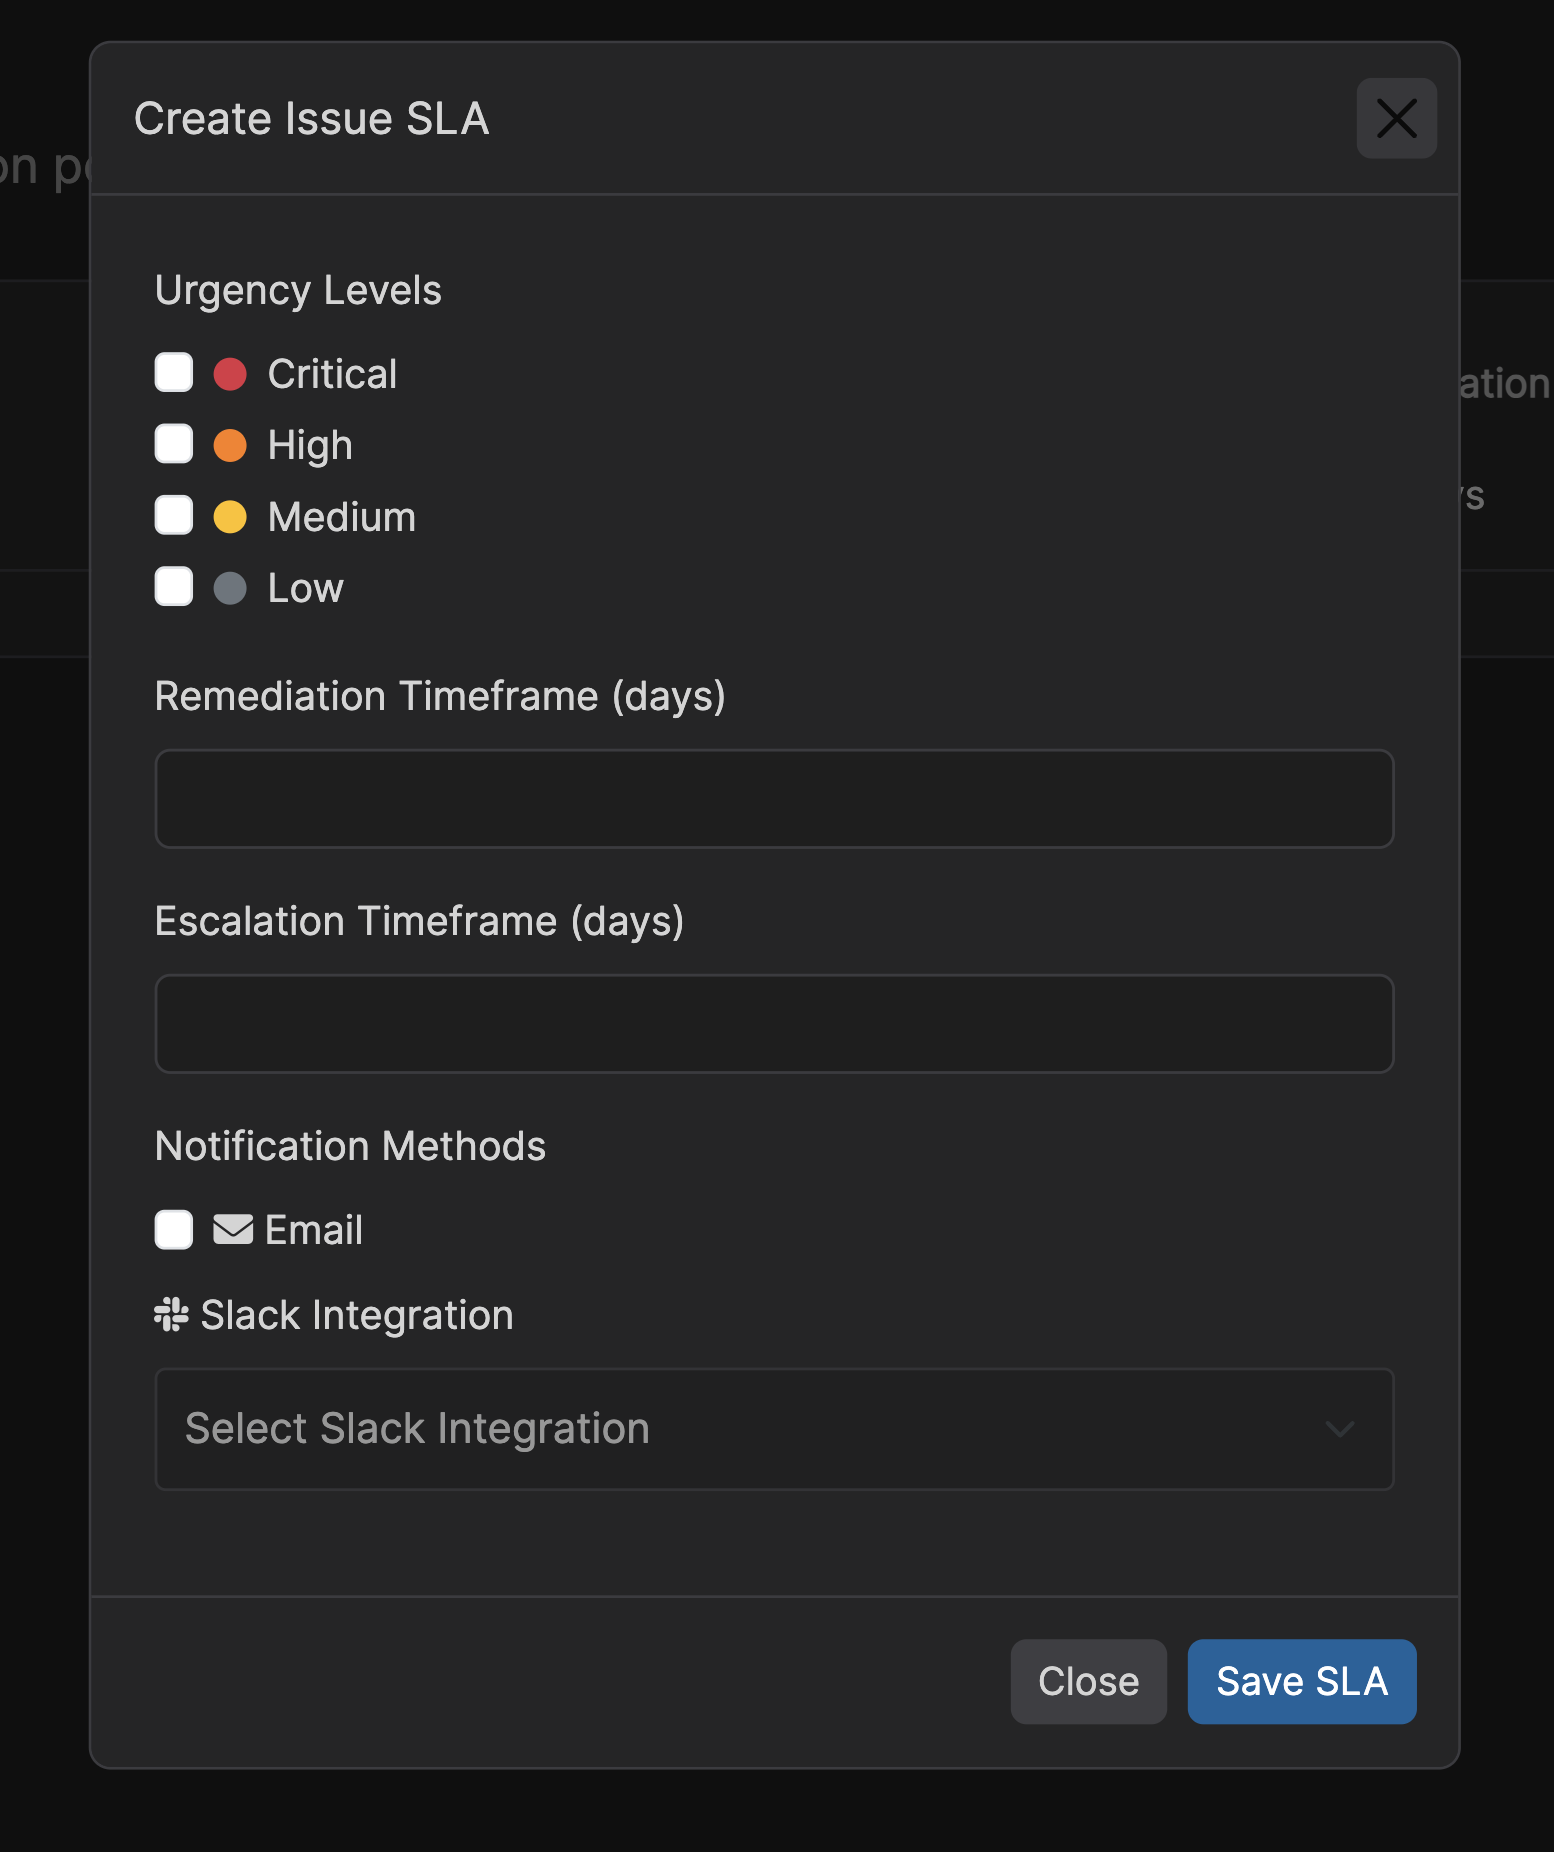 Select **Code Vulnerability (SAST)** or **Dependency Vulnerability (SCA)**. Each SLA applies only to the selected type.
Choose urgency levels and set **Remediation** and **Escalation** timeframes (days).
* **Email** — optional; sends a daily summary to the right people when a deadline is missed (see below).
* **Webhook** — optional; pick an existing webhook from the dropdown or enter a new HTTPS URL (creates a webhook subscribed to `sla.violation`). See [Webhooks](webhooks).
Click **Save SLA**.
## How Notifications Work
Corgea checks open issues **once per day**. Alerts are sent only after a deadline is missed—not while an issue is still within its SLA window.
### Email notifications
Turn on **Email** when creating or editing an SLA. You’ll receive a **daily summary** listing overdue issues by project and severity (one email per person, not one email per issue).
There are two kinds of deadlines:
* **Remediation** — the first alert that an issue is overdue and should be addressed.
* **Escalation** — a later alert, typically for project leads when the issue remains open.
**Who receives the email?** That depends on the issue type and which deadline was missed:
**Code vulnerabilities (SAST)**
| Deadline missed | Who is notified |
| --------------- | ------------------------------------------------------------------------------------------------------------------------------------------ |
| Remediation | The person **assigned** to the issue. If no one is assigned, **project owners**. If the project has no owners, **company administrators**. |
| Escalation | **Project owners**, or **company administrators** if the project has no owners. |
**Dependency vulnerabilities (SCA)**
| Deadline missed | Who is notified |
| --------------- | ------------------------------------------------------------------------------------------------------------------------------------------ |
| Remediation | The person **assigned** to the issue. If no one is assigned, **project owners**. If the project has no owners, **company administrators**. |
| Escalation | **Project owners**, or **company administrators** if the project has no owners. |
Assign dependency issues from the issue details page (**Assignee** dropdown), the same way as code issues.
Add **project owners** under **Project settings** so SLA emails reach the right team. Without owners, notifications go to company administrators.
### Webhook notifications
When a webhook is configured on an SLA, Corgea fires a **`sla.violation`** event to that webhook with a structured JSON payload (see [Webhooks](webhooks)). You can:
* Select an **existing** webhook (Corgea automatically subscribes it to `sla.violation` if needed), or
* Enter a **new URL** to create a dedicated webhook for SLA alerts (HTTPS required).
Webhooks use the same delivery pipeline as other Corgea webhooks (retries, signing, delivery history). For `sla.violation`, **project filters** match if any project in the payload overlaps your filter (useful when one notification spans multiple projects).
SLAs created before this release may still list **Slack** as a notification method. New and edited SLAs use **webhook** instead; subscribe a Slack incoming webhook under **Integrations → Webhooks** and select it on the SLA form.
## Editing and Managing SLAs
* Use **Edit** on an existing SLA. The form pre-fills issue type, urgency, timeframes, email checkbox, and the selected webhook (if any).
* The SLA table shows **Type** (SAST or SCA), timeframes, and configured notification methods.
## Reporting and Issue Status
* **Reporting → Aging** includes overdue **code** and **dependency** issues (summary counts, urgency breakdown, projects, ecosystems, and trends).
* **Code and dependency issues** show SLA status and appear in assignee breakdowns on the aging report when assigned.
* Filter dependency SLA status on scan dependency views when an SCA SLA applies.
Select **Code Vulnerability (SAST)** or **Dependency Vulnerability (SCA)**. Each SLA applies only to the selected type.
Choose urgency levels and set **Remediation** and **Escalation** timeframes (days).
* **Email** — optional; sends a daily summary to the right people when a deadline is missed (see below).
* **Webhook** — optional; pick an existing webhook from the dropdown or enter a new HTTPS URL (creates a webhook subscribed to `sla.violation`). See [Webhooks](webhooks).
Click **Save SLA**.
## How Notifications Work
Corgea checks open issues **once per day**. Alerts are sent only after a deadline is missed—not while an issue is still within its SLA window.
### Email notifications
Turn on **Email** when creating or editing an SLA. You’ll receive a **daily summary** listing overdue issues by project and severity (one email per person, not one email per issue).
There are two kinds of deadlines:
* **Remediation** — the first alert that an issue is overdue and should be addressed.
* **Escalation** — a later alert, typically for project leads when the issue remains open.
**Who receives the email?** That depends on the issue type and which deadline was missed:
**Code vulnerabilities (SAST)**
| Deadline missed | Who is notified |
| --------------- | ------------------------------------------------------------------------------------------------------------------------------------------ |
| Remediation | The person **assigned** to the issue. If no one is assigned, **project owners**. If the project has no owners, **company administrators**. |
| Escalation | **Project owners**, or **company administrators** if the project has no owners. |
**Dependency vulnerabilities (SCA)**
| Deadline missed | Who is notified |
| --------------- | ------------------------------------------------------------------------------------------------------------------------------------------ |
| Remediation | The person **assigned** to the issue. If no one is assigned, **project owners**. If the project has no owners, **company administrators**. |
| Escalation | **Project owners**, or **company administrators** if the project has no owners. |
Assign dependency issues from the issue details page (**Assignee** dropdown), the same way as code issues.
Add **project owners** under **Project settings** so SLA emails reach the right team. Without owners, notifications go to company administrators.
### Webhook notifications
When a webhook is configured on an SLA, Corgea fires a **`sla.violation`** event to that webhook with a structured JSON payload (see [Webhooks](webhooks)). You can:
* Select an **existing** webhook (Corgea automatically subscribes it to `sla.violation` if needed), or
* Enter a **new URL** to create a dedicated webhook for SLA alerts (HTTPS required).
Webhooks use the same delivery pipeline as other Corgea webhooks (retries, signing, delivery history). For `sla.violation`, **project filters** match if any project in the payload overlaps your filter (useful when one notification spans multiple projects).
SLAs created before this release may still list **Slack** as a notification method. New and edited SLAs use **webhook** instead; subscribe a Slack incoming webhook under **Integrations → Webhooks** and select it on the SLA form.
## Editing and Managing SLAs
* Use **Edit** on an existing SLA. The form pre-fills issue type, urgency, timeframes, email checkbox, and the selected webhook (if any).
* The SLA table shows **Type** (SAST or SCA), timeframes, and configured notification methods.
## Reporting and Issue Status
* **Reporting → Aging** includes overdue **code** and **dependency** issues (summary counts, urgency breakdown, projects, ecosystems, and trends).
* **Code and dependency issues** show SLA status and appear in assignee breakdowns on the aging report when assigned.
* Filter dependency SLA status on scan dependency views when an SCA SLA applies.
 ## Examples
### SLA for critical code findings
Create an SLA with type **Code Vulnerability (SAST)** and **Critical** urgency.
Set remediation to 2 days and escalation to 3 days.
Enable **Email** and select a Slack or Teams webhook subscribed to `sla.violation`.
### SLA for high-severity dependencies
Create an SLA with type **Dependency Vulnerability (SCA)** and **High** (and **Critical**, if desired) urgency.
Set remediation and escalation windows appropriate for your patch cadence.
Use **Email** to project owners and/or a webhook for your security channel.
## Best Practices
* Use short remediation windows in non-production environments to validate email and webhook delivery.
* Assign project owners on all active projects that have SLAs.
* Prefer integration webhooks (Slack, Zapier, custom) subscribed to `sla.violation` for team channels instead of one-off URLs when possible.
* Define separate SAST and SCA SLAs when remediation timelines differ between code fixes and dependency upgrades.
## Troubleshooting
* **No emails** — Confirm **Email** is enabled on the SLA, issues have actually missed a deadline, and the expected recipients (assignee, project owners, or admins) have valid email addresses on their Corgea accounts.
* **No webhooks** — Confirm the SLA has a webhook selected or created, the webhook is **active**, and issues have actually breached the SLA. Check **Integrations → Webhooks → History**.
* **Empty recipient list** — Add project owners or company Admin users with valid email addresses.
* **SCA issues not matching** — Ensure the issue’s project is linked via the scan and urgency matches the SLA rule.
## Examples
### SLA for critical code findings
Create an SLA with type **Code Vulnerability (SAST)** and **Critical** urgency.
Set remediation to 2 days and escalation to 3 days.
Enable **Email** and select a Slack or Teams webhook subscribed to `sla.violation`.
### SLA for high-severity dependencies
Create an SLA with type **Dependency Vulnerability (SCA)** and **High** (and **Critical**, if desired) urgency.
Set remediation and escalation windows appropriate for your patch cadence.
Use **Email** to project owners and/or a webhook for your security channel.
## Best Practices
* Use short remediation windows in non-production environments to validate email and webhook delivery.
* Assign project owners on all active projects that have SLAs.
* Prefer integration webhooks (Slack, Zapier, custom) subscribed to `sla.violation` for team channels instead of one-off URLs when possible.
* Define separate SAST and SCA SLAs when remediation timelines differ between code fixes and dependency upgrades.
## Troubleshooting
* **No emails** — Confirm **Email** is enabled on the SLA, issues have actually missed a deadline, and the expected recipients (assignee, project owners, or admins) have valid email addresses on their Corgea accounts.
* **No webhooks** — Confirm the SLA has a webhook selected or created, the webhook is **active**, and issues have actually breached the SLA. Check **Integrations → Webhooks → History**.
* **Empty recipient list** — Add project owners or company Admin users with valid email addresses.
* **SCA issues not matching** — Ensure the issue’s project is linked via the scan and urgency matches the SLA rule.