> ## Documentation Index
> Fetch the complete documentation index at: https://docs.corgea.app/llms.txt
> Use this file to discover all available pages before exploring further.
# Azure DevOps
> Comprehensive Guide to Configuring Azure DevOps with Corgea
The integration of Azure DevOps with Corgea empowers users to seamlessly scan projects and initiate pull requests for code fixes directly from the Corgea platform.
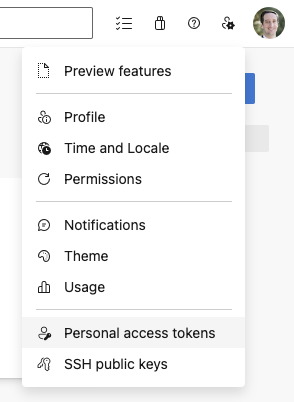
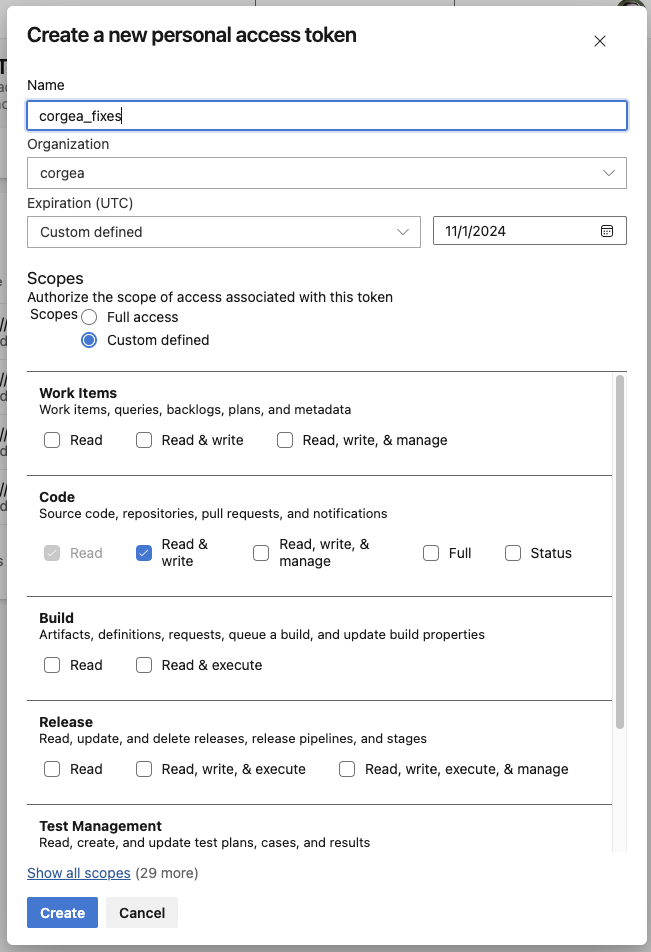
Access your Azure DevOps account and generate a personal access token (PAT) with both read and write permissions.
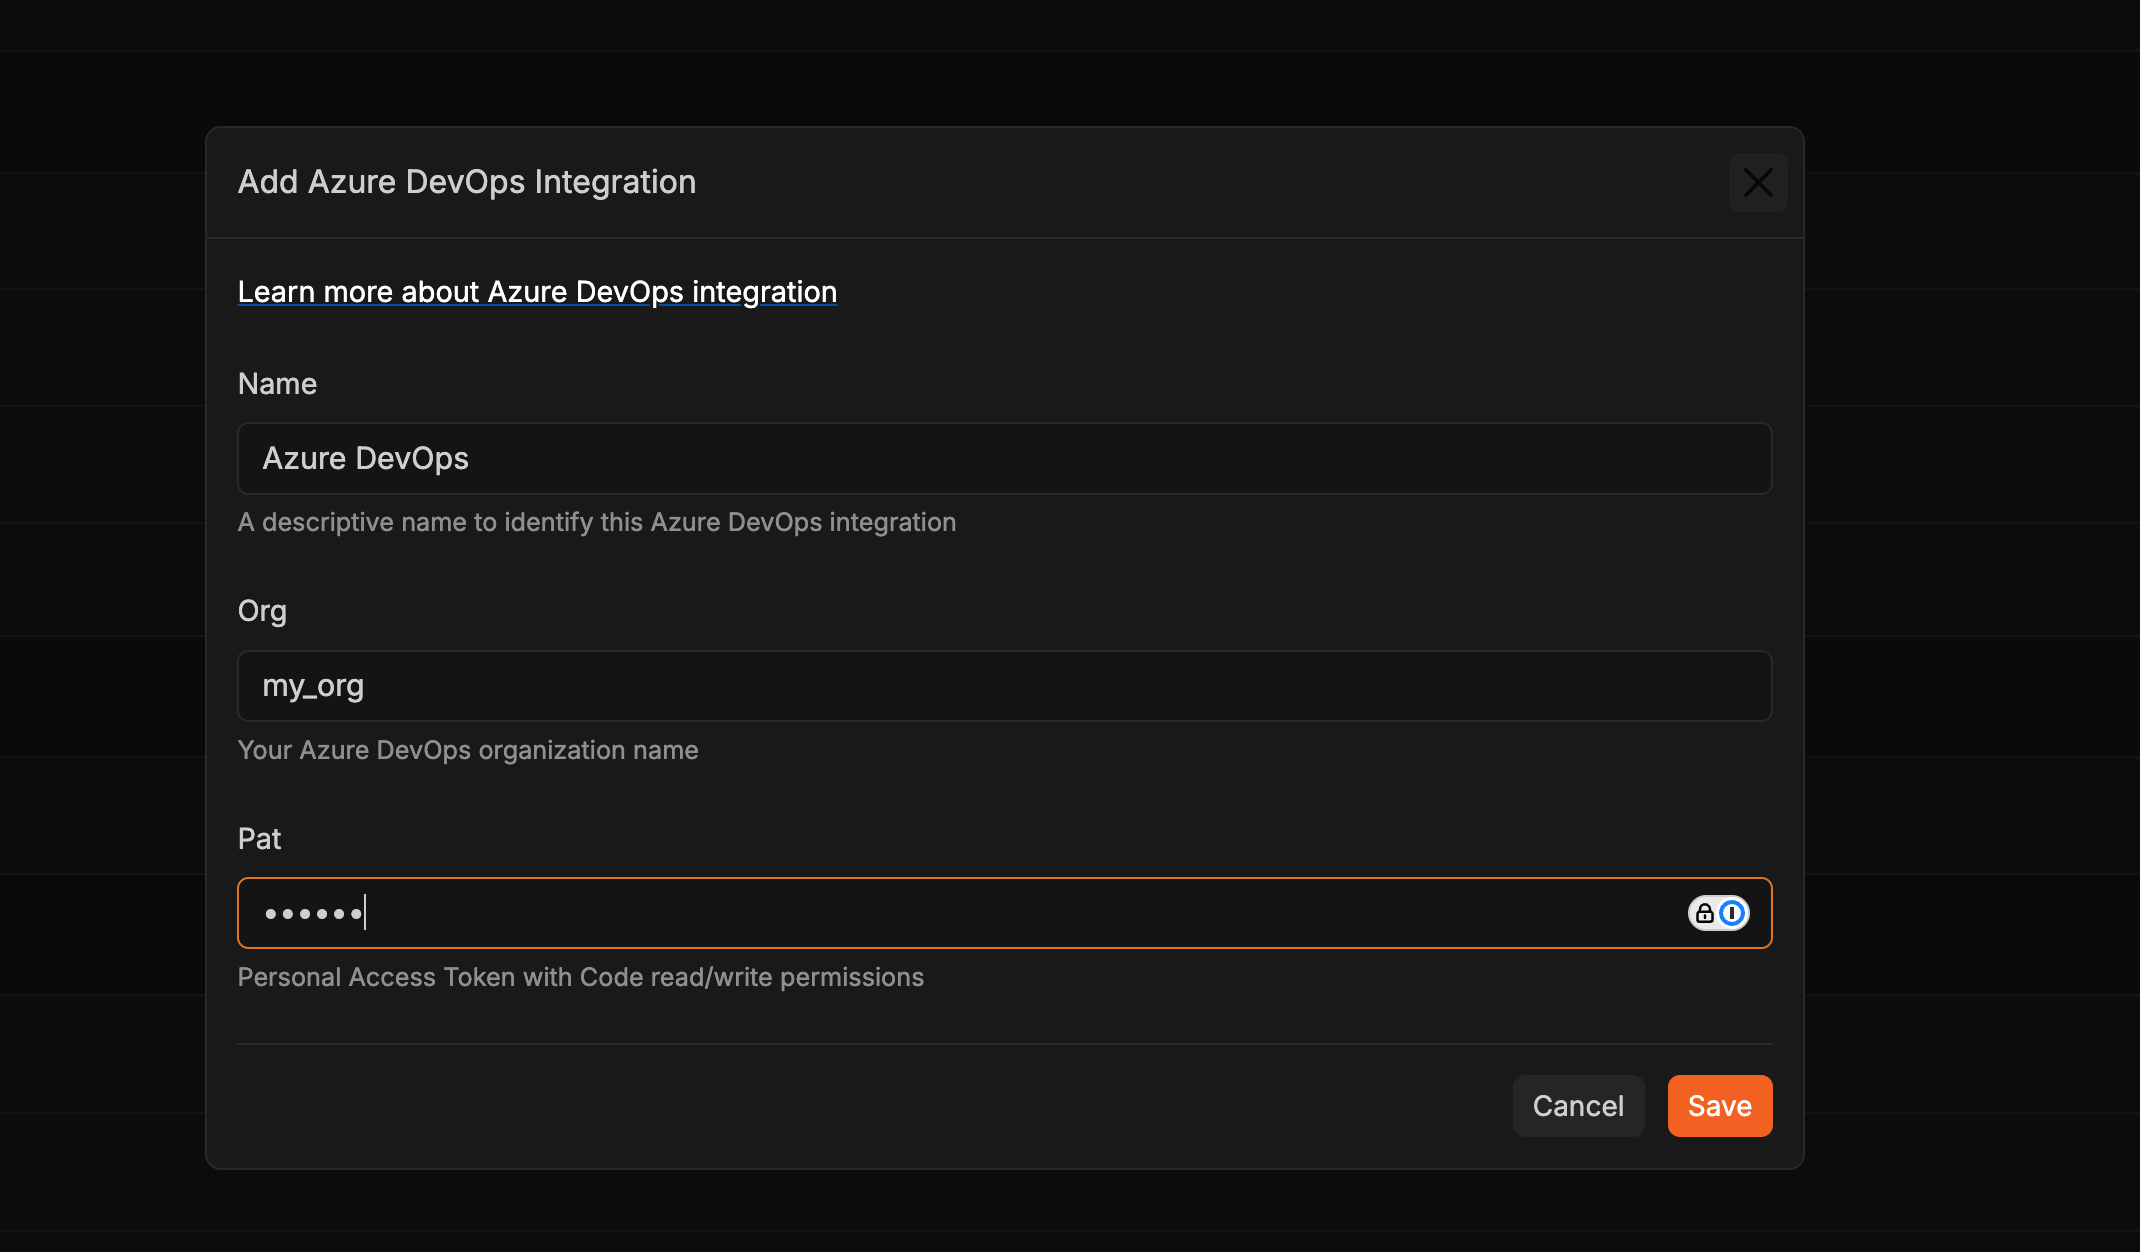
 Proceed to the Integrations page on Corgea. Click the "+" button within the Azure DevOps section and ensure the token is securely saved.
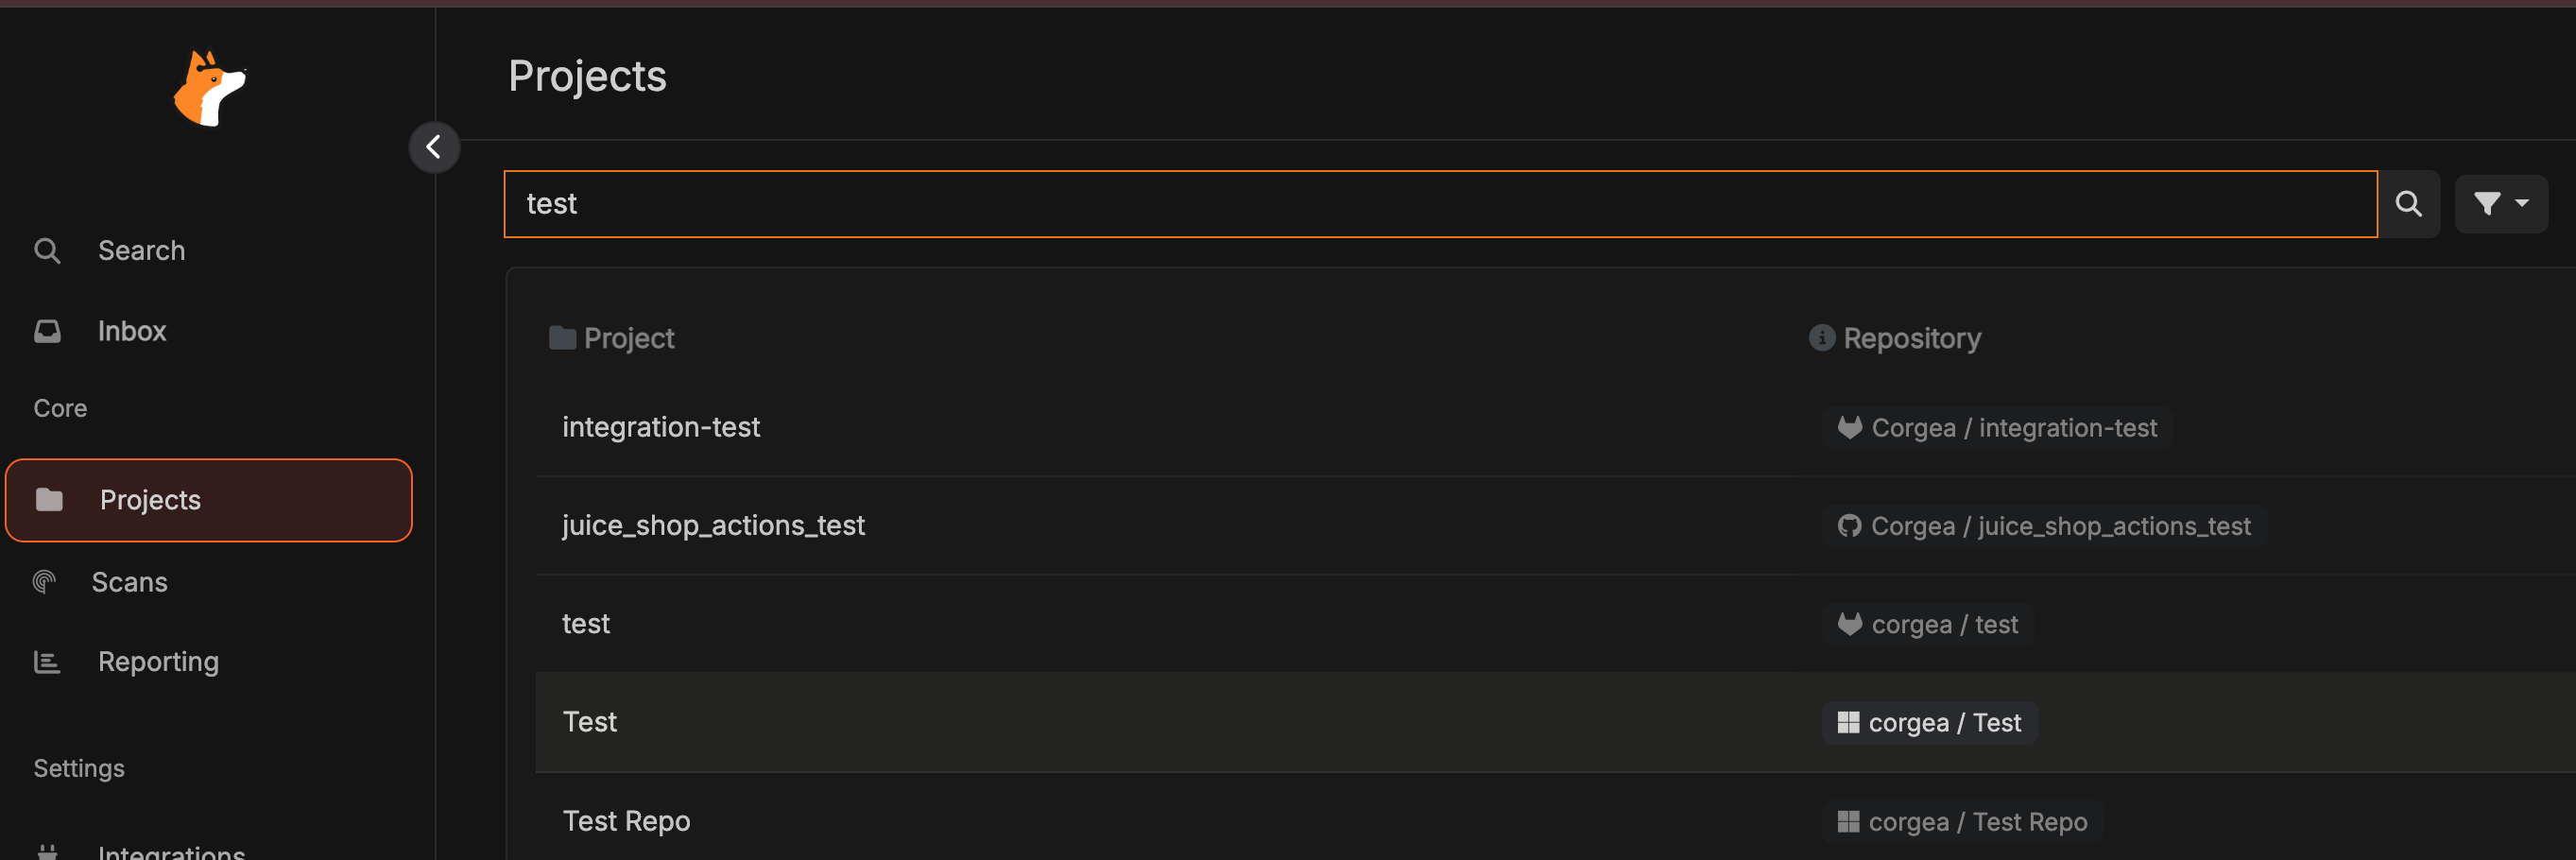
 After configuration, navigate to the Projects page. Your Azure DevOps project will be displayed with a Windows icon. Click the "+" in the action column to initiate the first scan, or select the project name and click "New Scan" to commence a new scan.
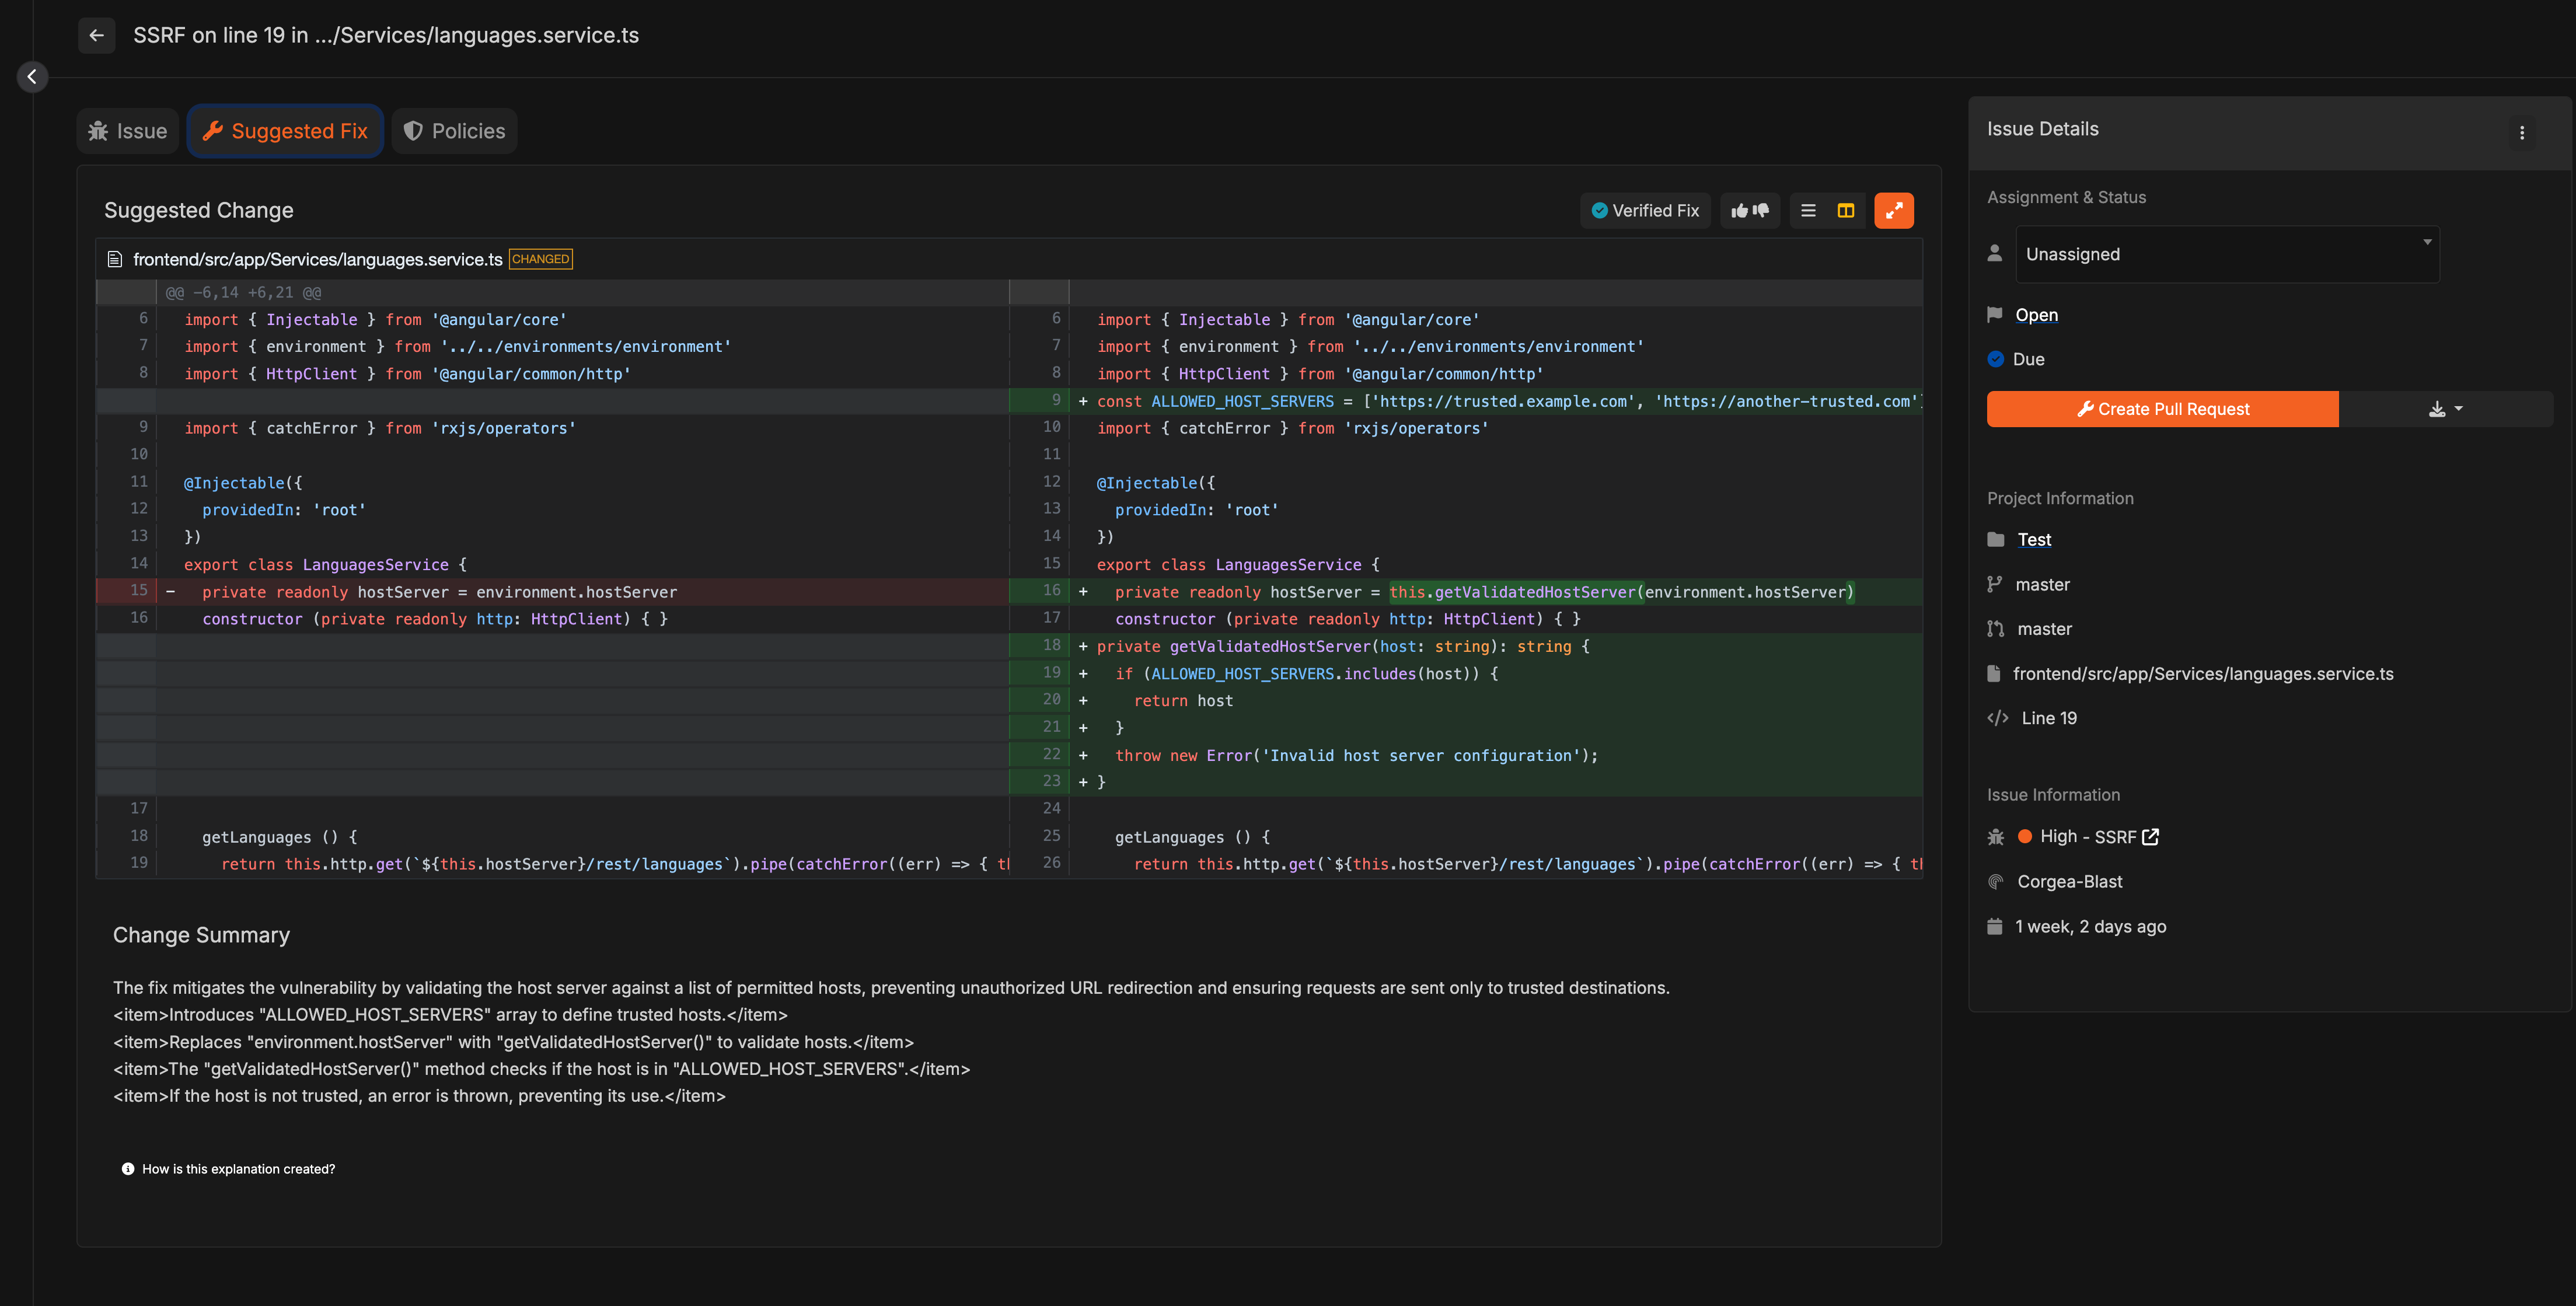
 From any issue page associated with Azure DevOps projects in Corgea, you can submit a pull request to address an issue.
 ## Optional: Webhook Configuration
To enable scans for each pull request, configure a webhook. Ensure you possess the requisite permissions to set up webhooks for your project.
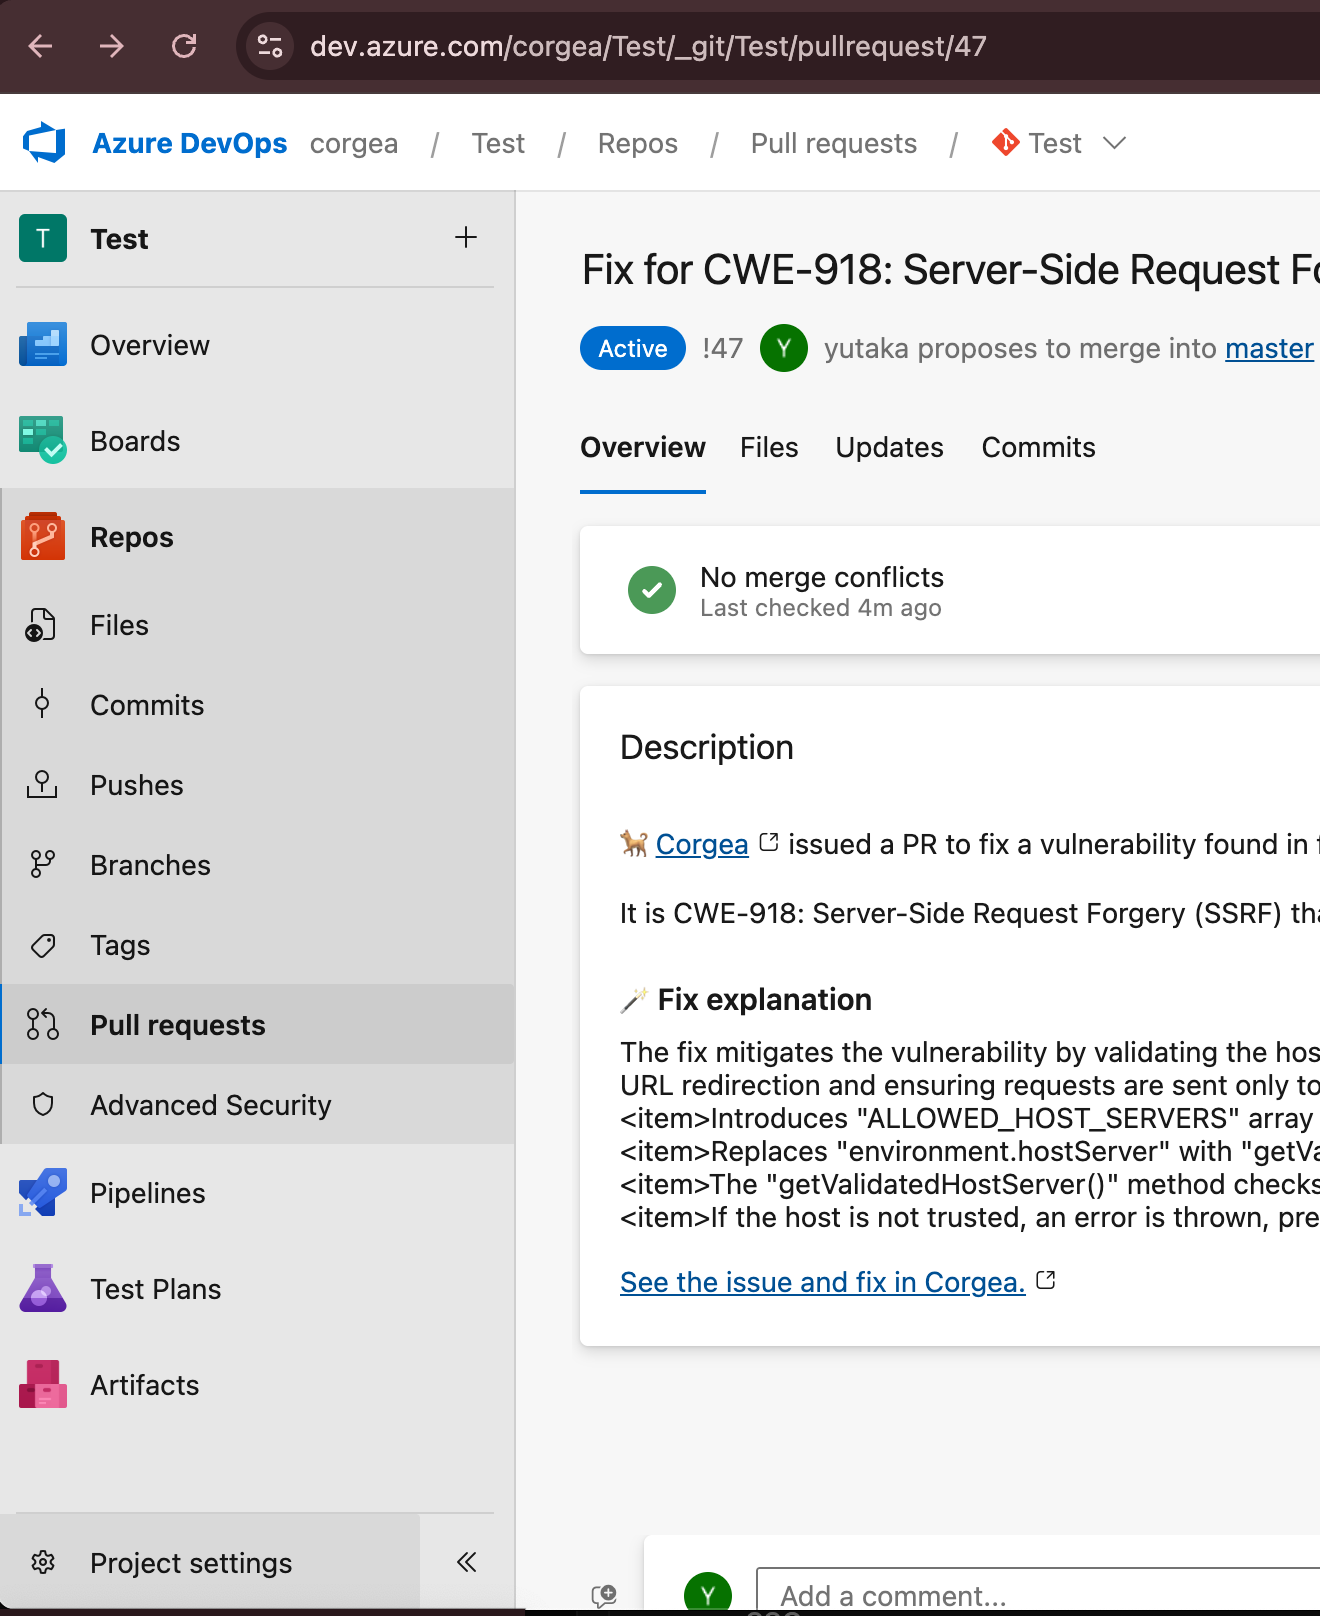
Select "Project settings" located at the bottom left of the Azure DevOps interface.
## Optional: Webhook Configuration
To enable scans for each pull request, configure a webhook. Ensure you possess the requisite permissions to set up webhooks for your project.
Select "Project settings" located at the bottom left of the Azure DevOps interface.
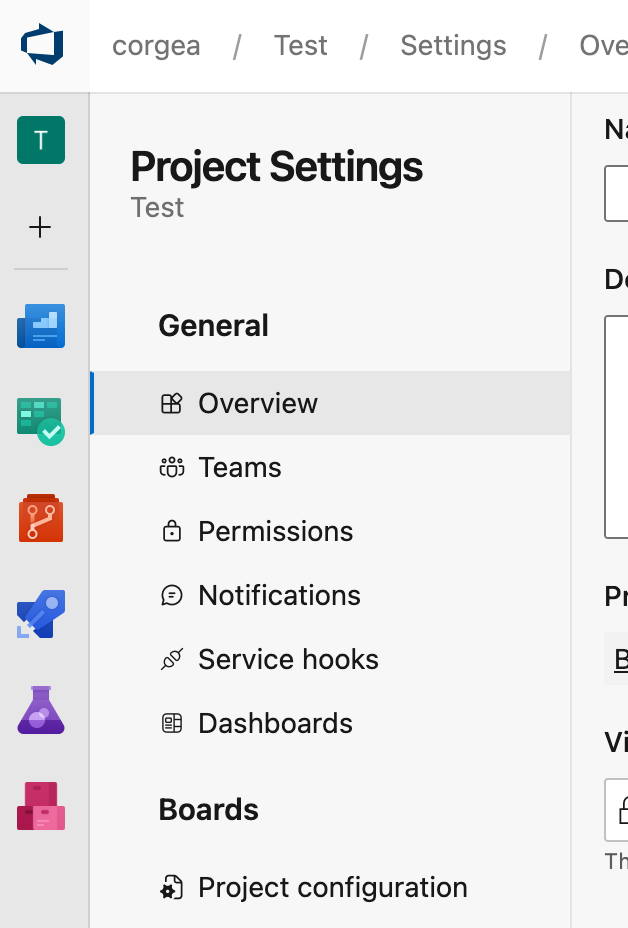
 Click on "Service Hooks". Multiple clicks may be necessary if it does not load immediately.
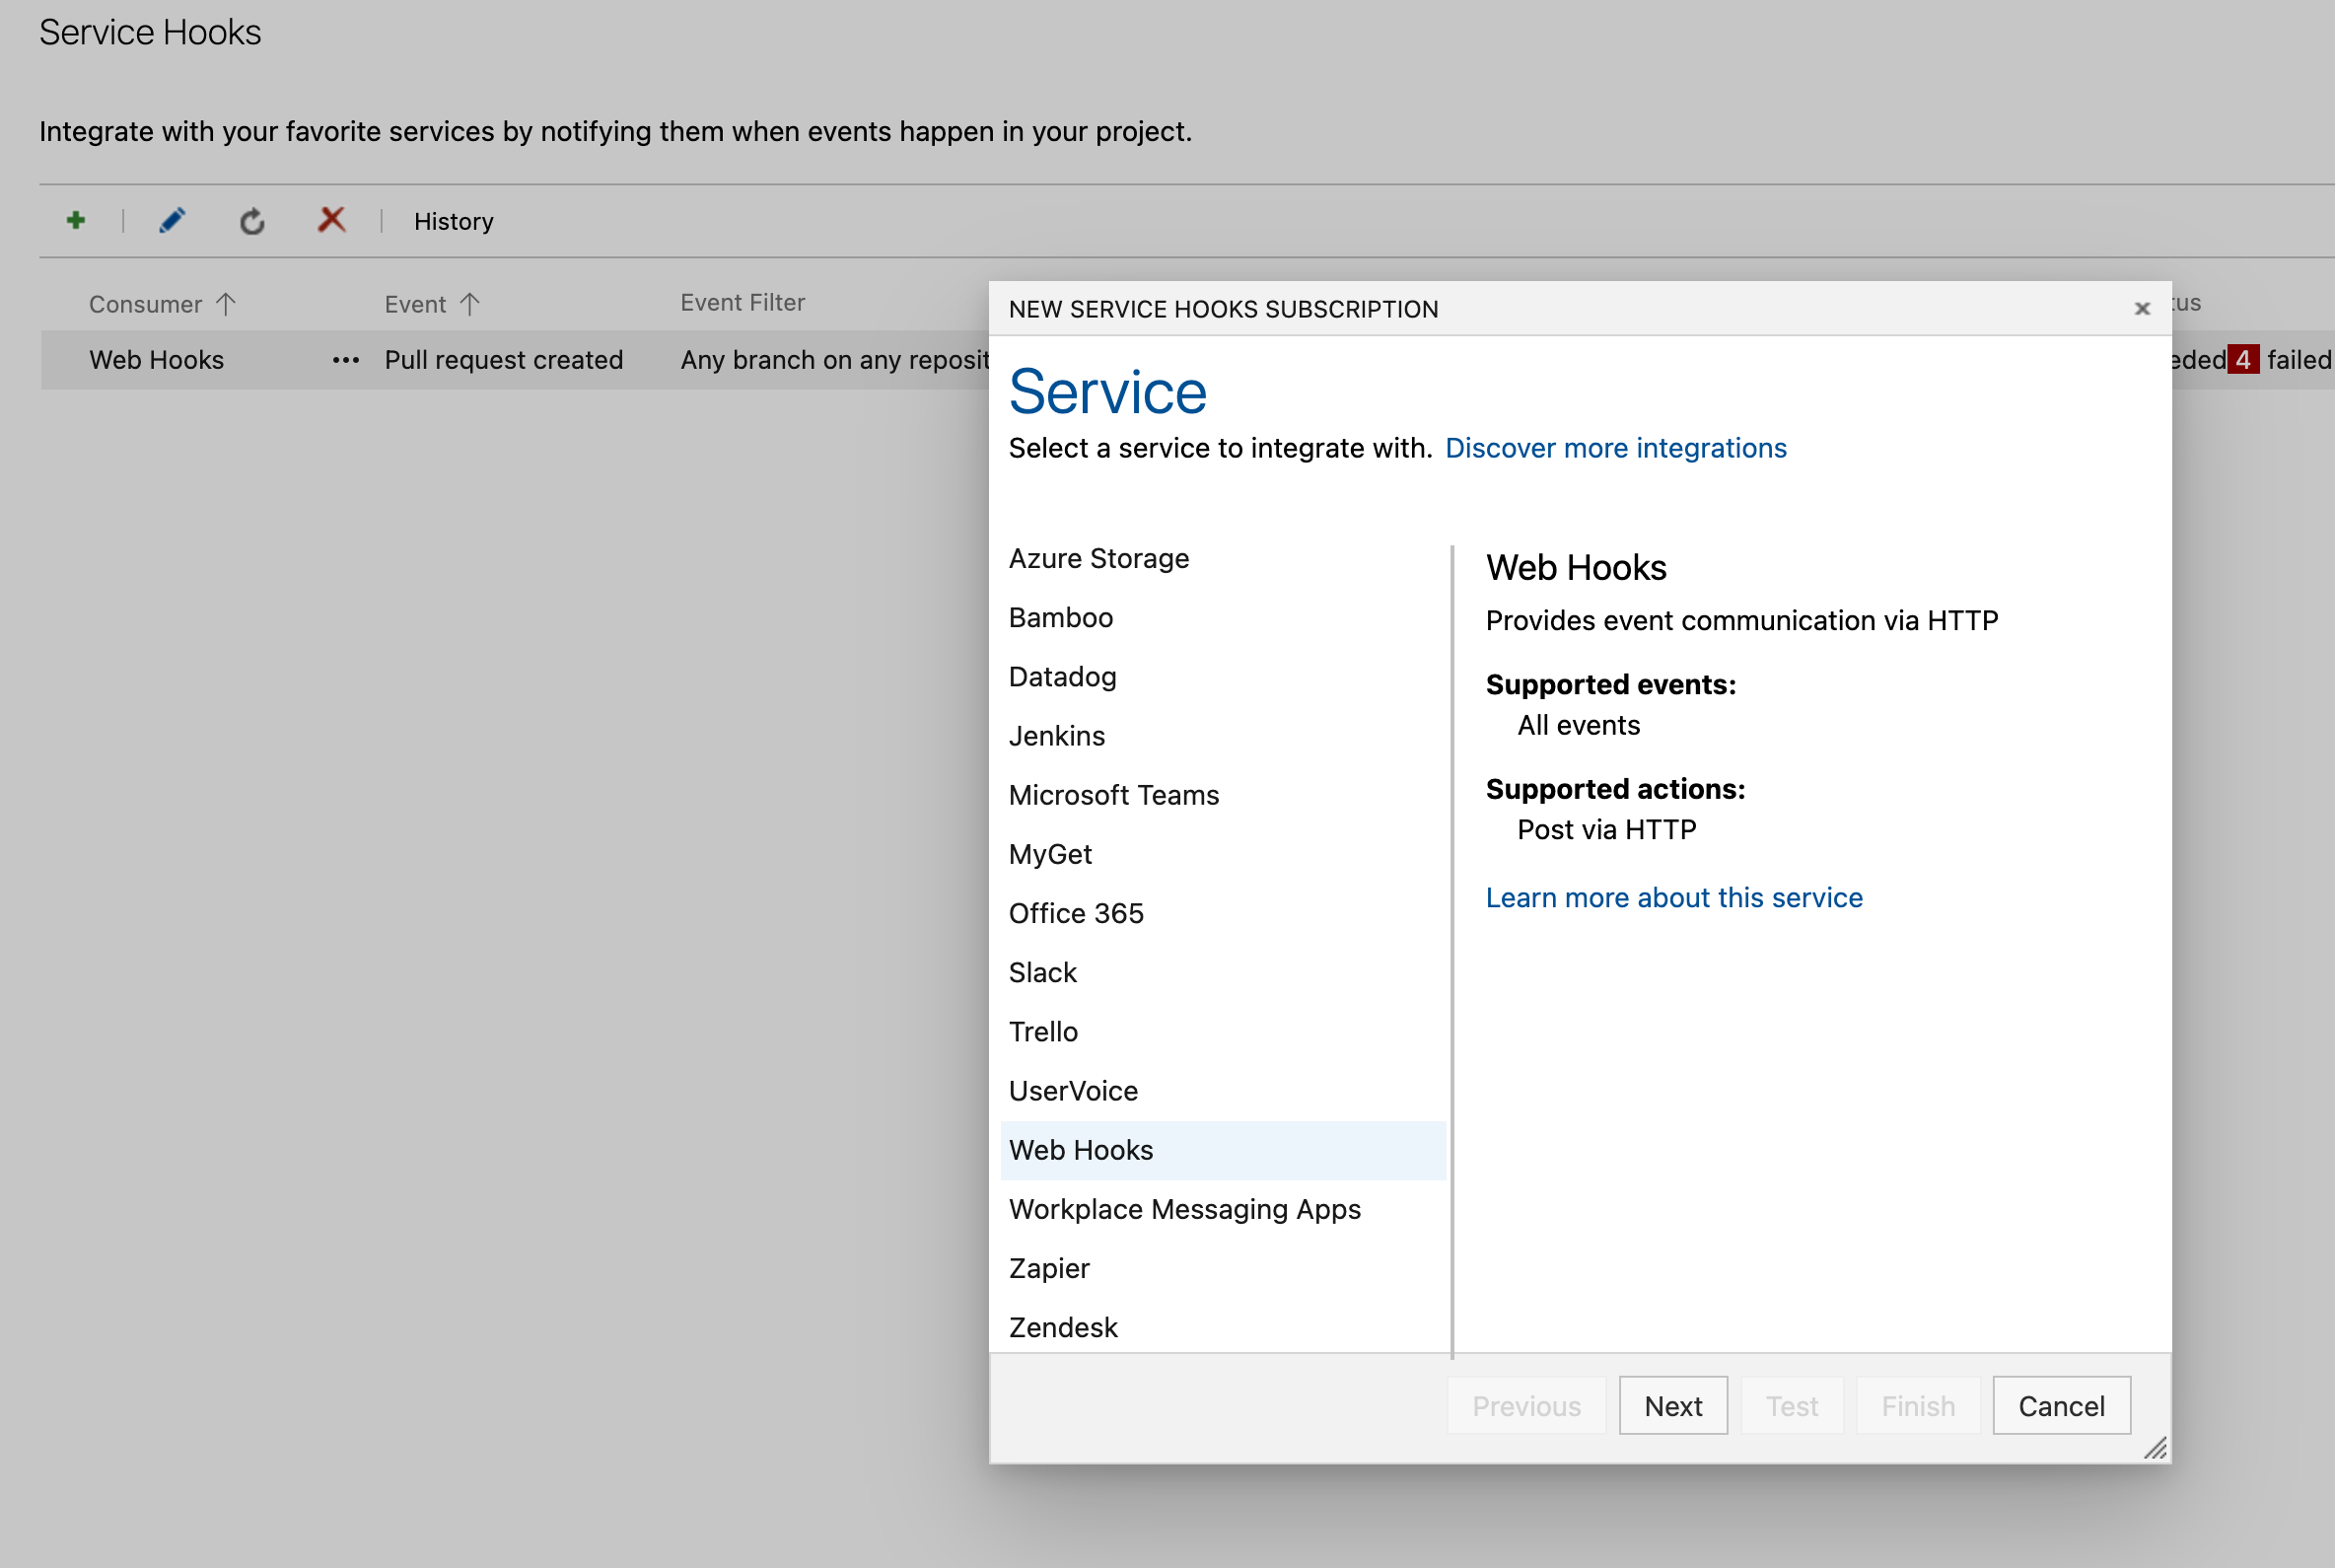
 Click the "+" button and choose "Web Hooks".
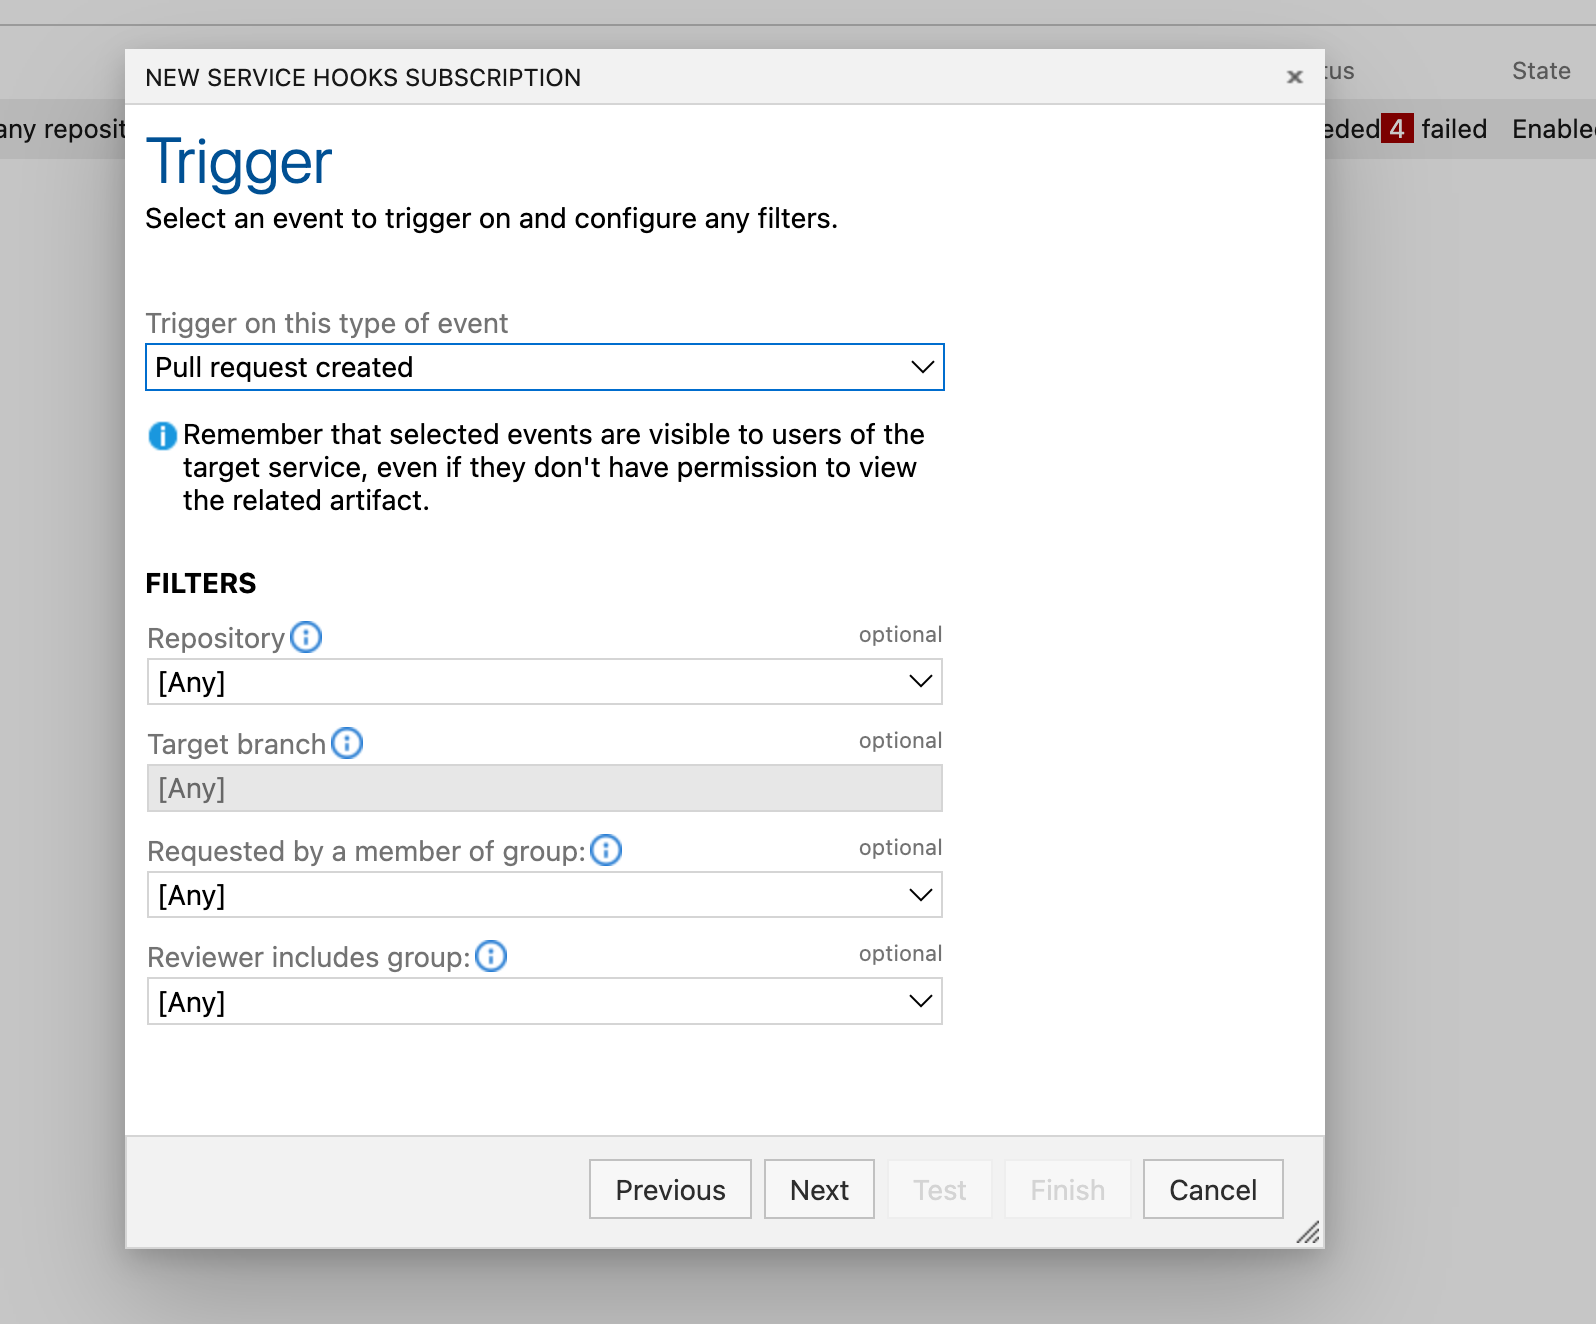
 Select "Pull request created" as the trigger event, configure any optional settings, and click "Next".
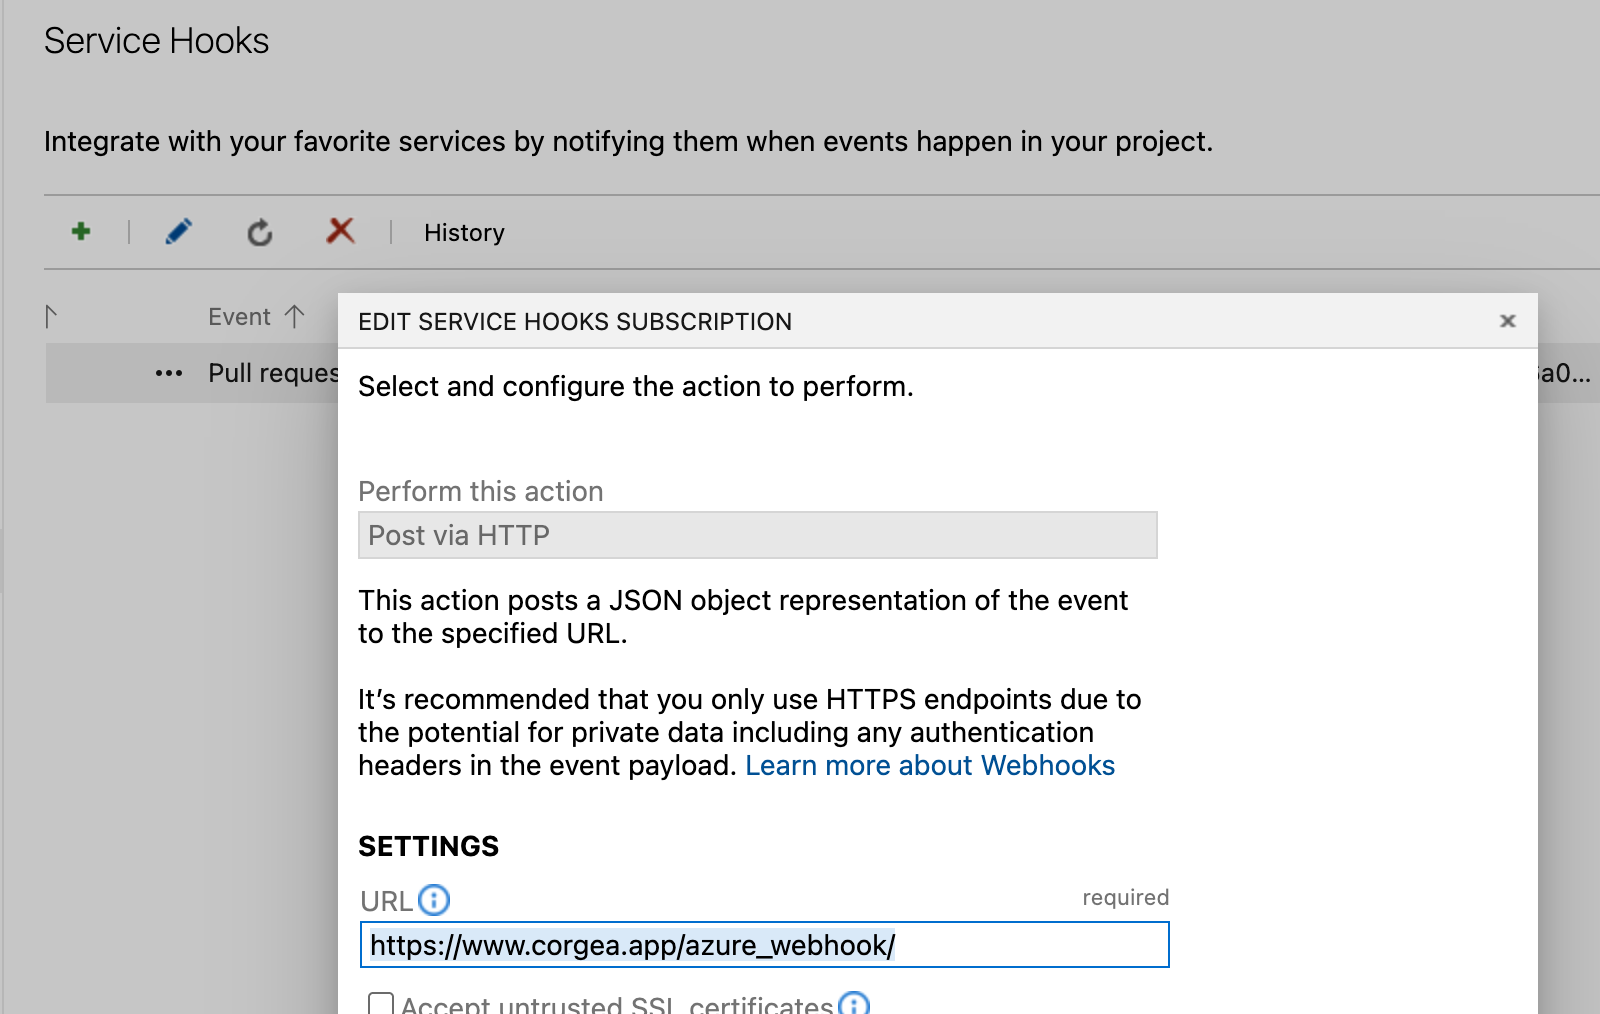
 In the Settings section, input the URL as [https://www.corgea.app/azure\_webhook/](https://www.corgea.app/azure_webhook/) or `https://your_instance.corgea.app/azure_webhook/` for private deployments.
 Open a new browser tab, navigate to the Corgea integrations page, and locate your Azure integration. Copy the X-CORGEA-UUID value.
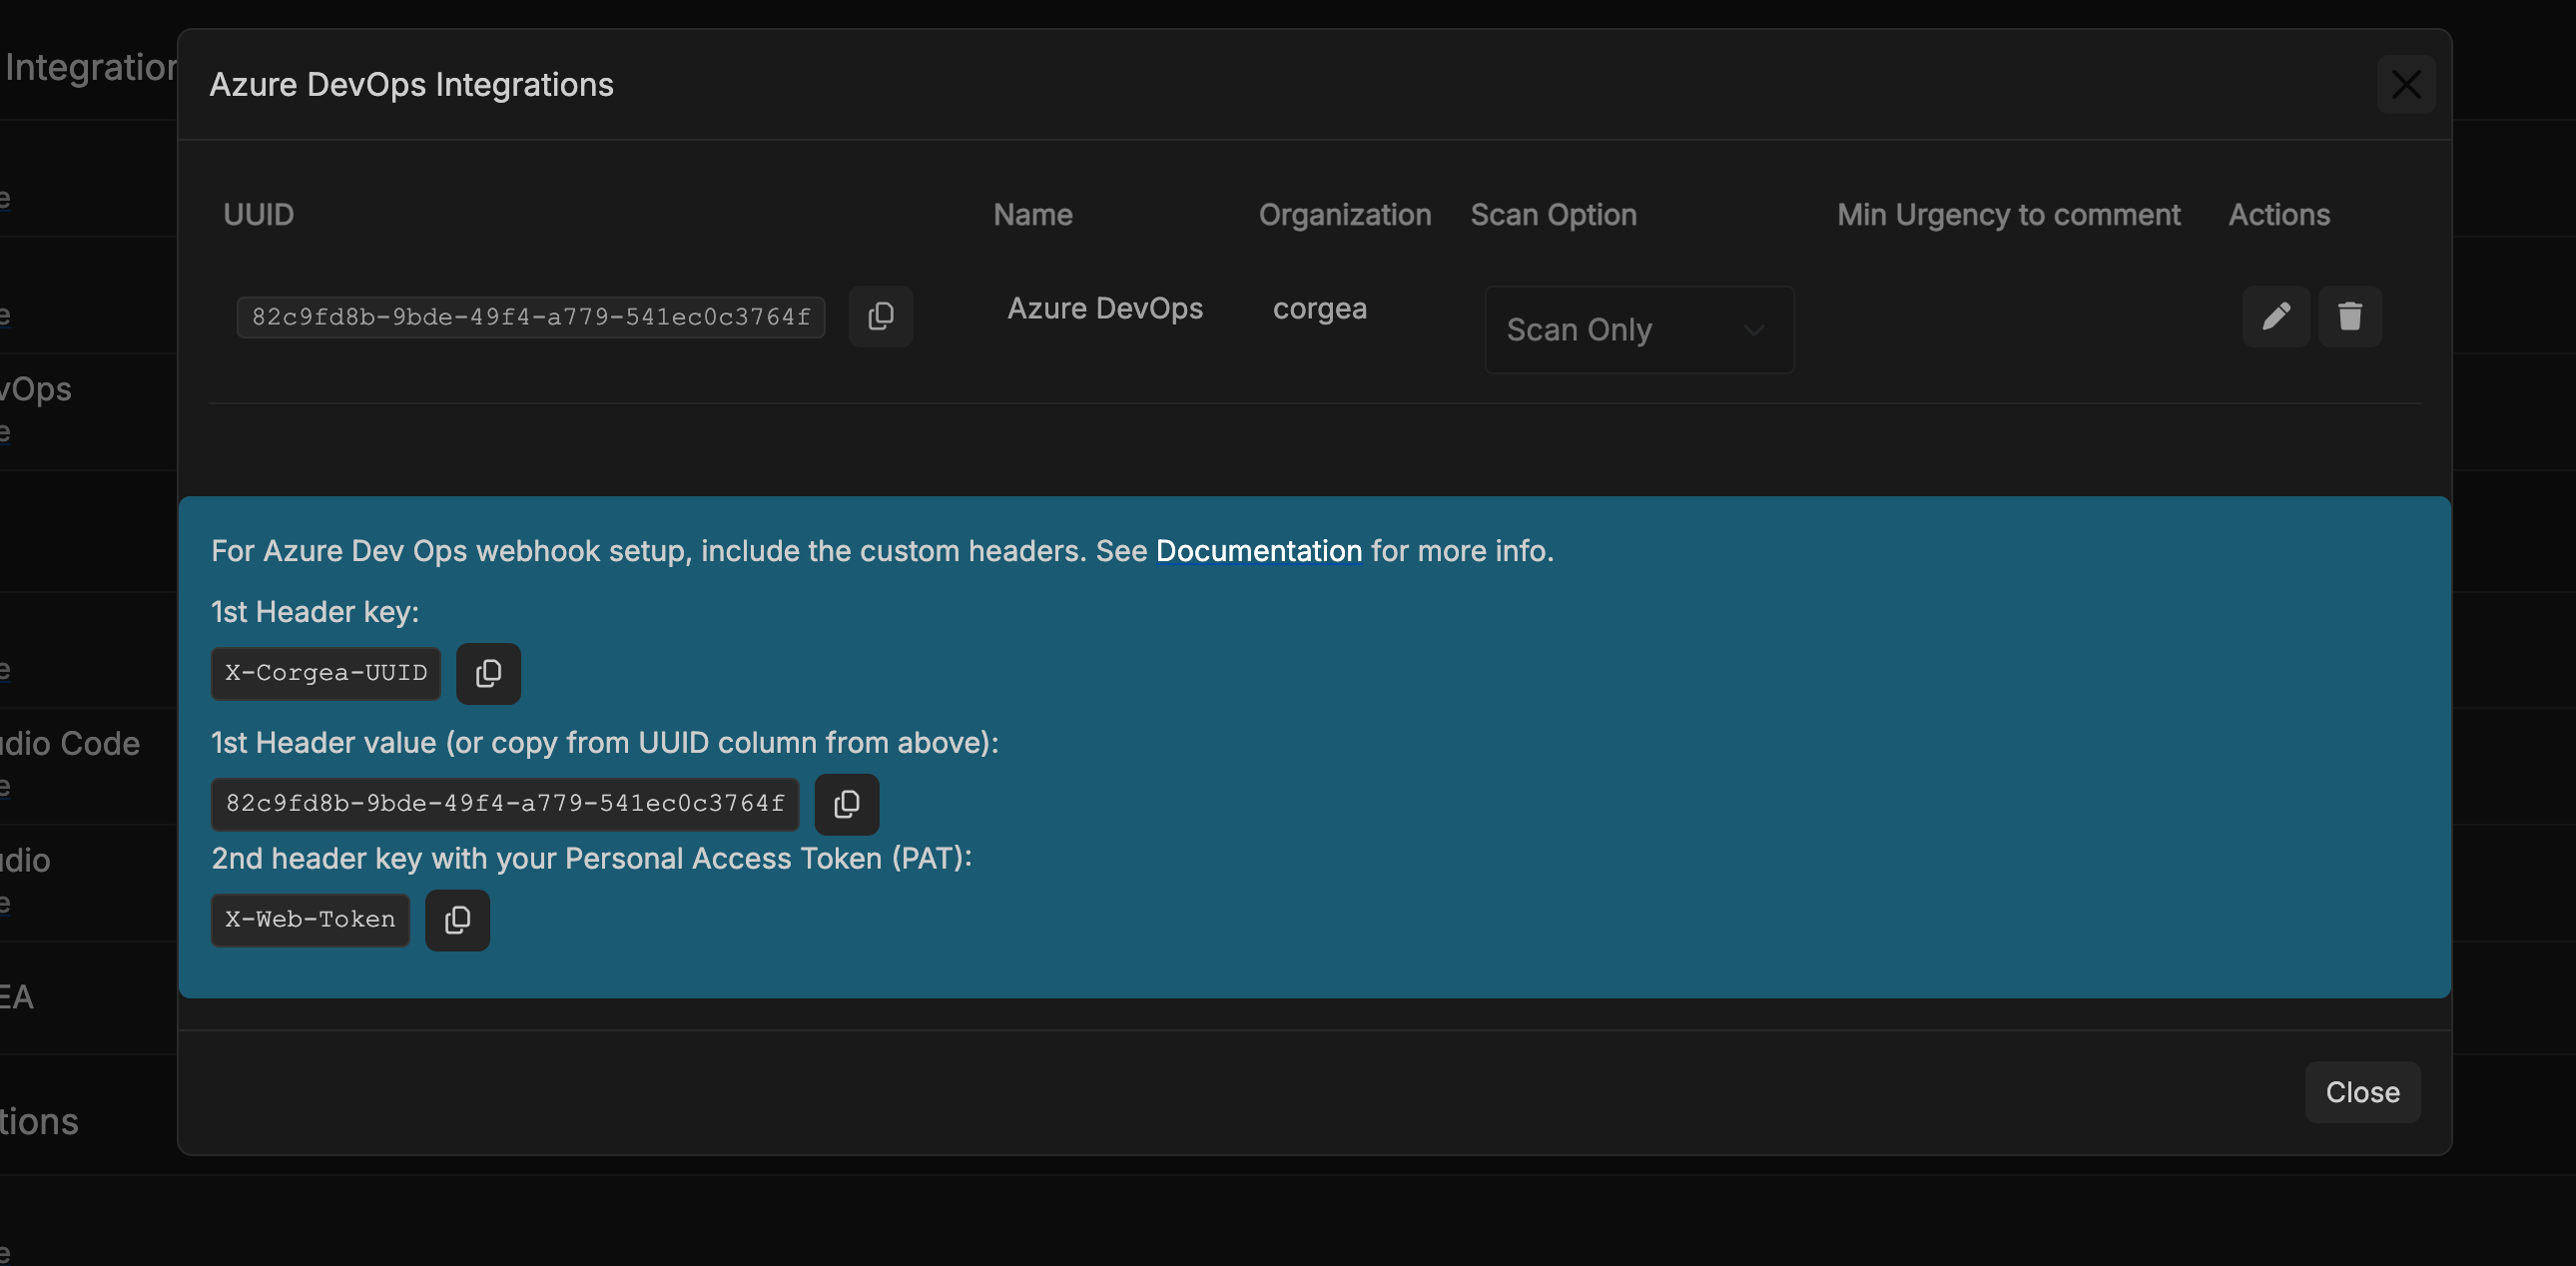 Return to the Azure DevOps Webhook configuration page and populate the headers section with:
* X-CORGEA-UUID: (UUID value you copied)
* X-WEB-TOKEN: (the same PAT configured in Corgea)
Return to the Azure DevOps Webhook configuration page and populate the headers section with:
* X-CORGEA-UUID: (UUID value you copied)
* X-WEB-TOKEN: (the same PAT configured in Corgea)
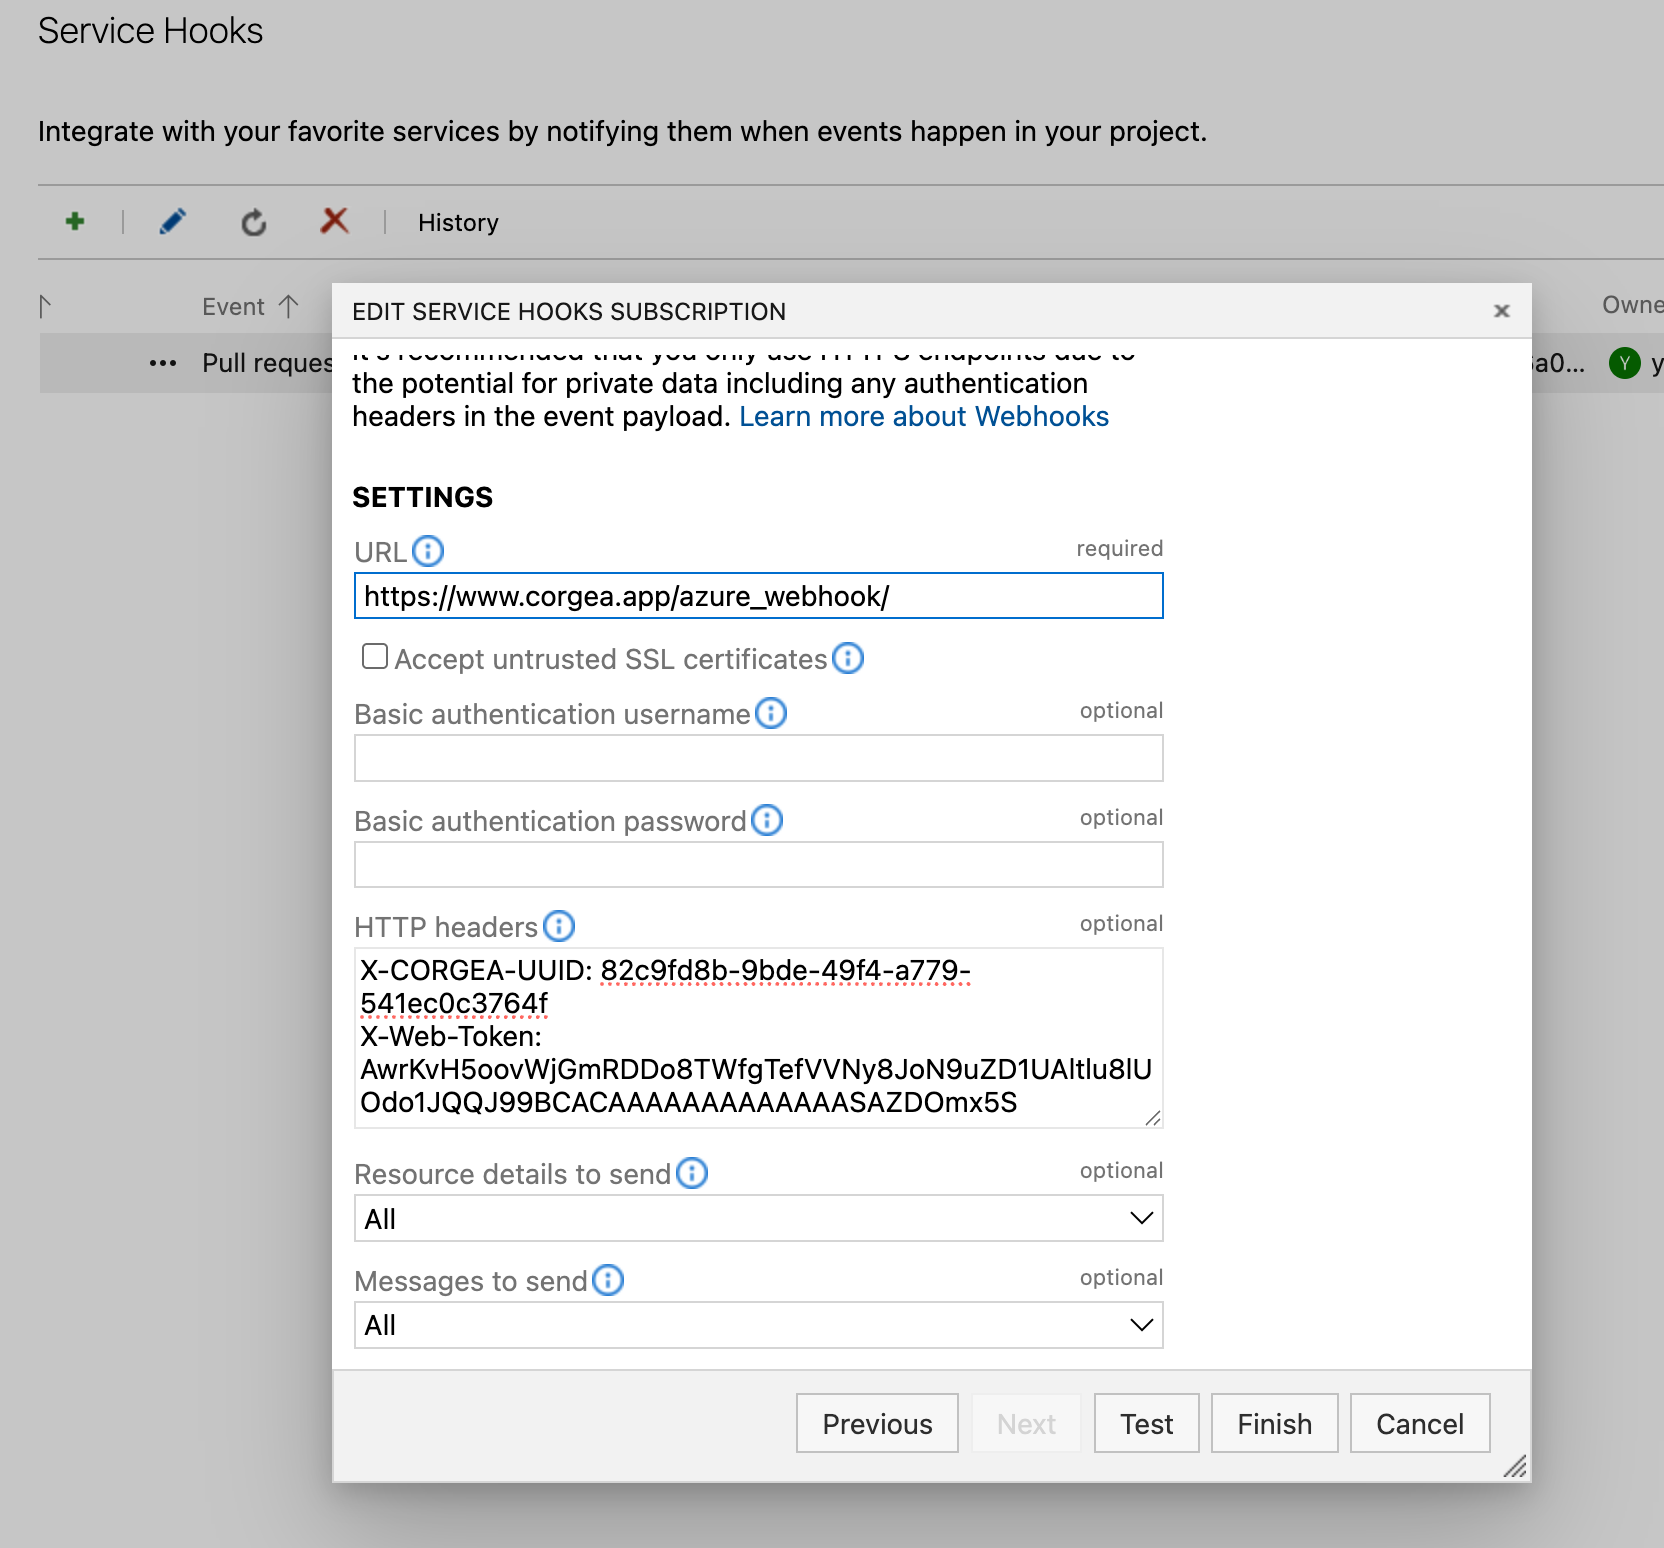 Click "Finish" to save the configuration. Disregard the "Test" button as it may attempt to trigger scans for files you do not have access to.
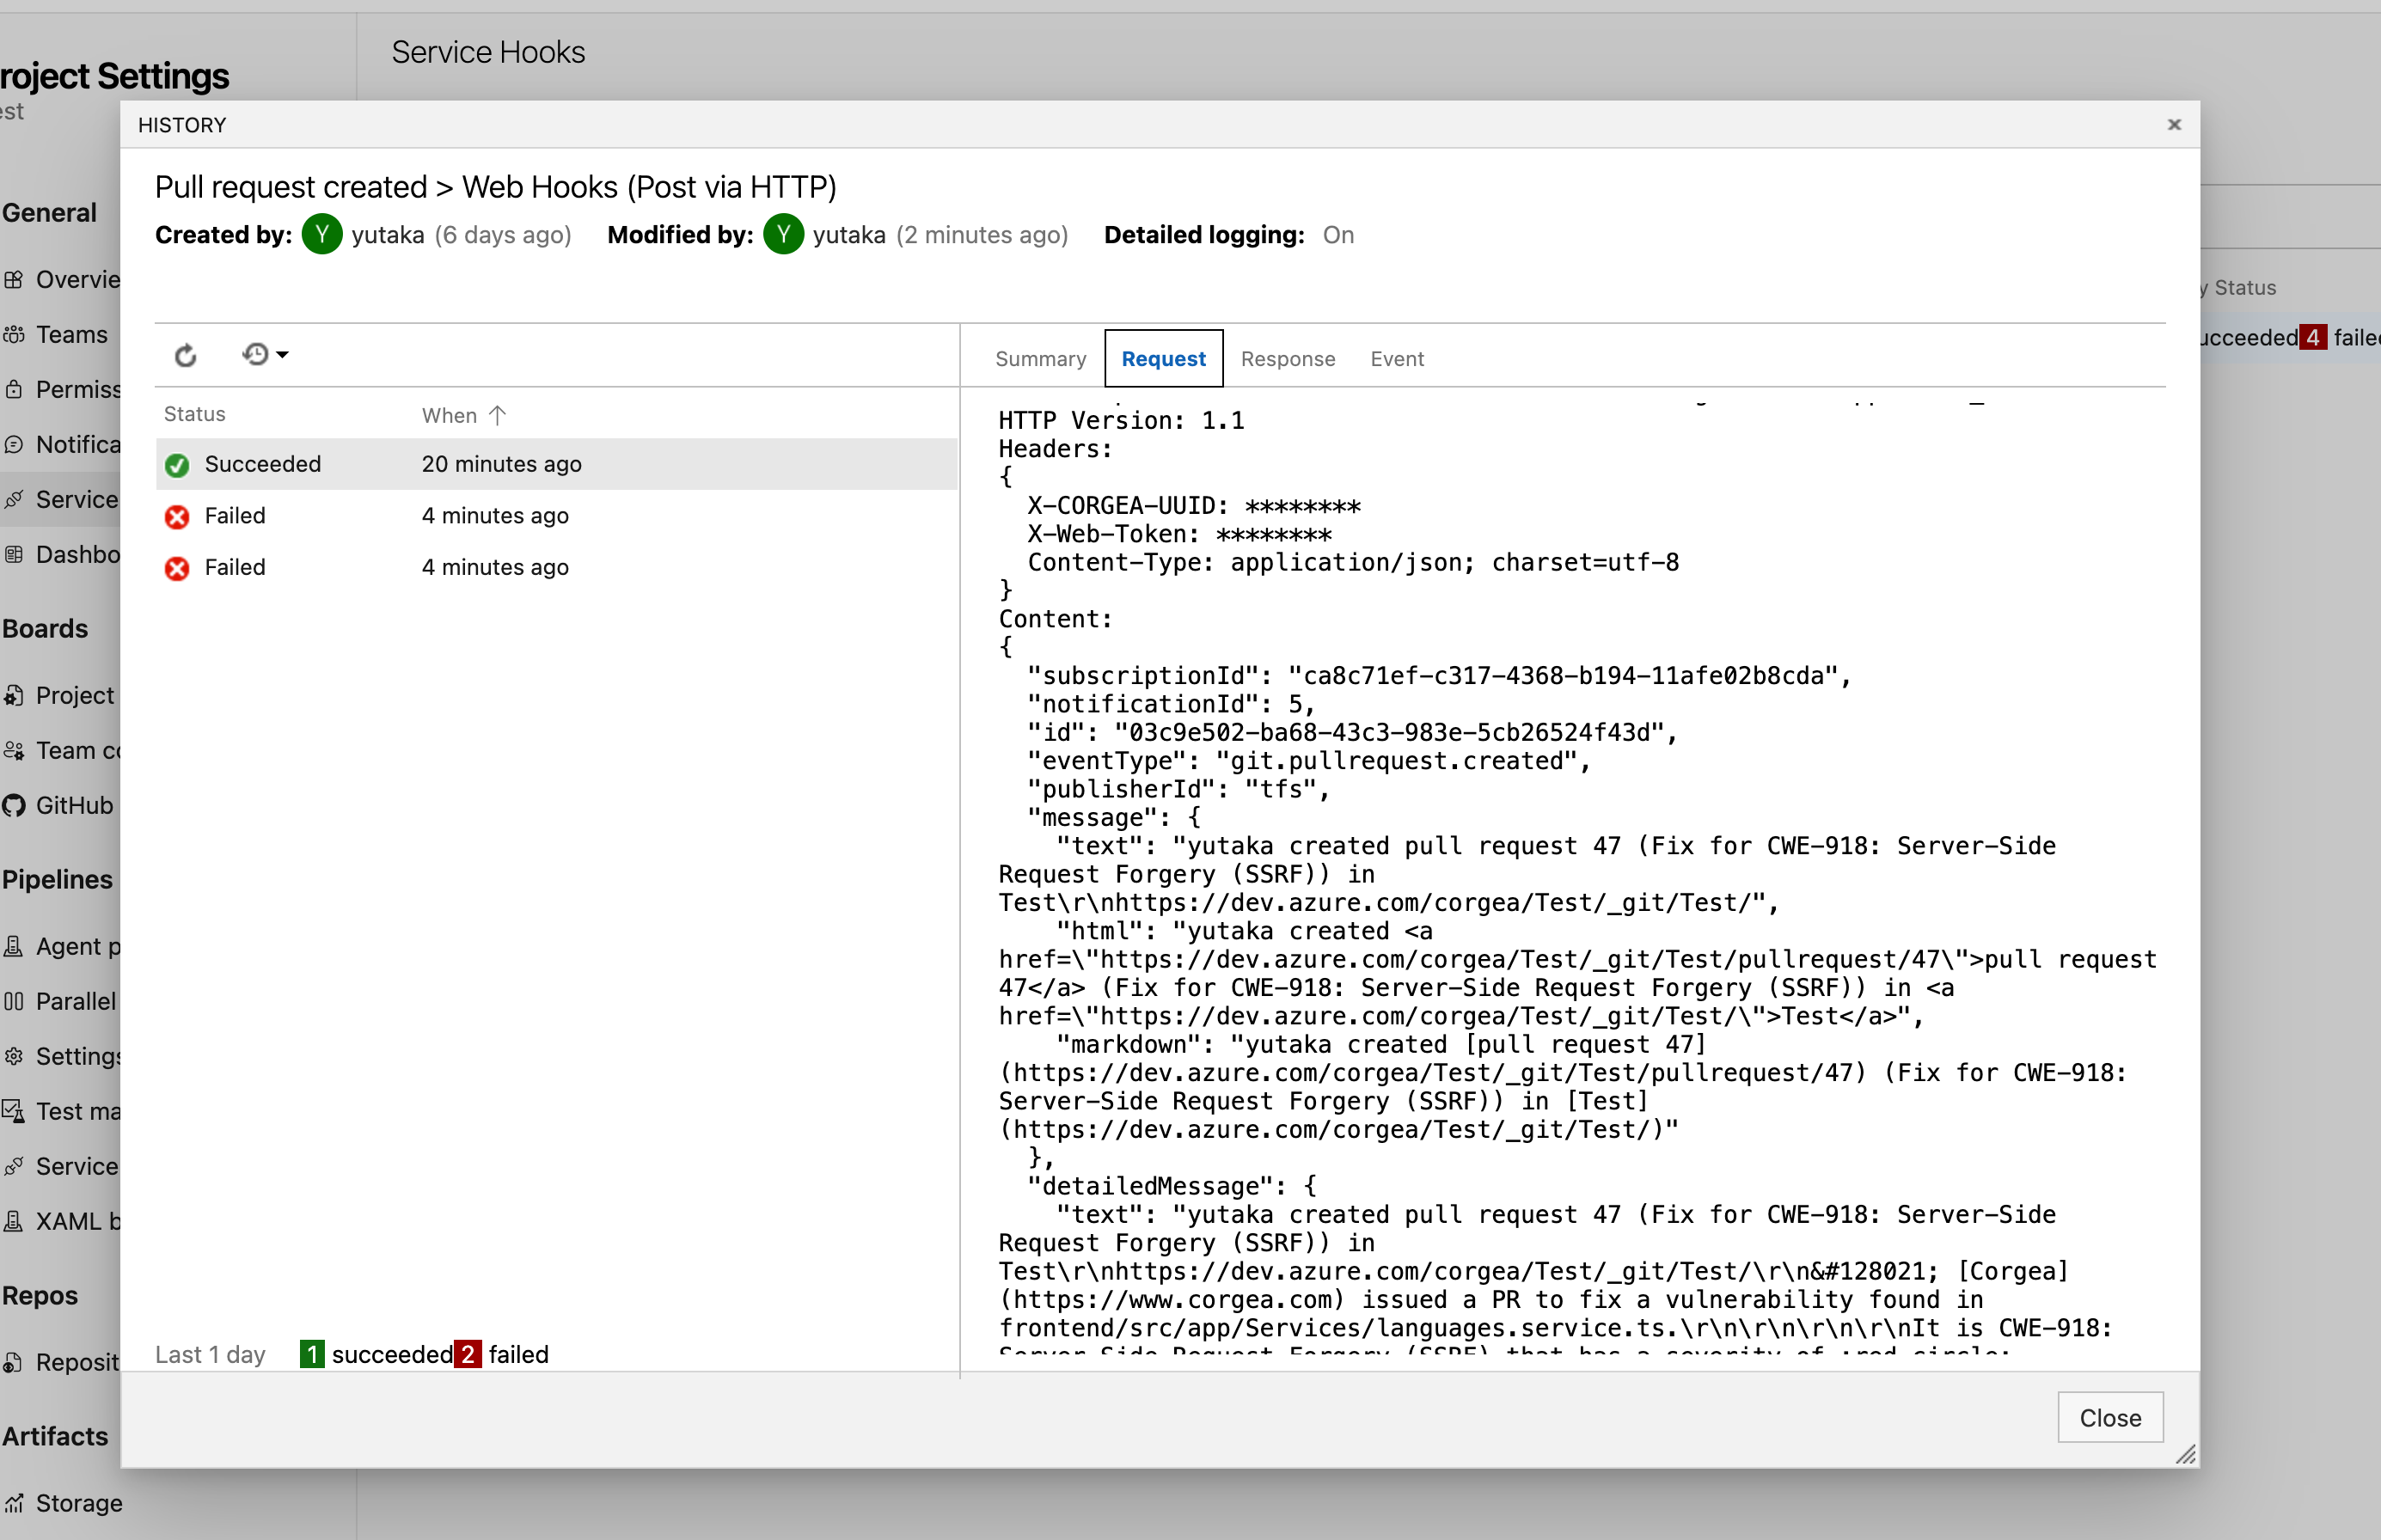
Validate the setup by creating a new pull request. A successful configuration will display a successful event in the webhook history and trigger a new scan on the Corgea Scans page at [https://www.corgea.app/scans/](https://www.corgea.app/scans/).
Click "Finish" to save the configuration. Disregard the "Test" button as it may attempt to trigger scans for files you do not have access to.
Validate the setup by creating a new pull request. A successful configuration will display a successful event in the webhook history and trigger a new scan on the Corgea Scans page at [https://www.corgea.app/scans/](https://www.corgea.app/scans/).